

Would you like to save this?
A guy keeps a stack of white index cards in the toolbox next to the torque wrench. Not for notes. For blotting fluid. Sounds like fussing, right up until it catches a head gasket starting to weep two months before it would have stranded anyone. Older cars don’t fail all at once — they send signals, small ones, and most people never learn to read them. The tricks below aren’t about spending money. They’re about noticing. Cheap habits that turn a 180,000-mile survivor into a long-haul old friend, and most drivers have never heard of a single one.
Please note that some of the images in this article were created with the assistance of AI.
41. Blot Every Fluid on White Cardstock to Expose Contamination
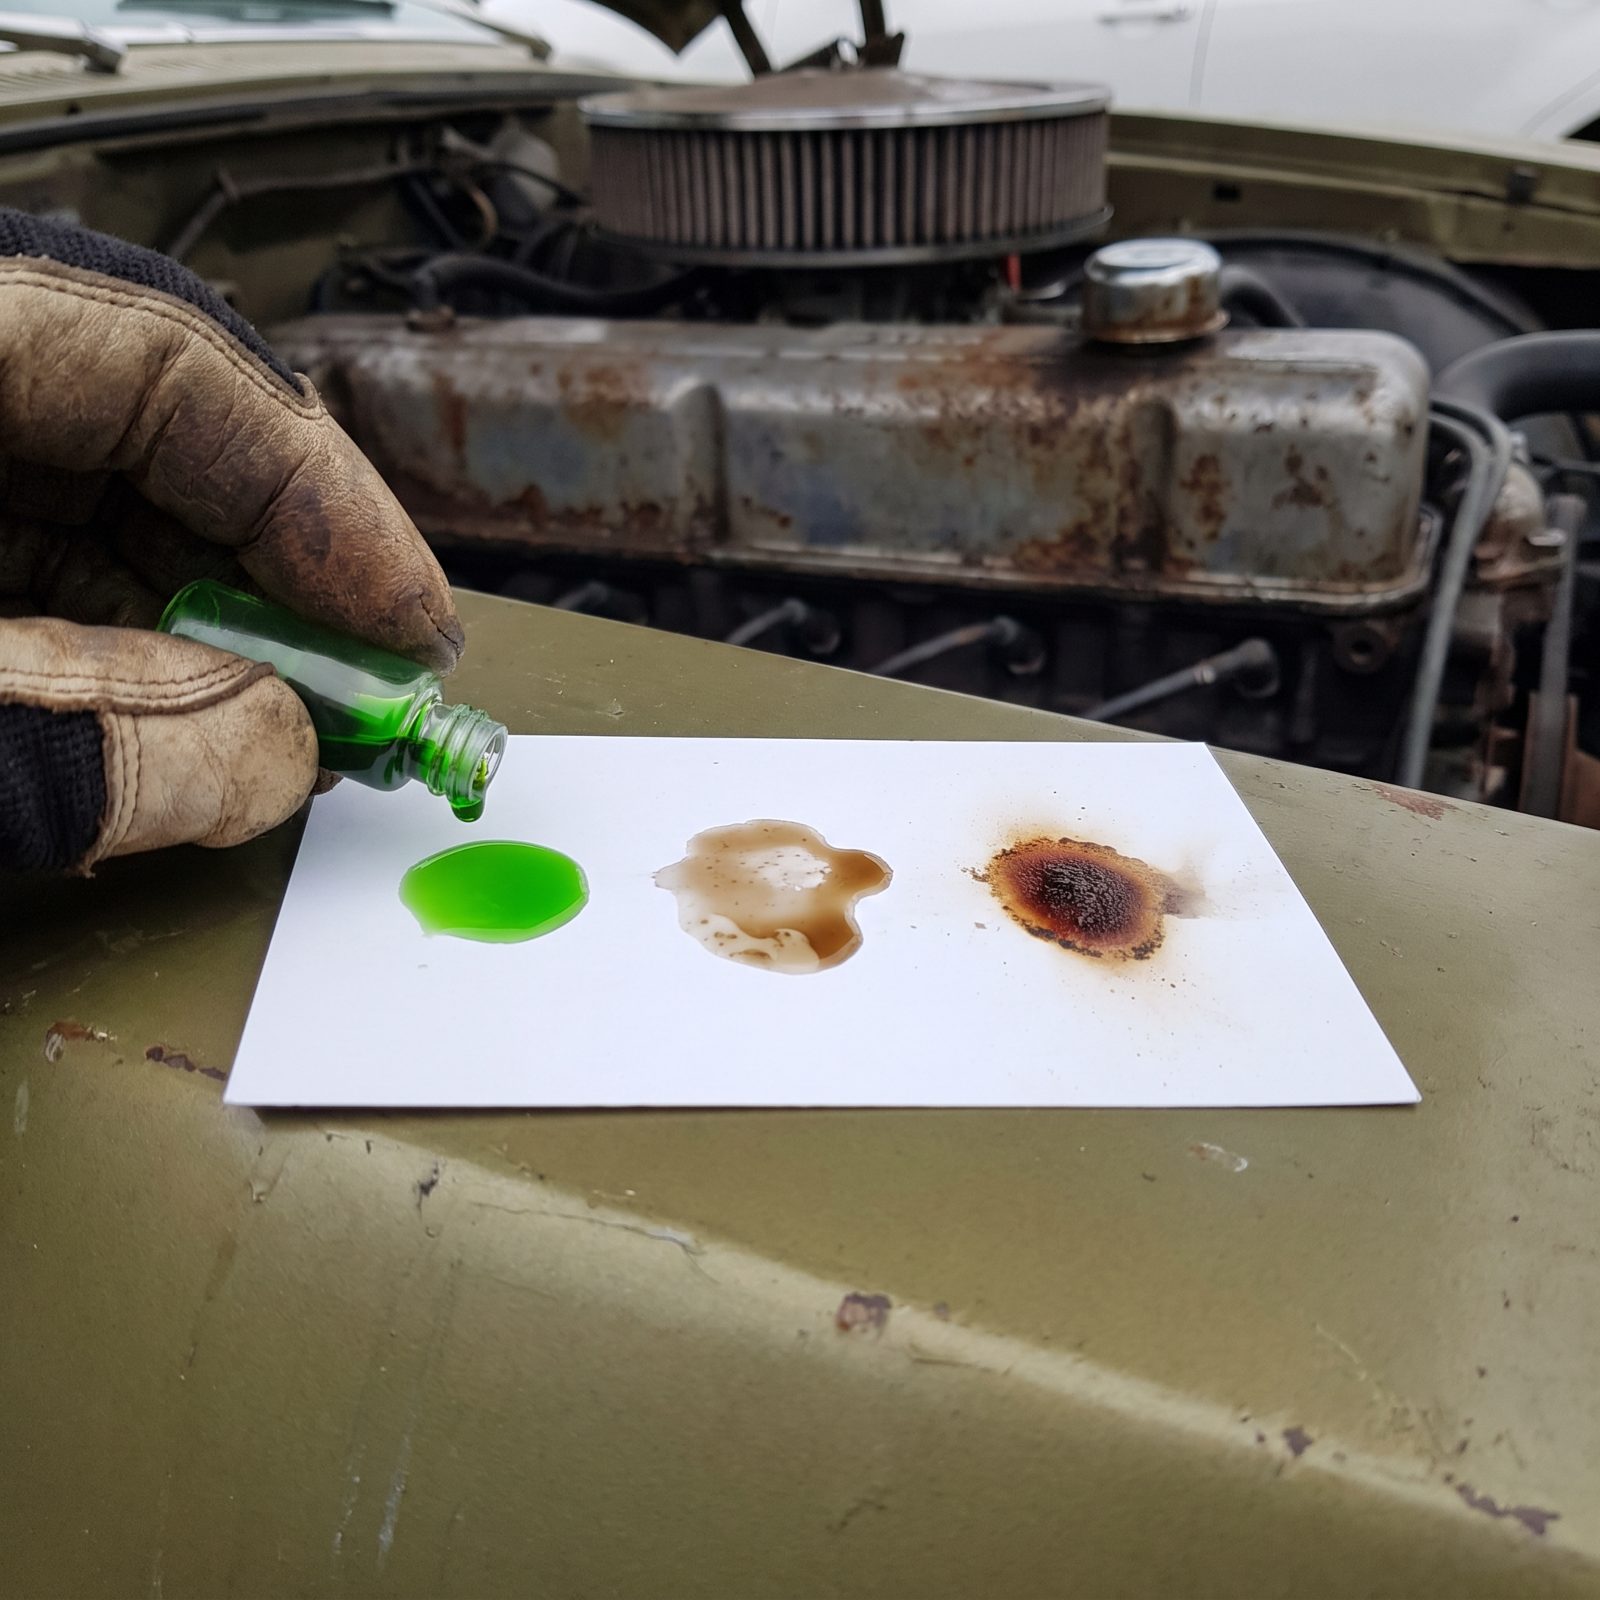
A fresh fluid tells you nothing. Same fluid against white tells you everything. Drip a drop of coolant, oil, or trans fluid onto a plain index card and let the card do the talking.
Coolant that leaves a milky ring means oil is getting in where it shouldn’t. Automatic trans fluid that spreads into a dark halo with a burnt smell is cooking itself. And oil leaving gritty specks around the edge is carrying metal it has no business carrying. The white background separates color and particulate your eye glosses right over in a dark reservoir.
40. Compare Wheel-Hub Temperatures After Drives to Catch Dragging Brakes
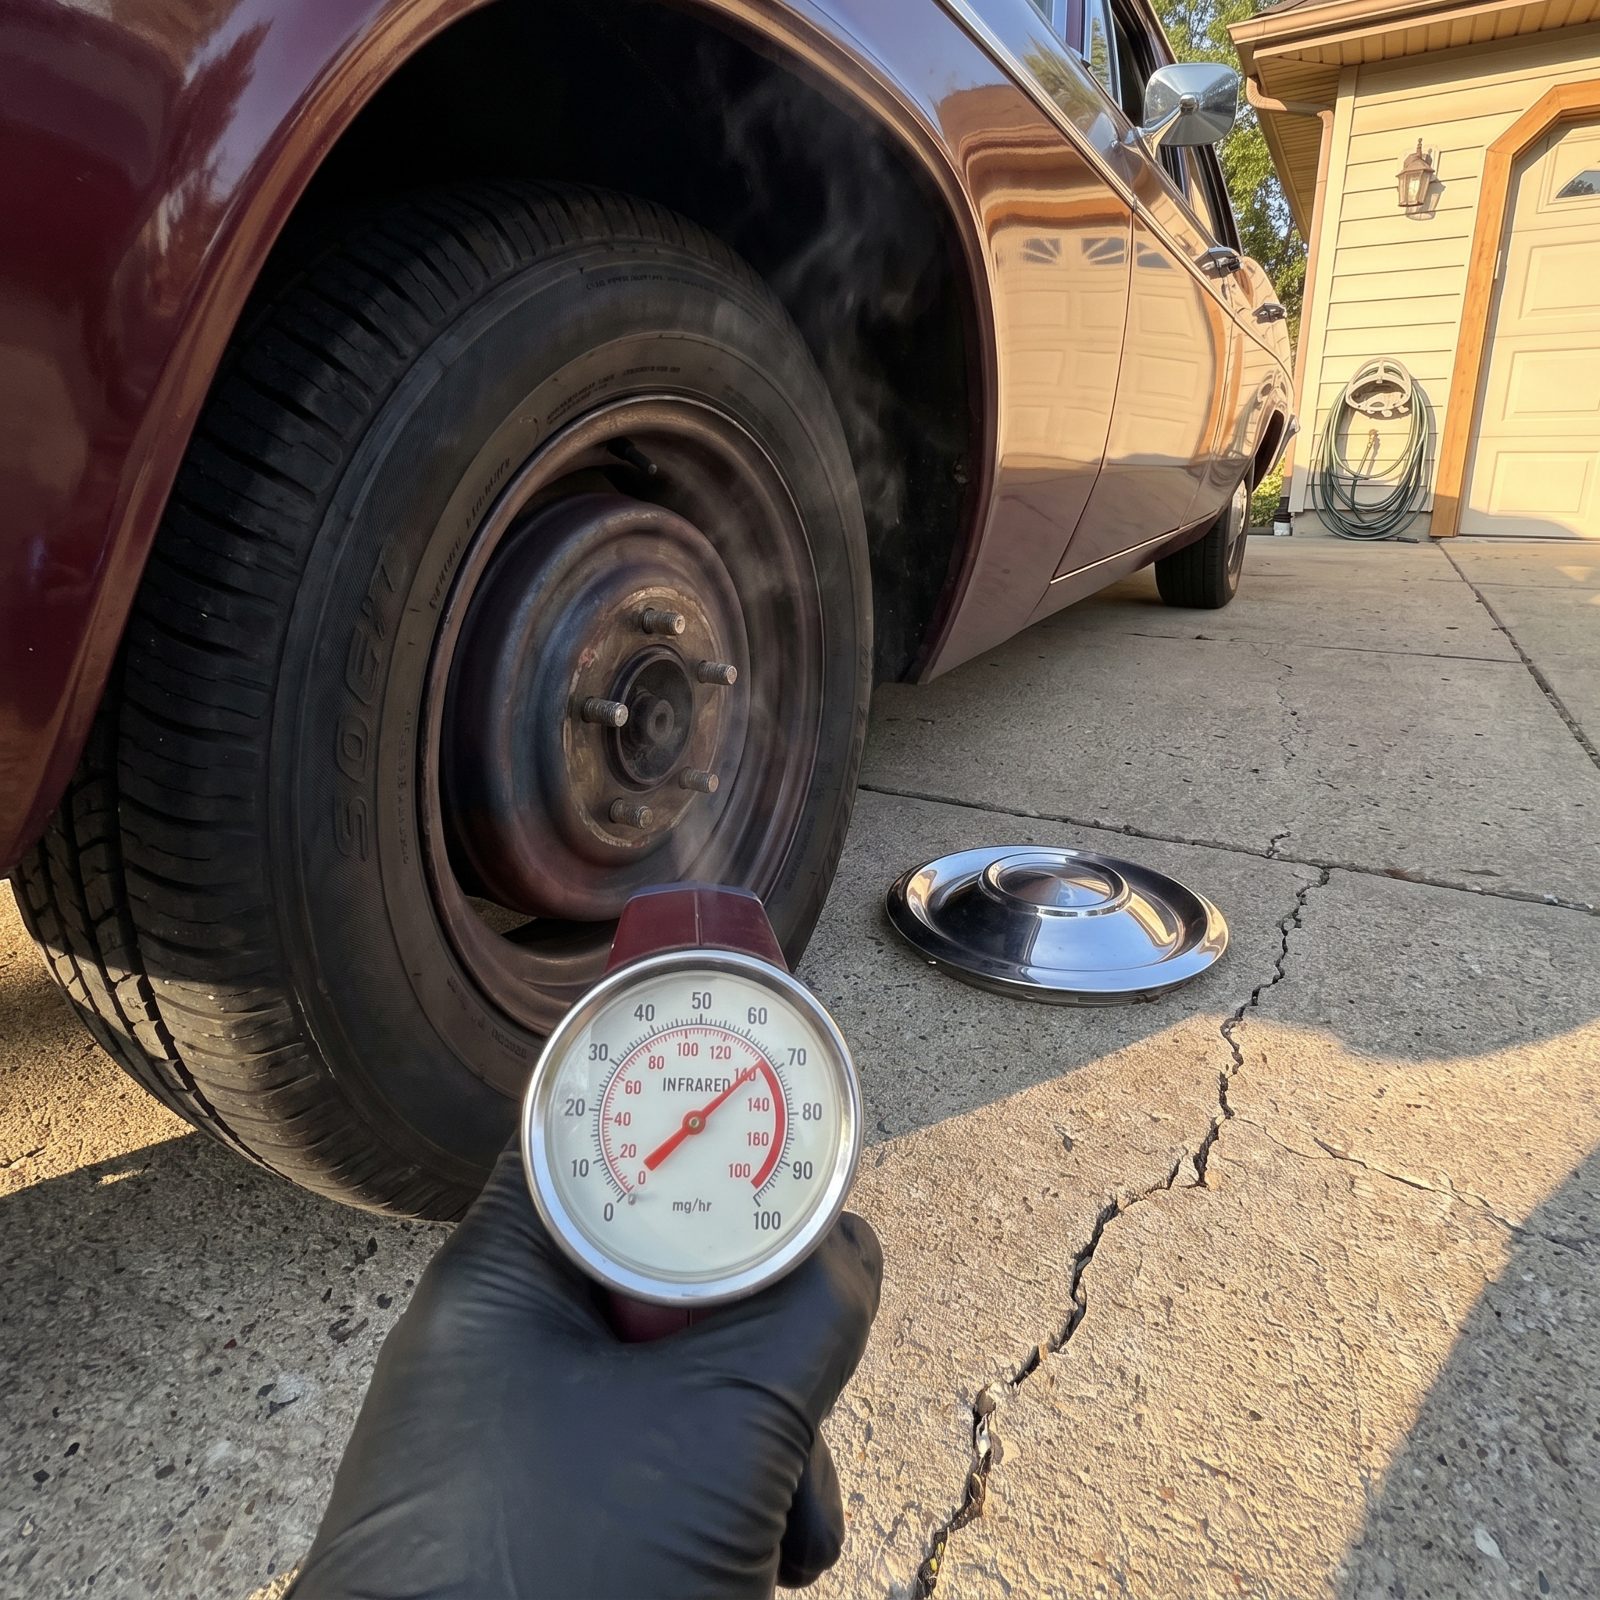
Pull into the driveway after a normal drive, pop the hubcaps off, and aim a cheap infrared thermometer at all four hubs. They should land within shouting distance of each other.
One hub running a good deal hotter than its mates? That brake is dragging. A sticky caliper slide, a collapsed flex hose acting like a check valve, a seized drum adjuster — any of them will do it. The dragging brake eats a set of pads, cooks the fluid, and kills your fuel economy long before it screeches loud enough to notice. Heat is the first word it says. Learn to hear it.
39. Cut Open Used Oil Filters to Find Metal Before Major Damage
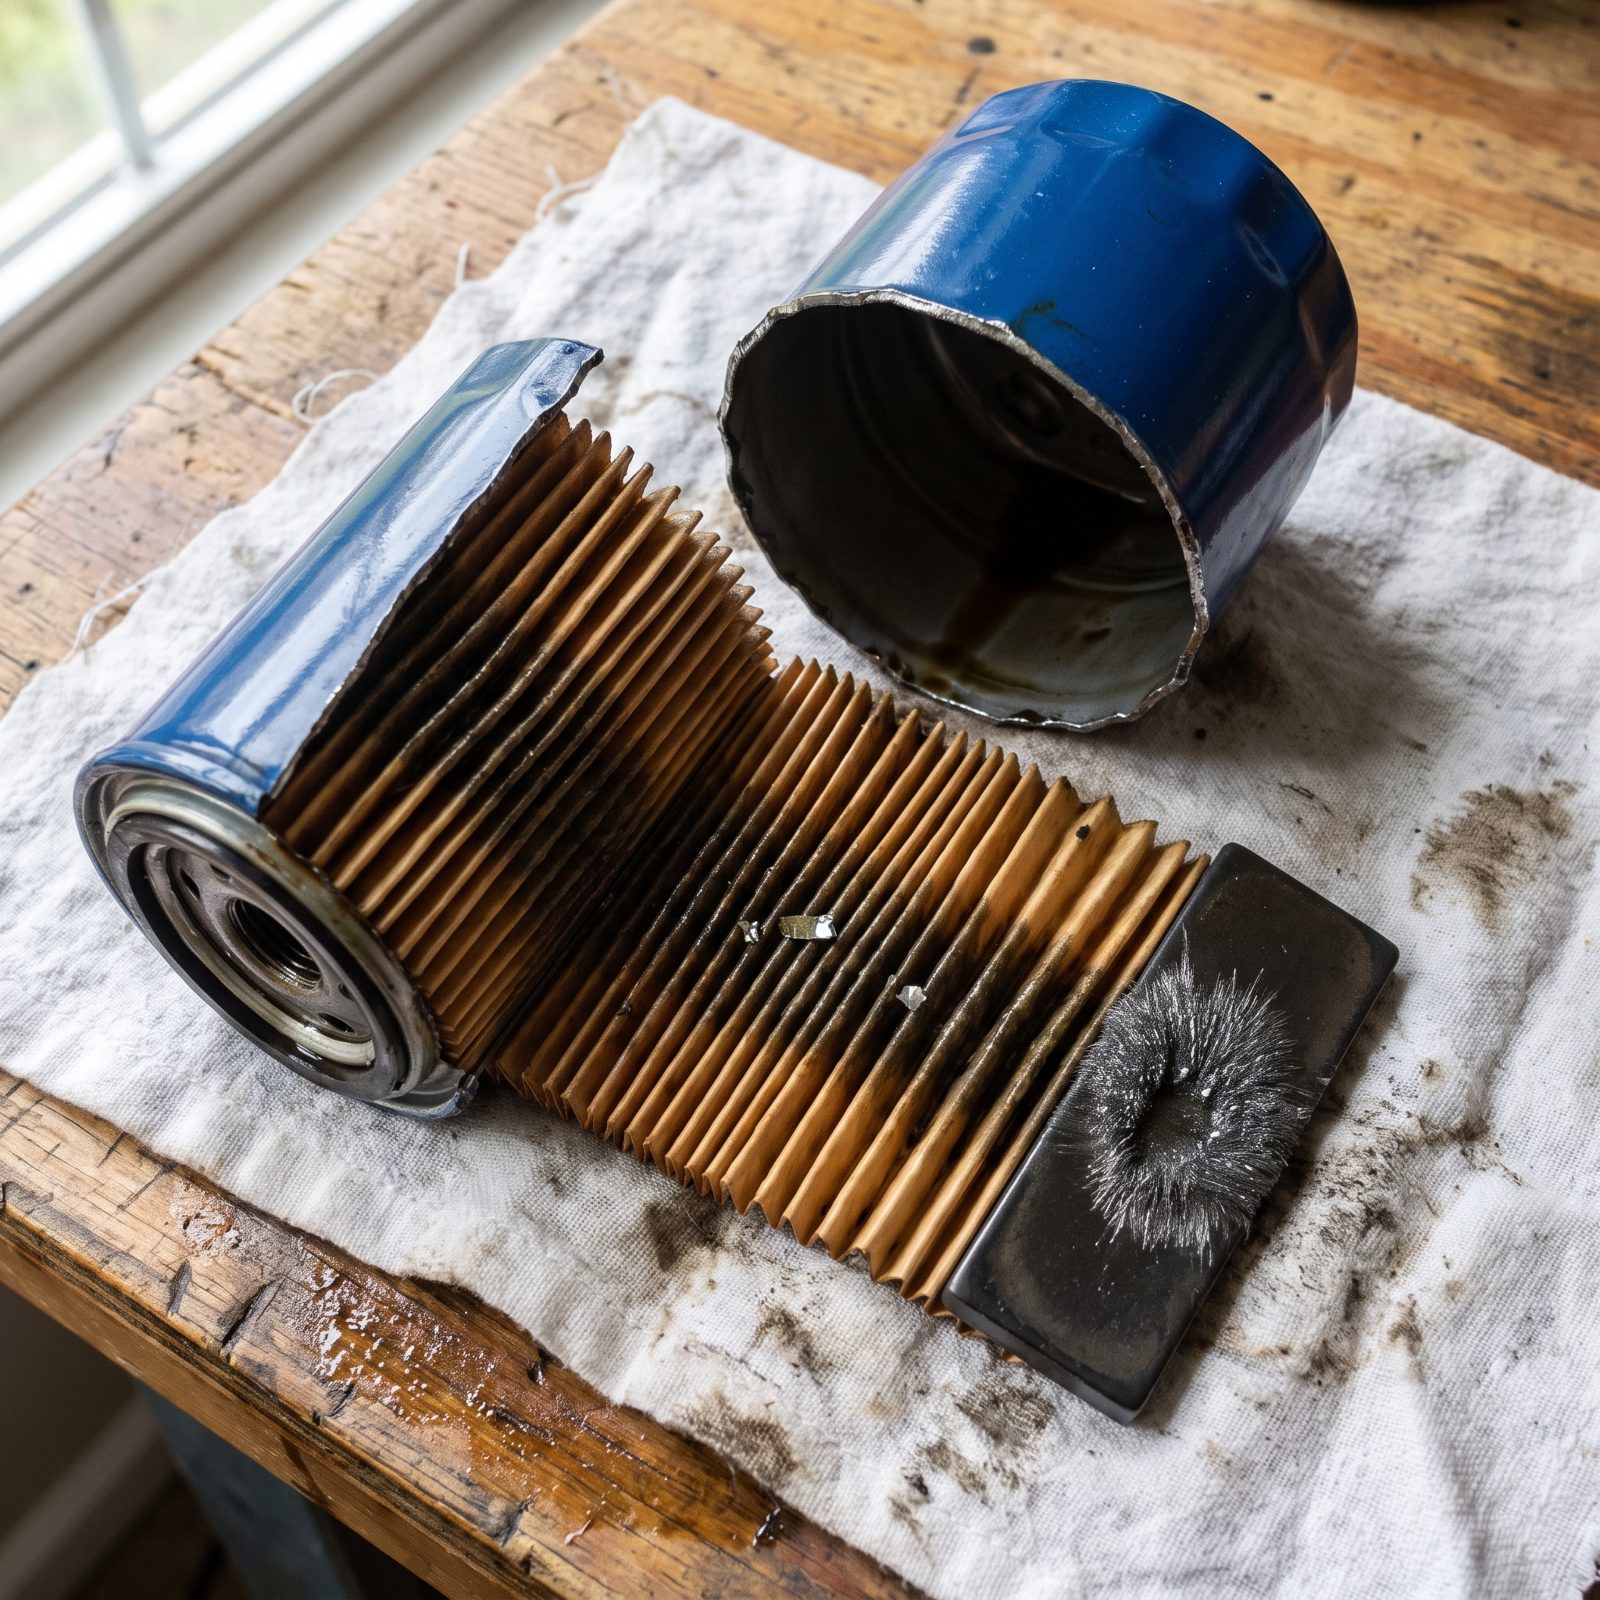
The oil filter is a flight recorder. It caught everything the engine shed since the last change, and almost nobody looks before tossing it in the trash.
Cut it open with a proper filter cutter, unroll the pleated media, and spread it under good light. A little fine fuzz is normal wear. Bright shiny flakes, bronze-colored bits, or chunks you can see without squinting are not. Bronze points at a bearing or bushing. Hard steel slivers point at gears, cam, or rings. Drag a magnet across the whole mess — if it grabs a thick coating, something steel is coming apart in there.
38. Send Used Oil for Analysis to Track Invisible Engine Wear

Metal in an engine doesn’t always show up as flakes. The dangerous stuff is dissolved and microscopic, and a lab reads it down to parts per million.
A used-oil analysis costs about what you’d pay for a couple gallons of premium. Draw a sample at the drain, mail it in, and you get back a sheet listing iron, copper, aluminum, lead, plus coolant, fuel dilution, and whether the oil had any additive package left in it. One report is interesting. Three reports on the same engine are a trend line — a rising iron count tells you something is wearing while the car still runs just fine.
The engine knows it’s failing long before you do. The oil is where it writes it down.
37. Paint Witness Marks Across Critical Fasteners to Expose Movement
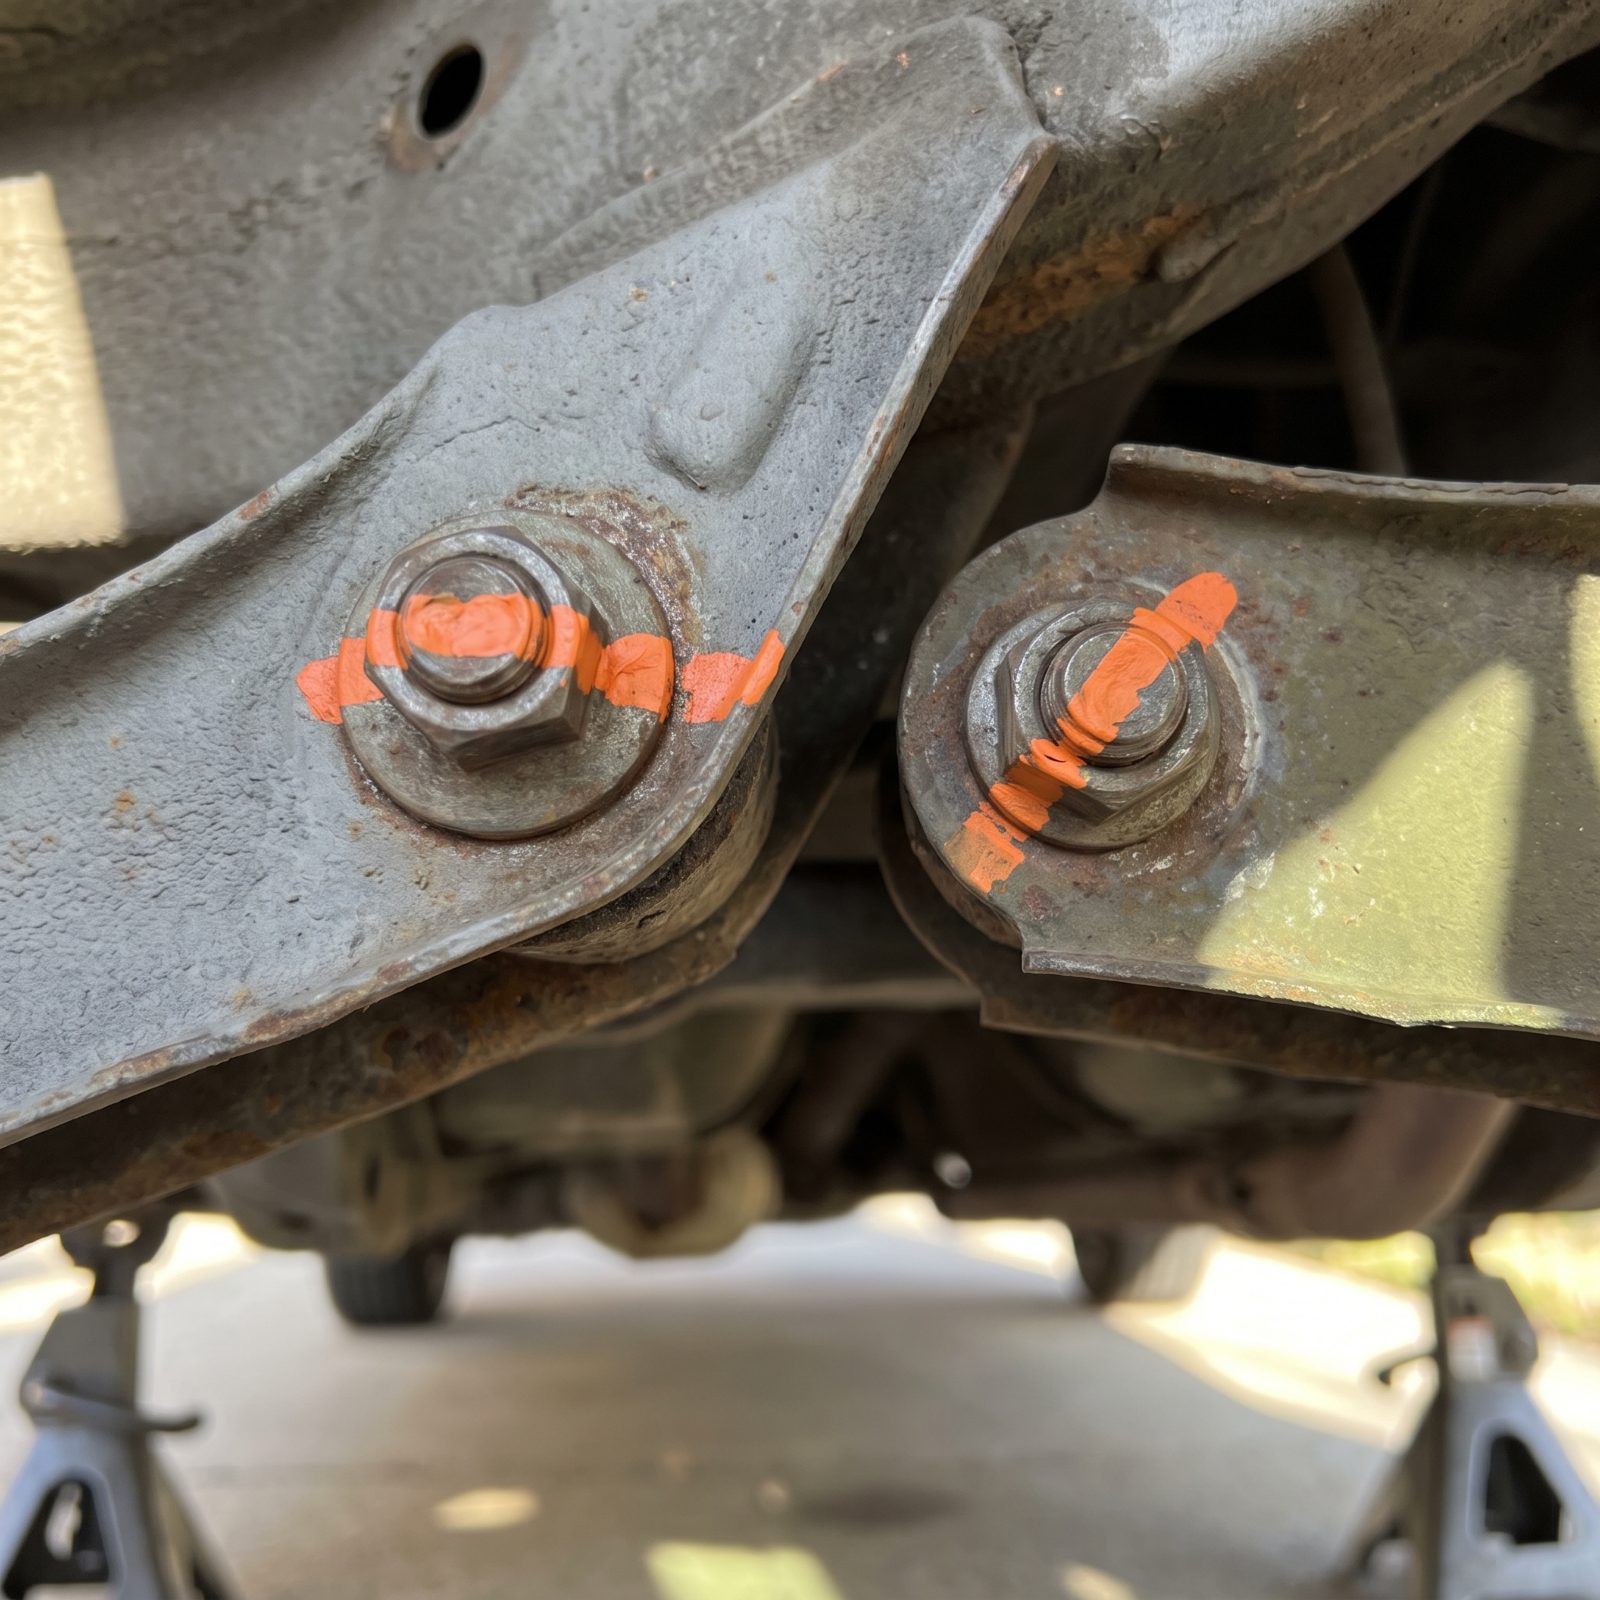
Mechanics call it torque seal. After you tighten a critical fastener, you lay a stripe of bright paint across the nut and onto the part behind it. One continuous line.
If that bolt ever loosens, the line breaks and shifts, and you catch it at a glance without ever touching a wrench. Use it on wheel lugs that have a history of walking loose, suspension bolts, steering components, exhaust manifold nuts that love to back themselves out. Next time you’re under the car, a cracked witness mark saves you from finding out the hard way at seventy on the interstate.
36. Mark Cold Fluid Levels With a Grease Pencil to Reveal Slow Losses
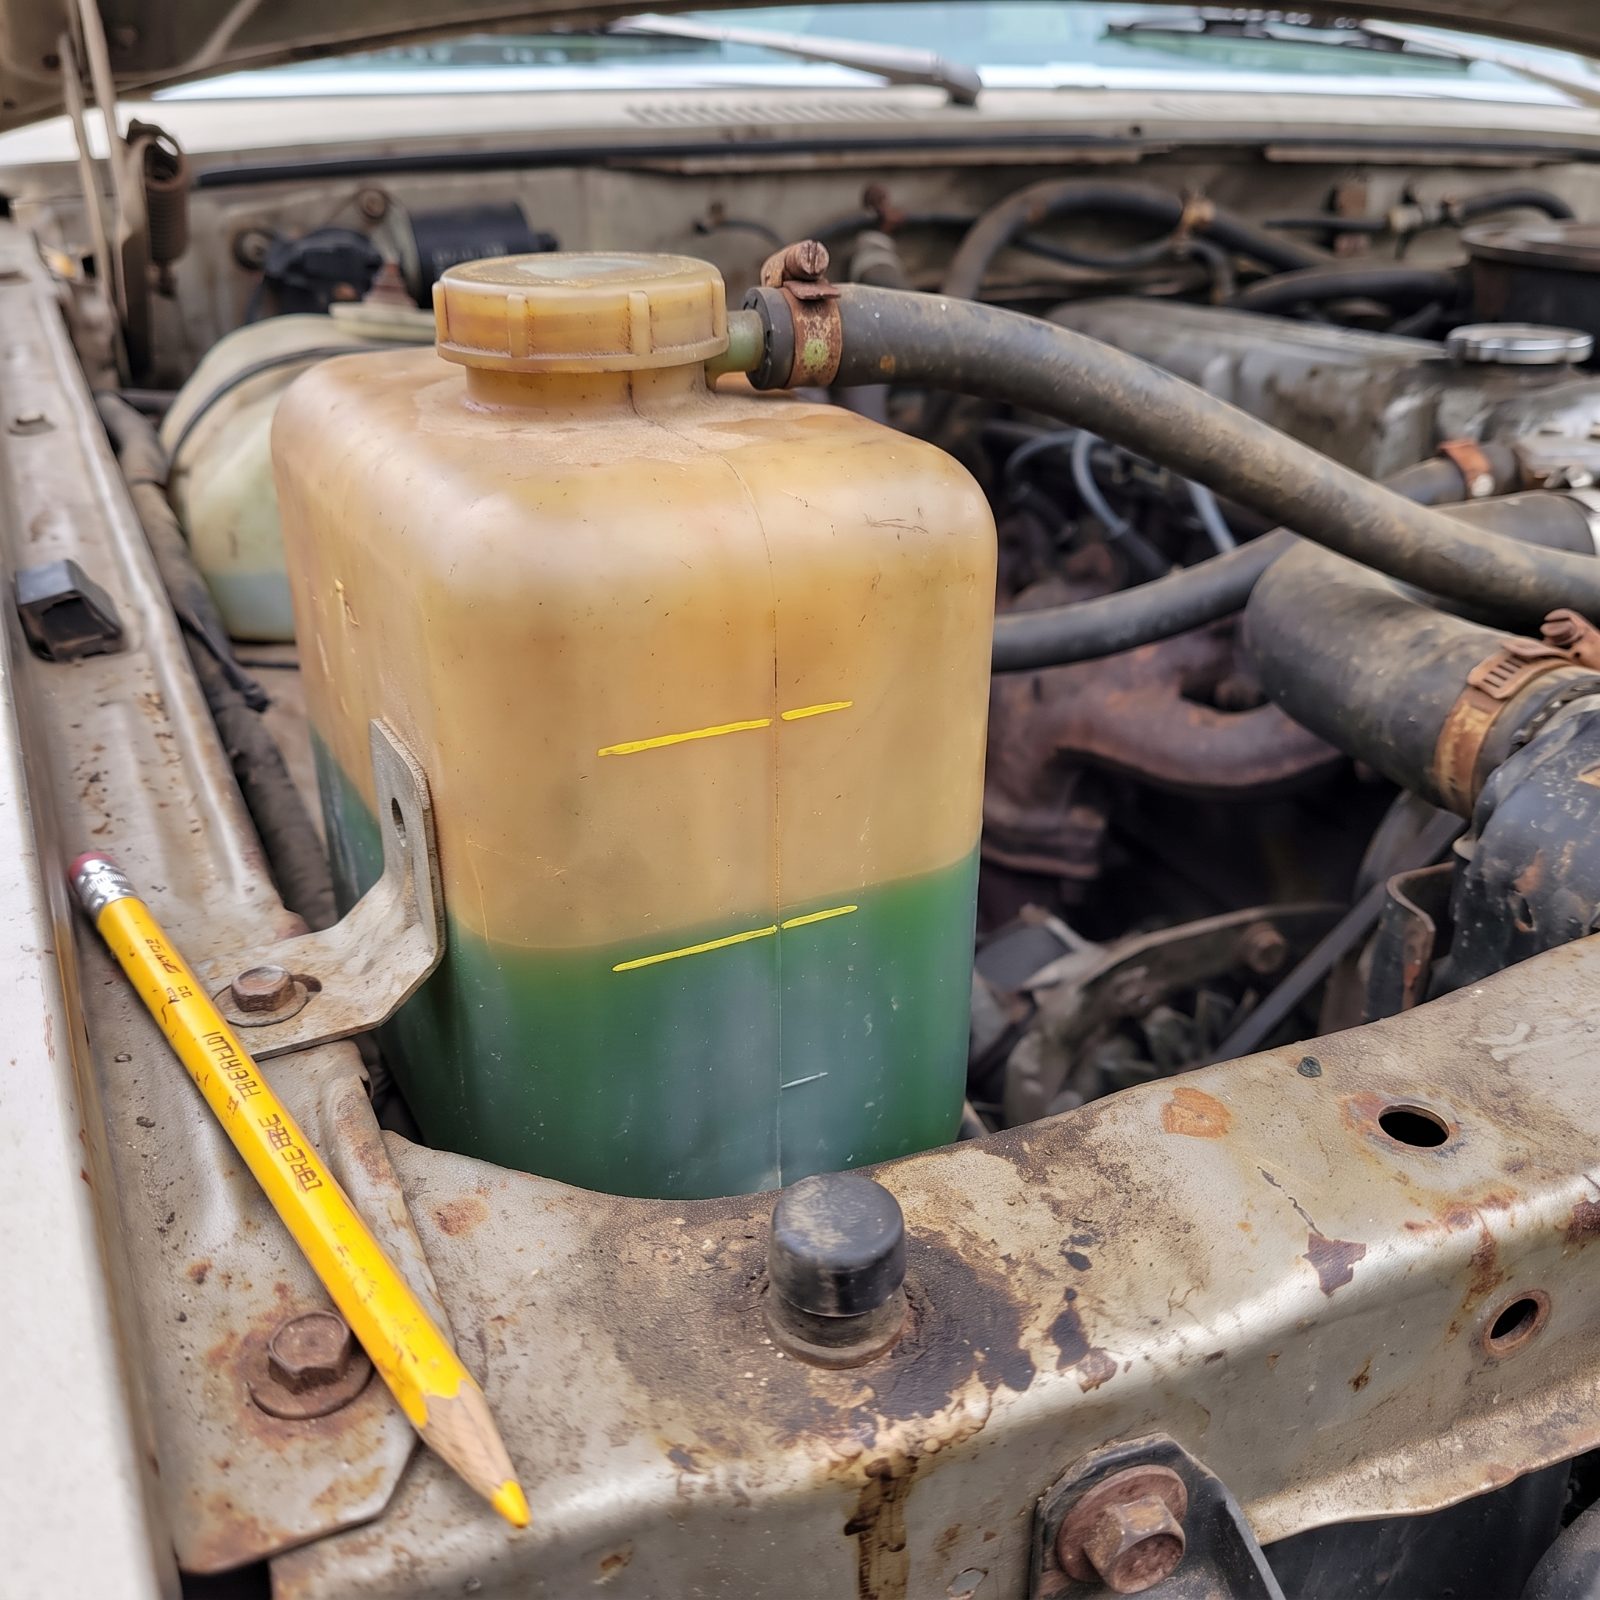
A dipstick full line and a reservoir MAX line are factory marks, and they’re useless for catching a slow leak because you’ve got nothing to compare today against.
So make your own. Check the fluid cold, mark the exact level on the translucent reservoir with a grease pencil, scratch the date next to it. Coolant, power steering, brake, washer — all of them. A month later the mark is still there, waiting. If the level crept below it, you’ve got a loss, and you found it as a stain on a hose instead of a cloud of steam at a red light. One bonus: brake fluid dropping slowly almost always means worn pads rather than a leak, which is a handy tell all on its own.
35. Test Coolant for Stray Voltage to Prevent Electrolysis Damage
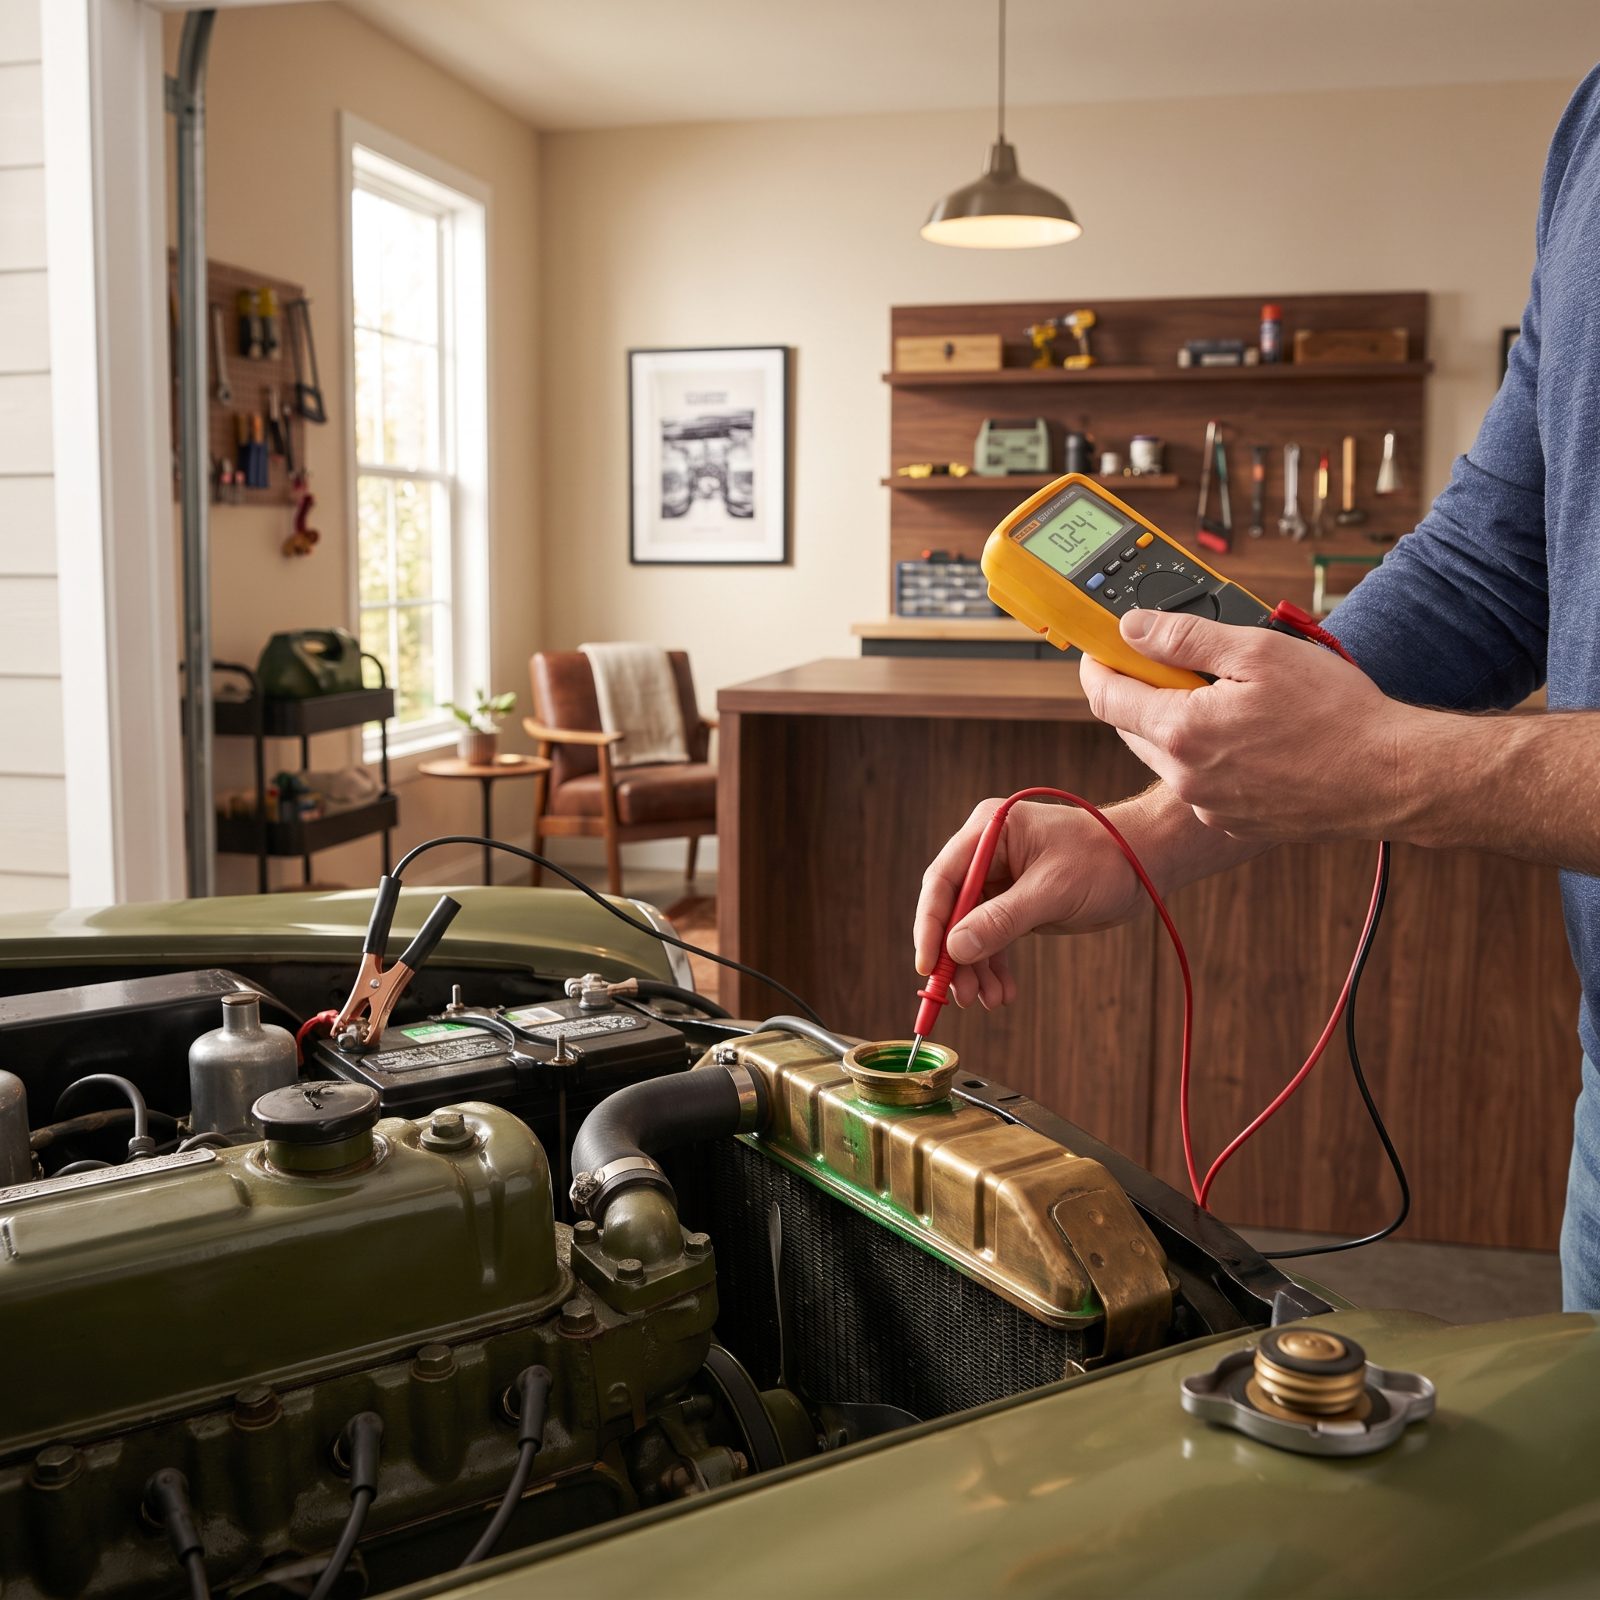
This is one almost nobody outside of cooling-system specialists knows about. Old coolant can carry stray electrical voltage, and that voltage quietly eats aluminum from the inside — a tiny battery running loose in your engine.
Set a multimeter to DC volts, clip the black lead to the battery negative, dip the red probe into the coolant without touching metal. Engine off. A reading past a few tenths of a volt means electrolysis is happening, usually from a bad ground strap or acidic worn-out coolant. Leave it and it pits the water pump, eats the radiator tanks, and eventually perforates the head. Fresh coolant and a clean ground strap fix the whole thing before a new radiator teaches you the lesson.
34. Photograph the Engine Bay Regularly to Reveal Gradual Changes
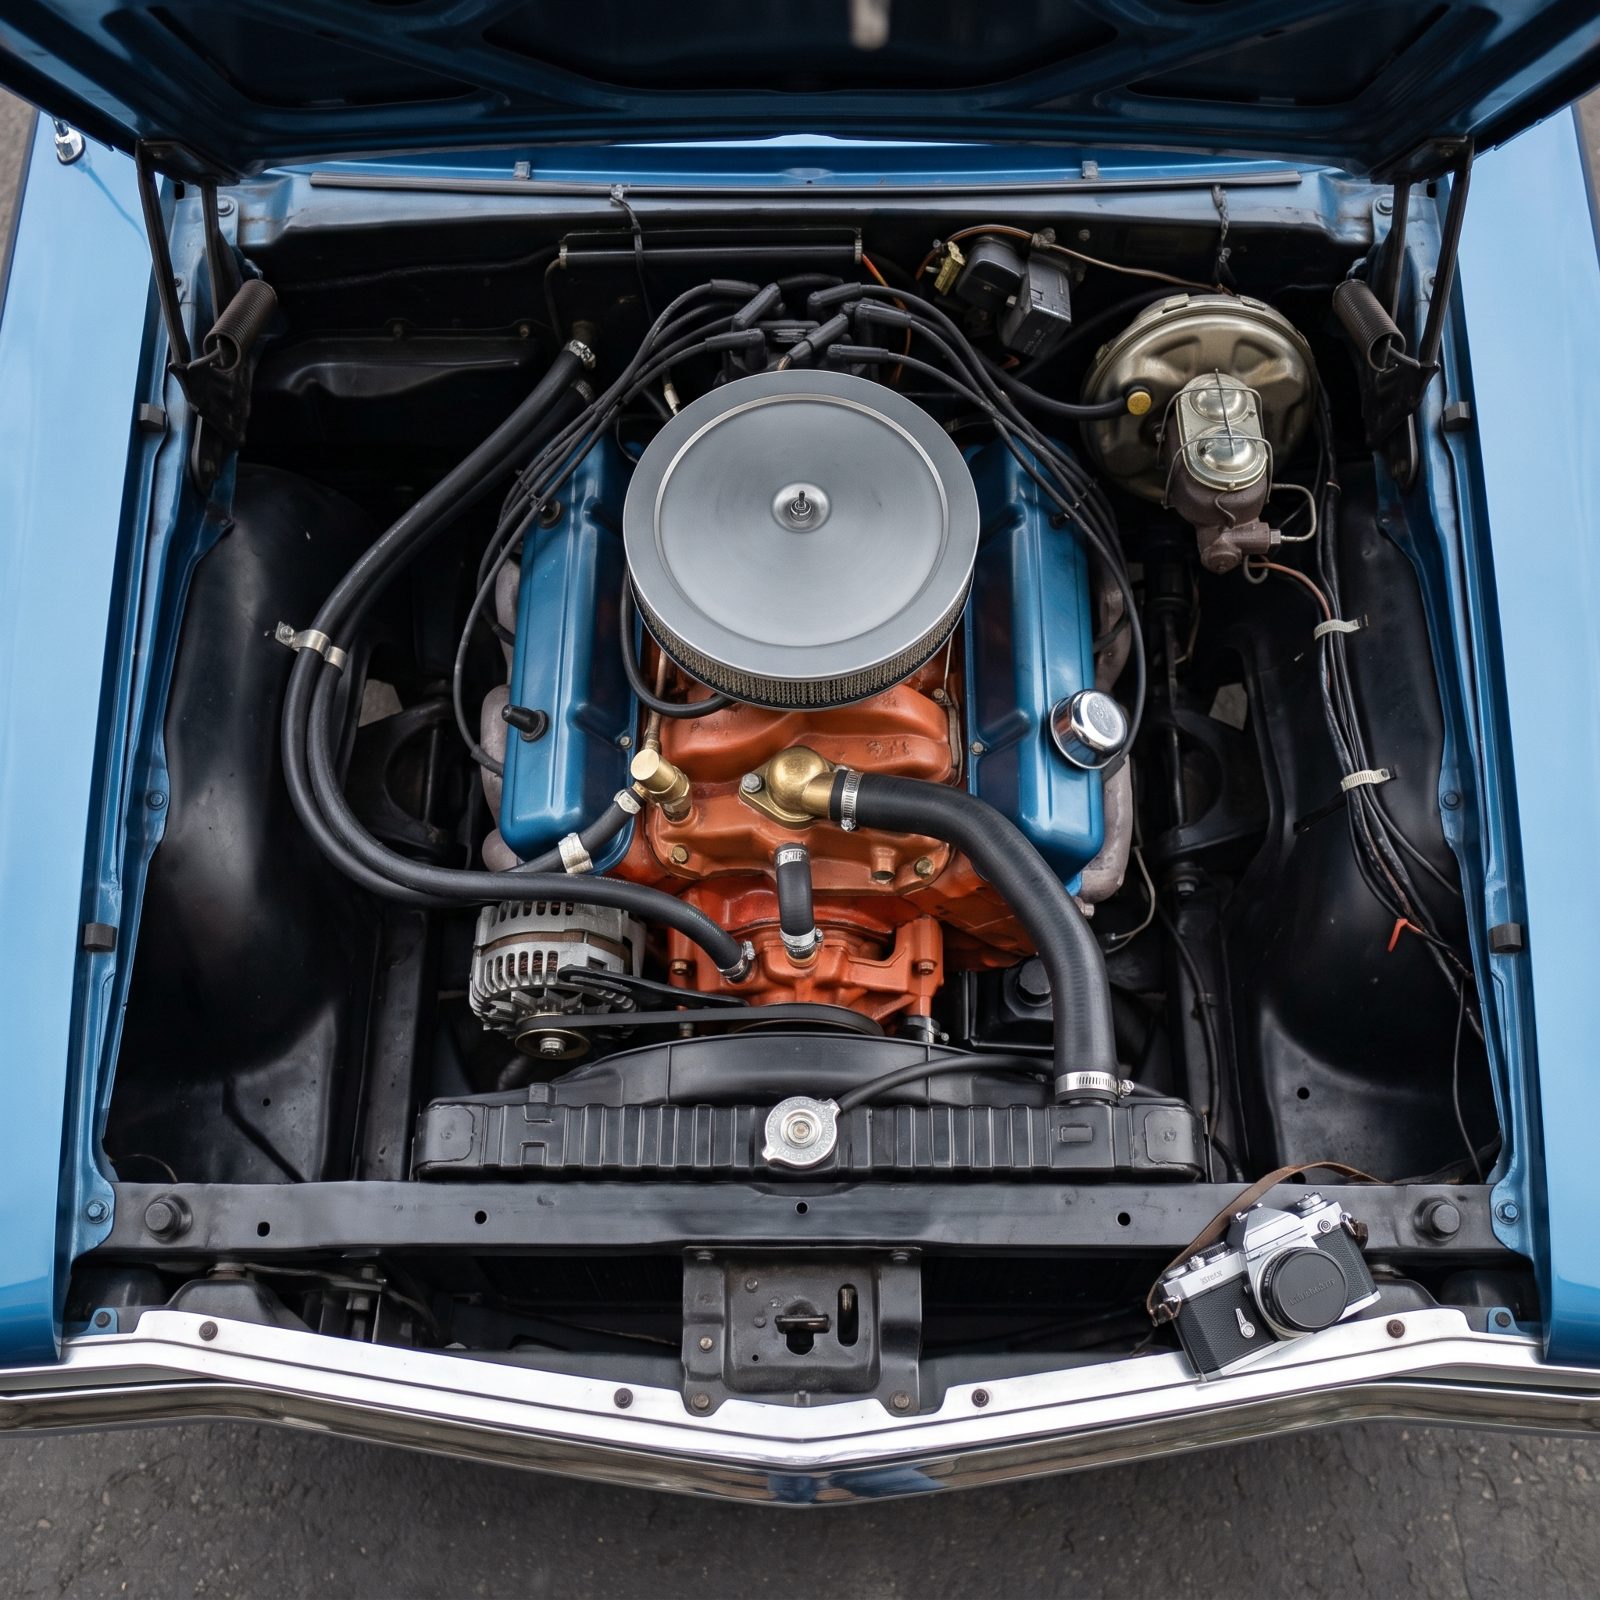
Your eyes adjust to slow change. A hose weeps a little more each week and you never clock it, because you saw it fine yesterday and the day before that.
A camera doesn’t adjust. Shoot the engine bay straight down in good light every few months and keep the photos in a folder. Put them side by side and the slow stuff jumps out — a belt gone glazed, a coolant crust forming at a clamp, a wire casing starting to crack, a wet shine on a seal that used to be bone dry. Same reason doctors compare this year’s scan to last year’s. Memory lies. The picture doesn’t.
33. Log Every Fill-Up to Spot Trouble Through Falling Fuel Economy
Would you like to save this?
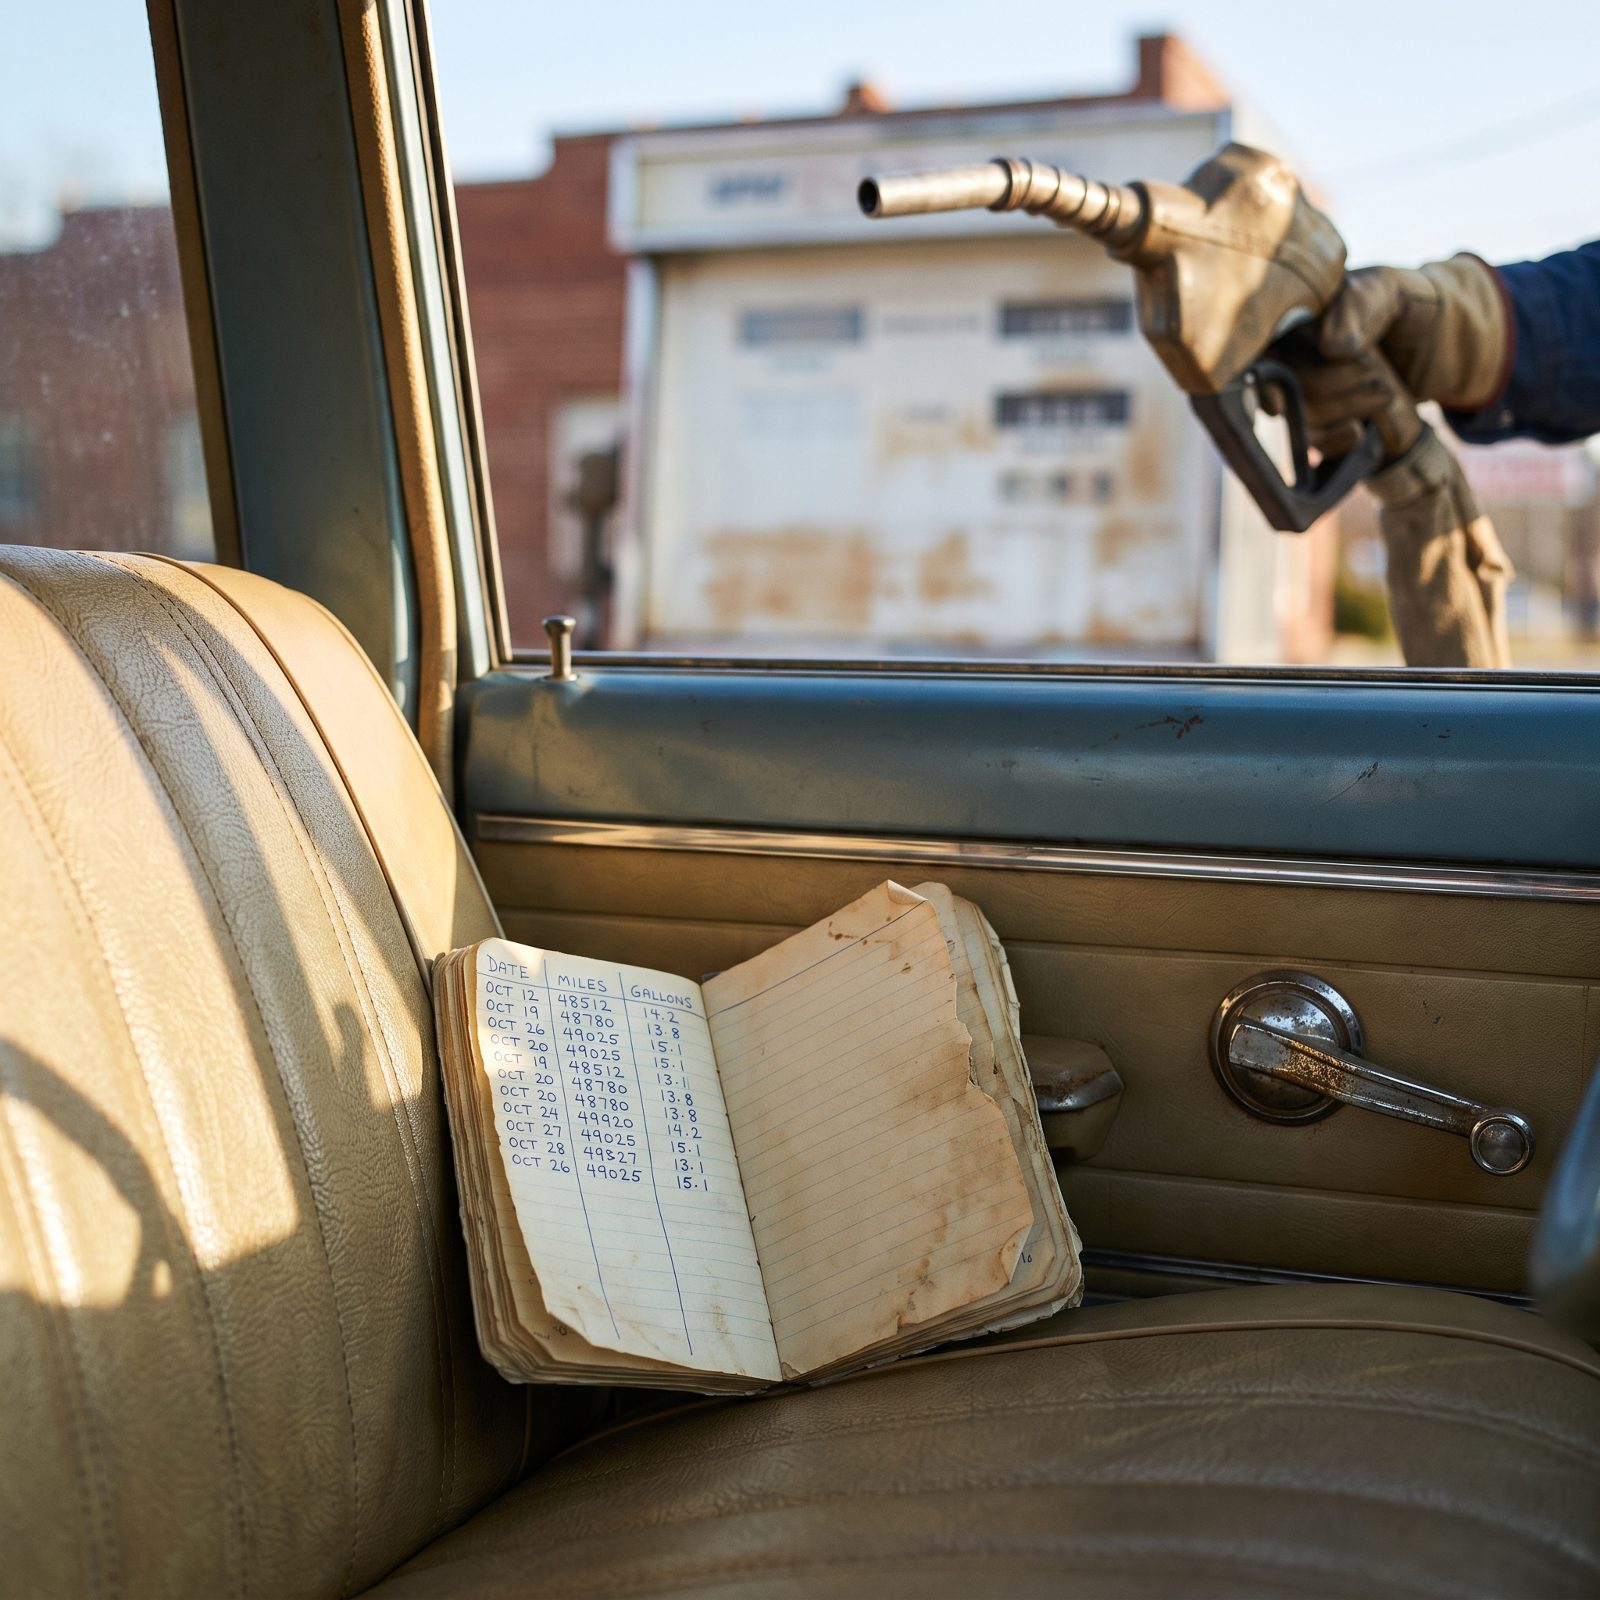
Fuel economy is the cheapest diagnostic gauge your car has, and it comes free with every fill-up if you bother to write it down.
Miles divided by gallons, logged every tank — and logged carefully. A steady number is a healthy engine. A number sliding down over a few tanks is the car telling you something — a dragging brake, a tired oxygen sensor, a clogging filter, soft tires, a thermostat stuck open and running the engine cold. None of those throw a warning light at first. All of them show up in the plain arithmetic weeks early.
32. Clean the Battery Case Top to Stop Current Tracking Through Grime
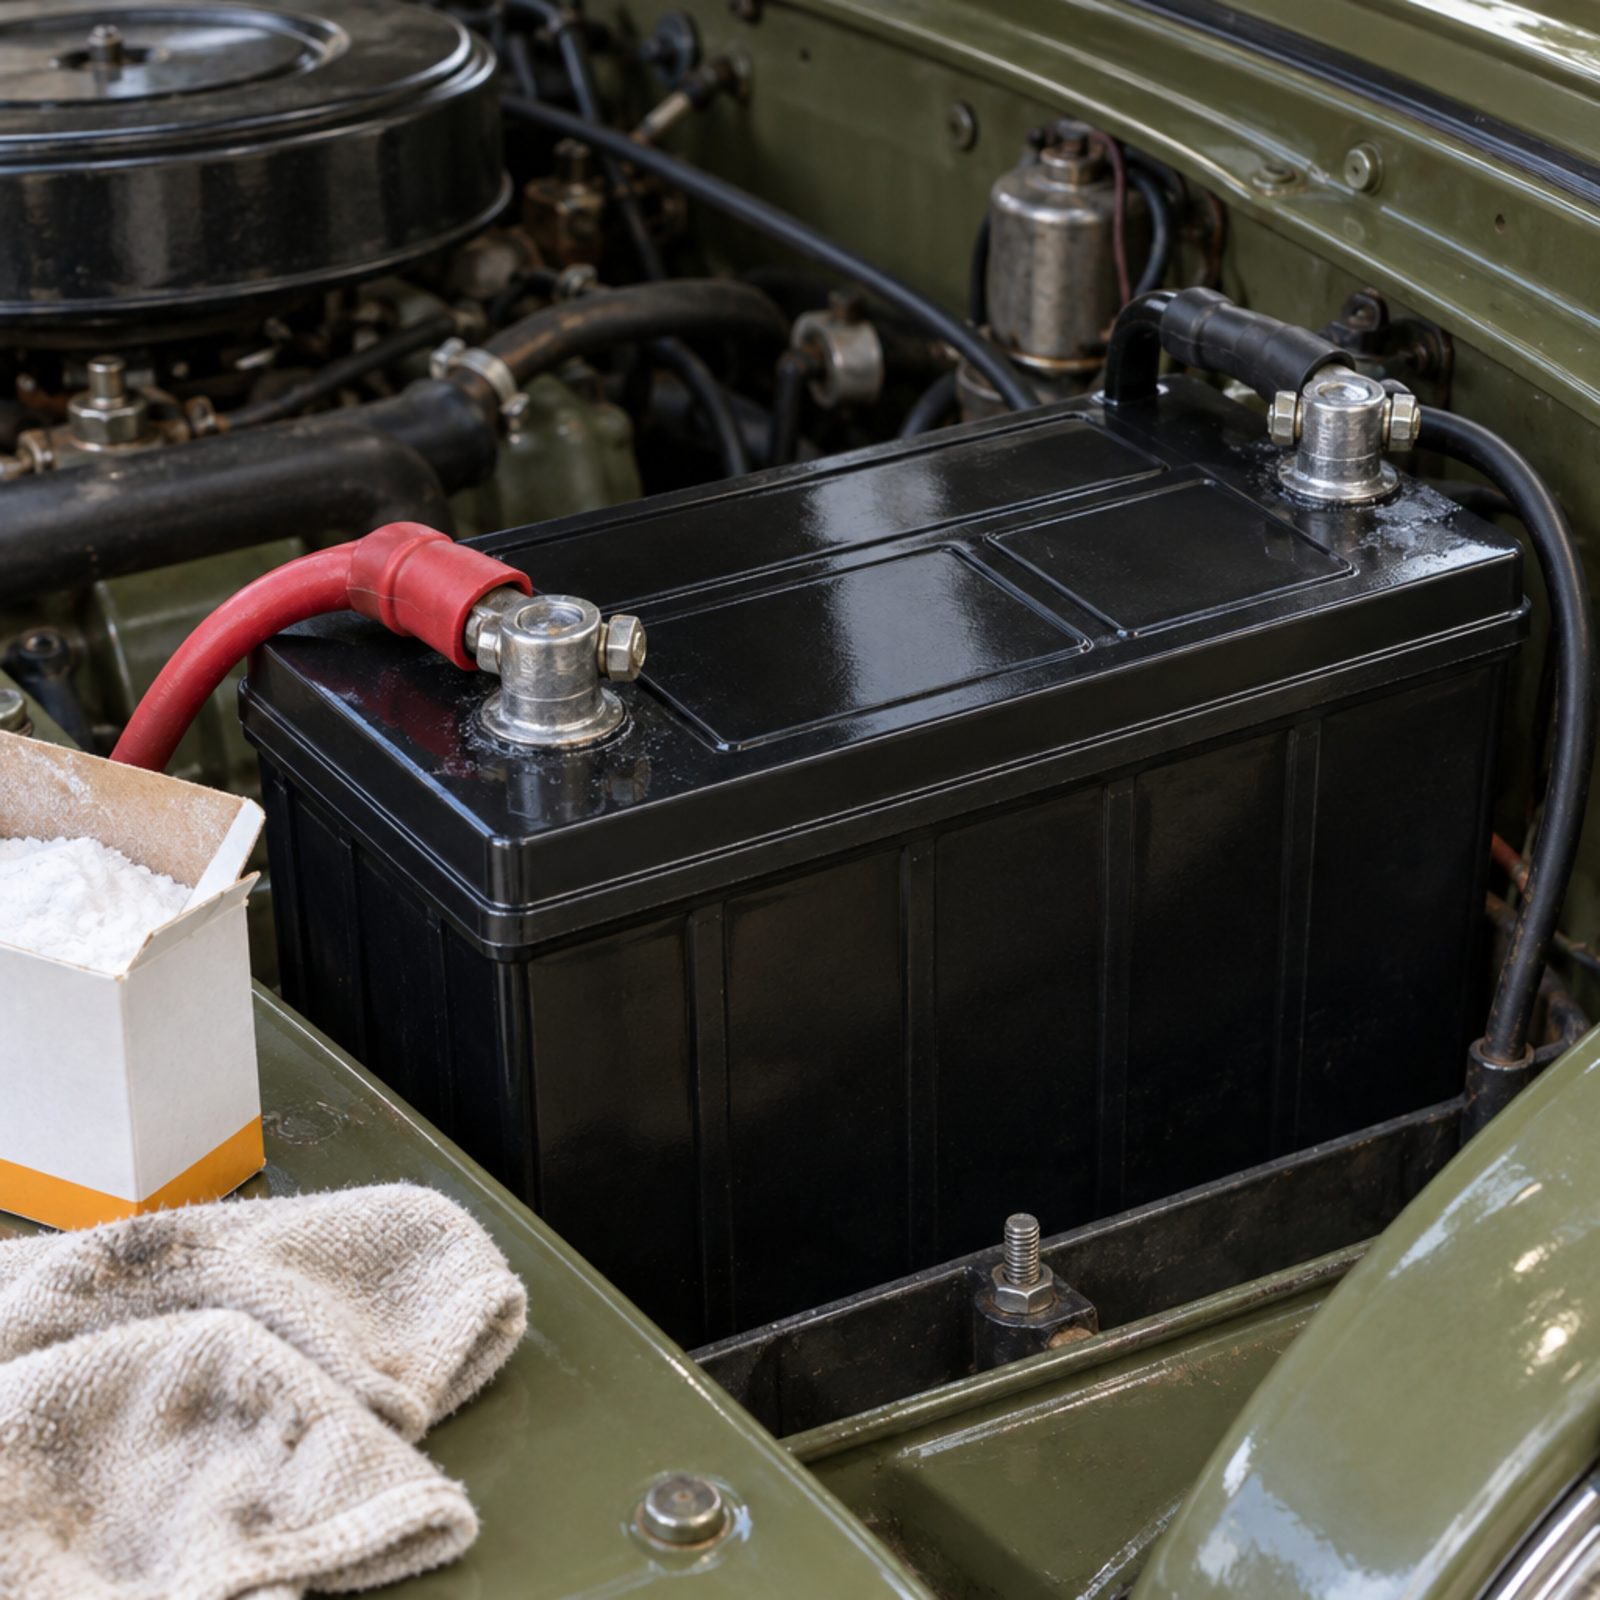
A dirty battery top will drain a good battery overnight. Most folks blame the battery and go buy a new one.
That film of dust, oil, and acid vapor building up between the two posts is slightly conductive. It gives current a path to leak straight across the top — a slow self-discharge that leaves you cranking a dead car on a cold morning for no reason the battery deserves. Wipe the case top clean, hit any white corrosion with a little baking soda and water, dry it off, and smear a thin film of grease on the terminals. Costs nothing. Buys years.
31. Park Over Clean Cardboard Overnight to Map Developing Leaks
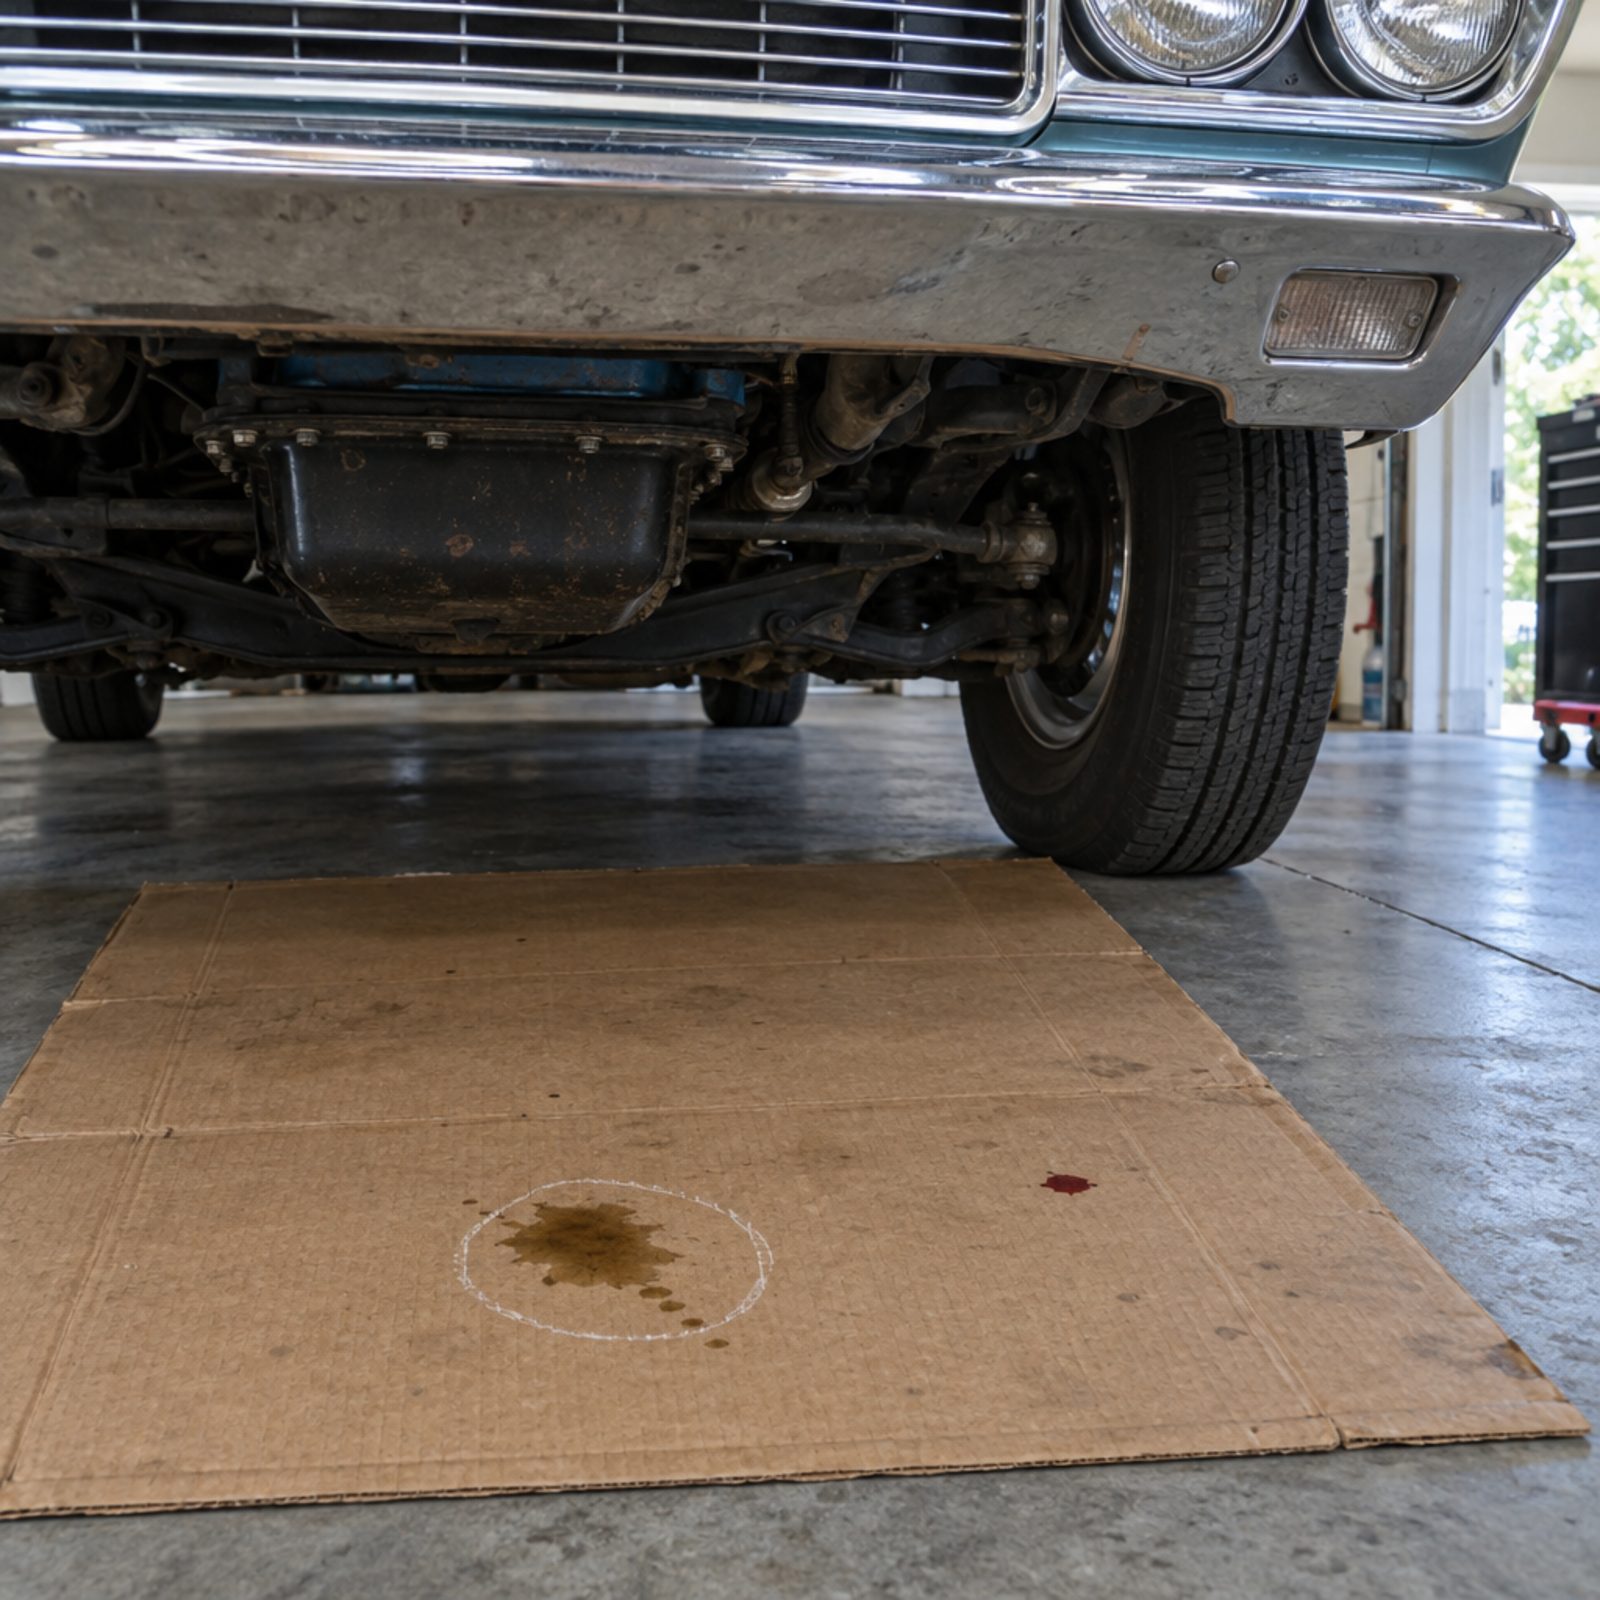
A stained floor tells you a car leaks. A clean sheet of cardboard tells you where and what. Lay one flat on the floor at the front of the car before you lock up for the night, then read it in the morning like a map. Amber near the pan is oil, reddish and slick is transmission or power steering, and a greenish streak points to coolant.
Here’s the part nobody mentions. Mark the date on the sheet with a marker and save a few of them. Three cardboards across three weeks shows you whether a drip is getting worse or just a tired gasket holding steady, and that difference decides whether you fix it now or watch it.
30. Smell the Dipstick for Fuel That Is Diluting the Engine Oil
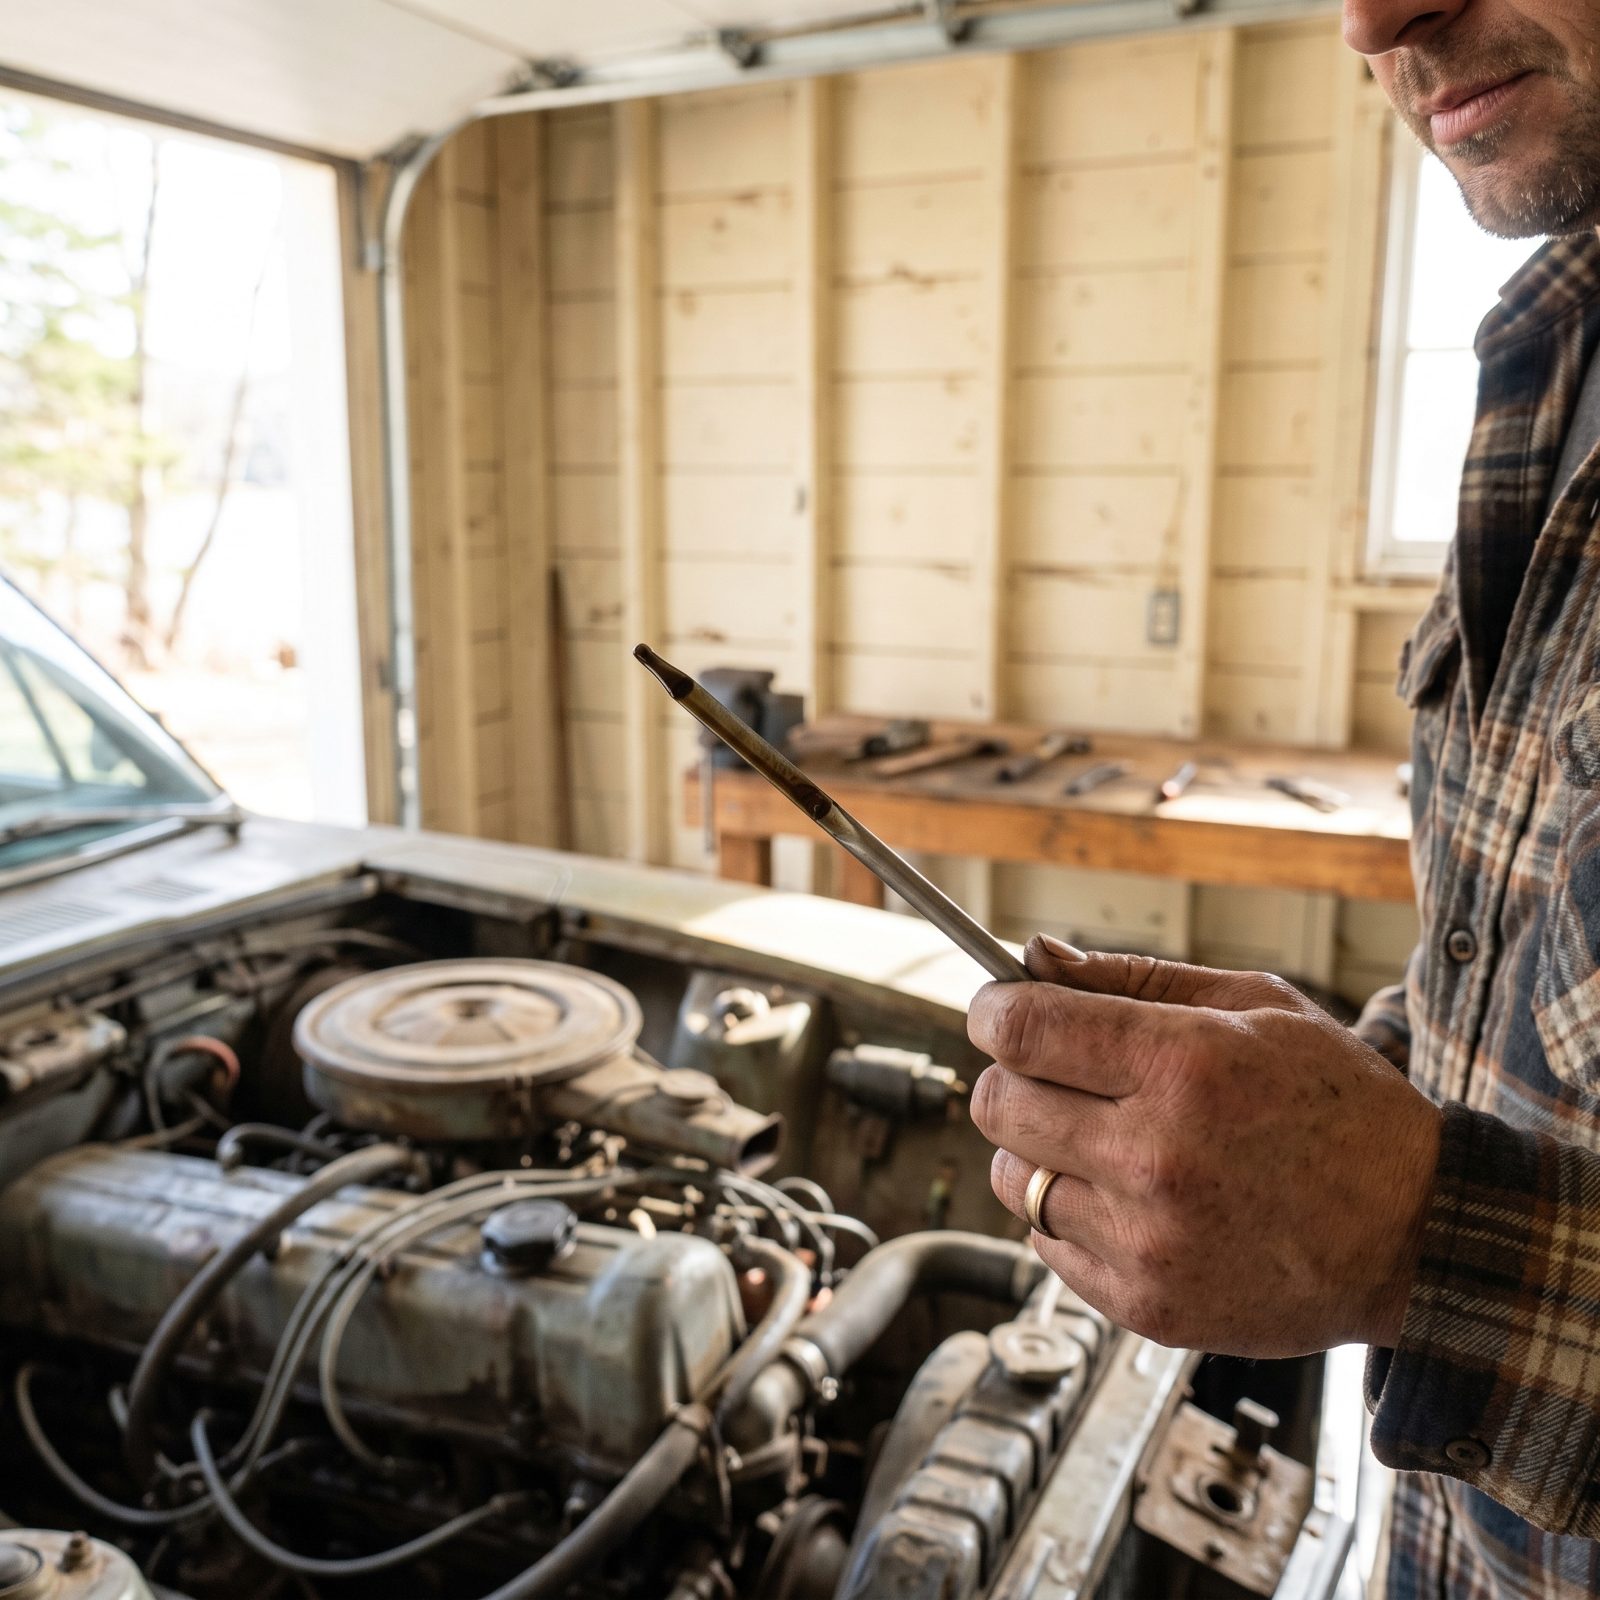
Pull the dipstick, wipe it, and actually smell the thing. Clean engine oil smells faintly like petroleum and not much else. If it smells sharp and gassy, raw fuel is washing past the rings into the crankcase.
Fuel dilution thins the oil until it can’t protect the bearings, and it’s a common problem on older carbureted engines running rich from a stuck choke or a worn needle. Watch the oil level too. If it creeps up between changes, that’s gasoline adding volume as it pools. Catching this by nose costs you nothing and can save a bottom-end rebuild.
29. Lift Rubber Floor Mats Monthly to Find Trapped Moisture
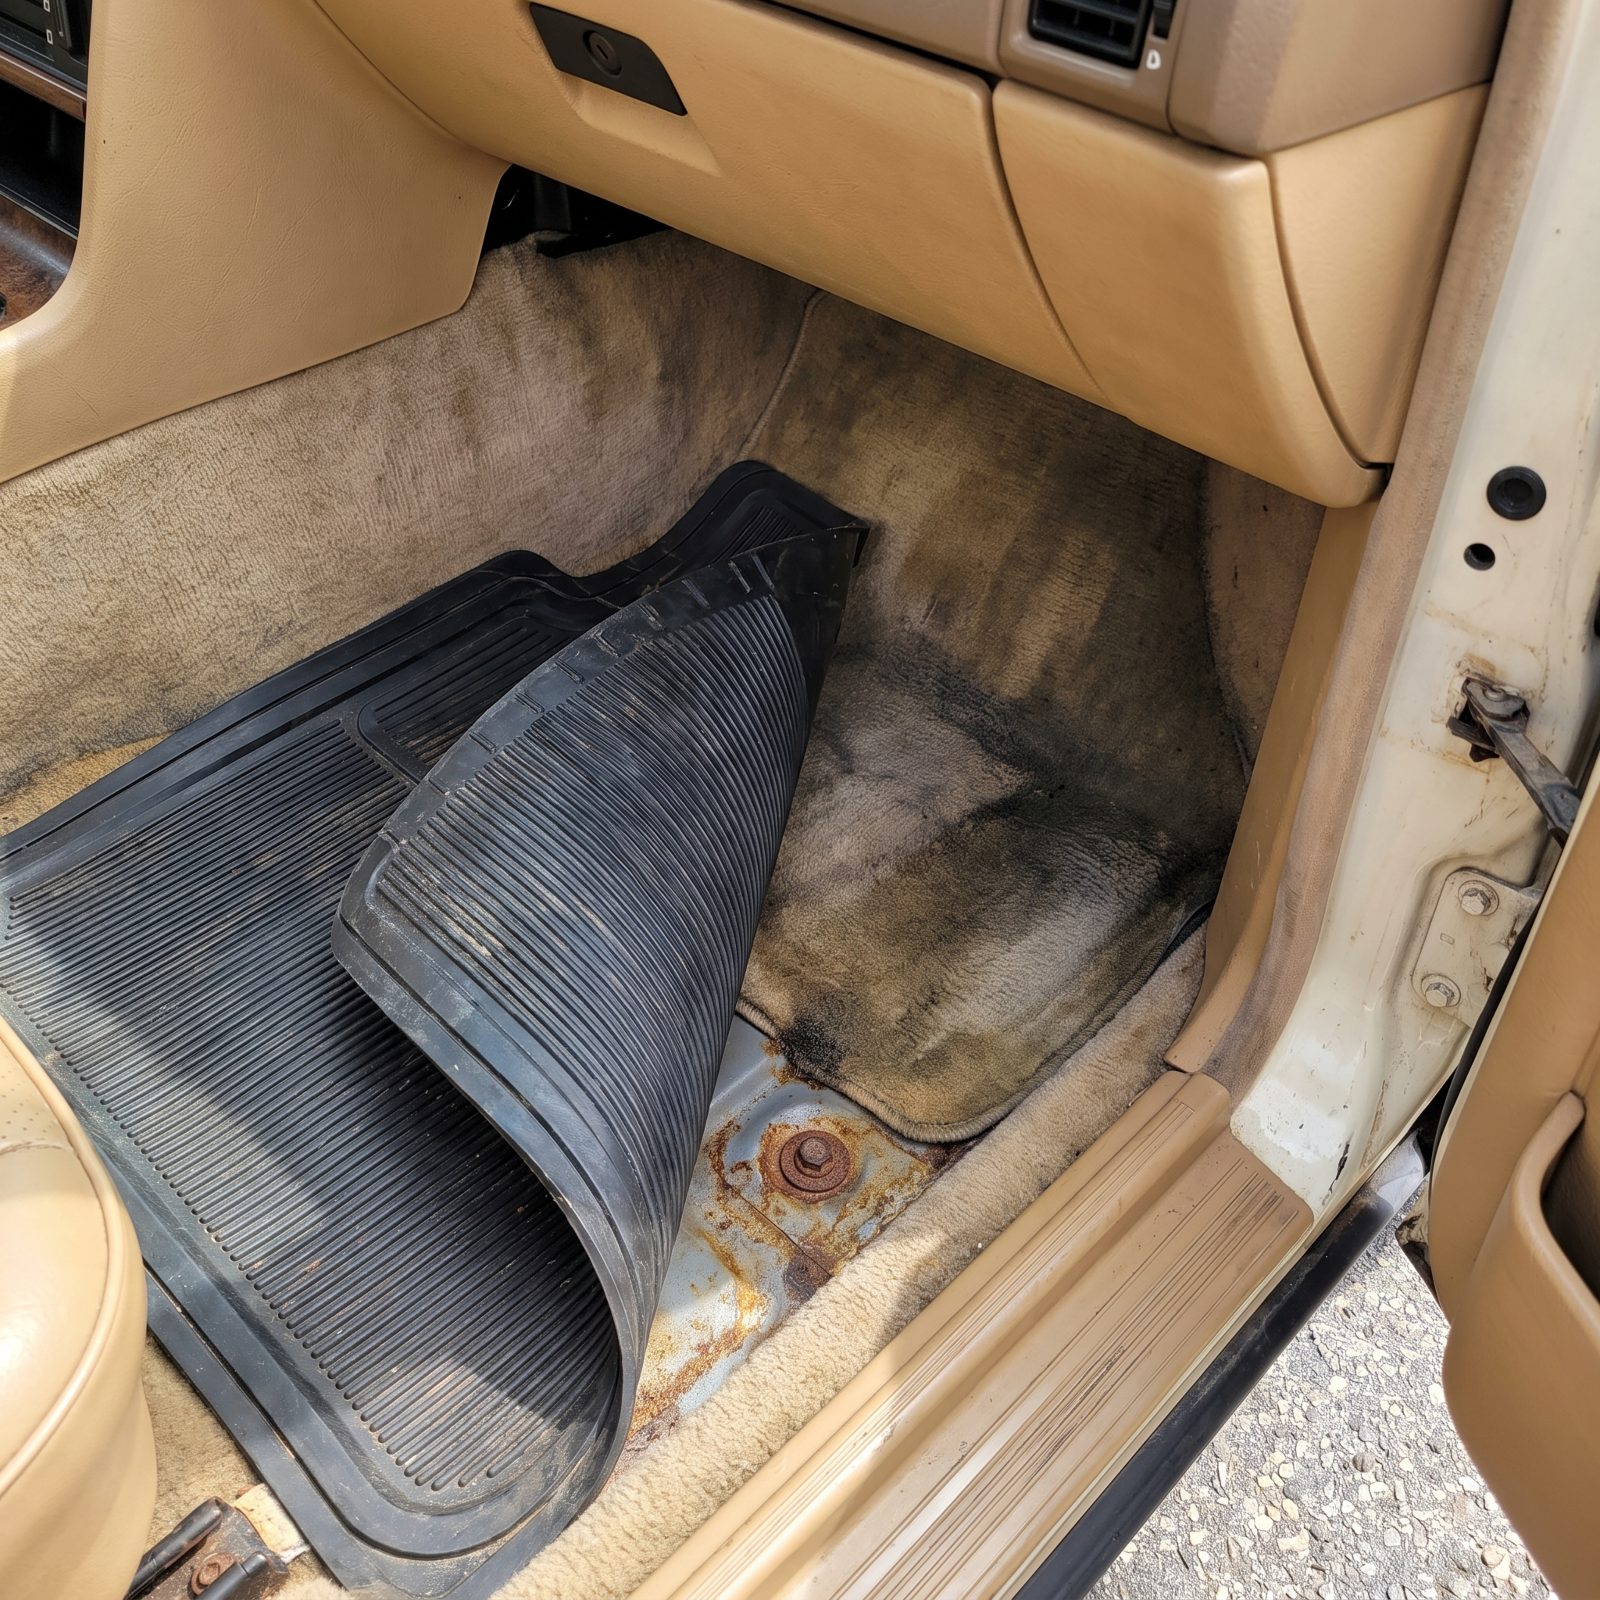
Rubber mats do one great thing and one terrible thing. They catch the slush and snow off your boots, then hold it against the carpet and the floor pan, out of sight, for weeks.
Flip them up once a month. A damp carpet underneath means a plugged drain, a leaking heater core, or a windshield seal letting water in. Dry it out, find the source, and you keep the floor pan from rusting through from the inside out, which is exactly how most old cars rot where nobody’s looking.
28. Clear Cowl Drains With Flexible Nylon Line to Prevent Hidden Rust
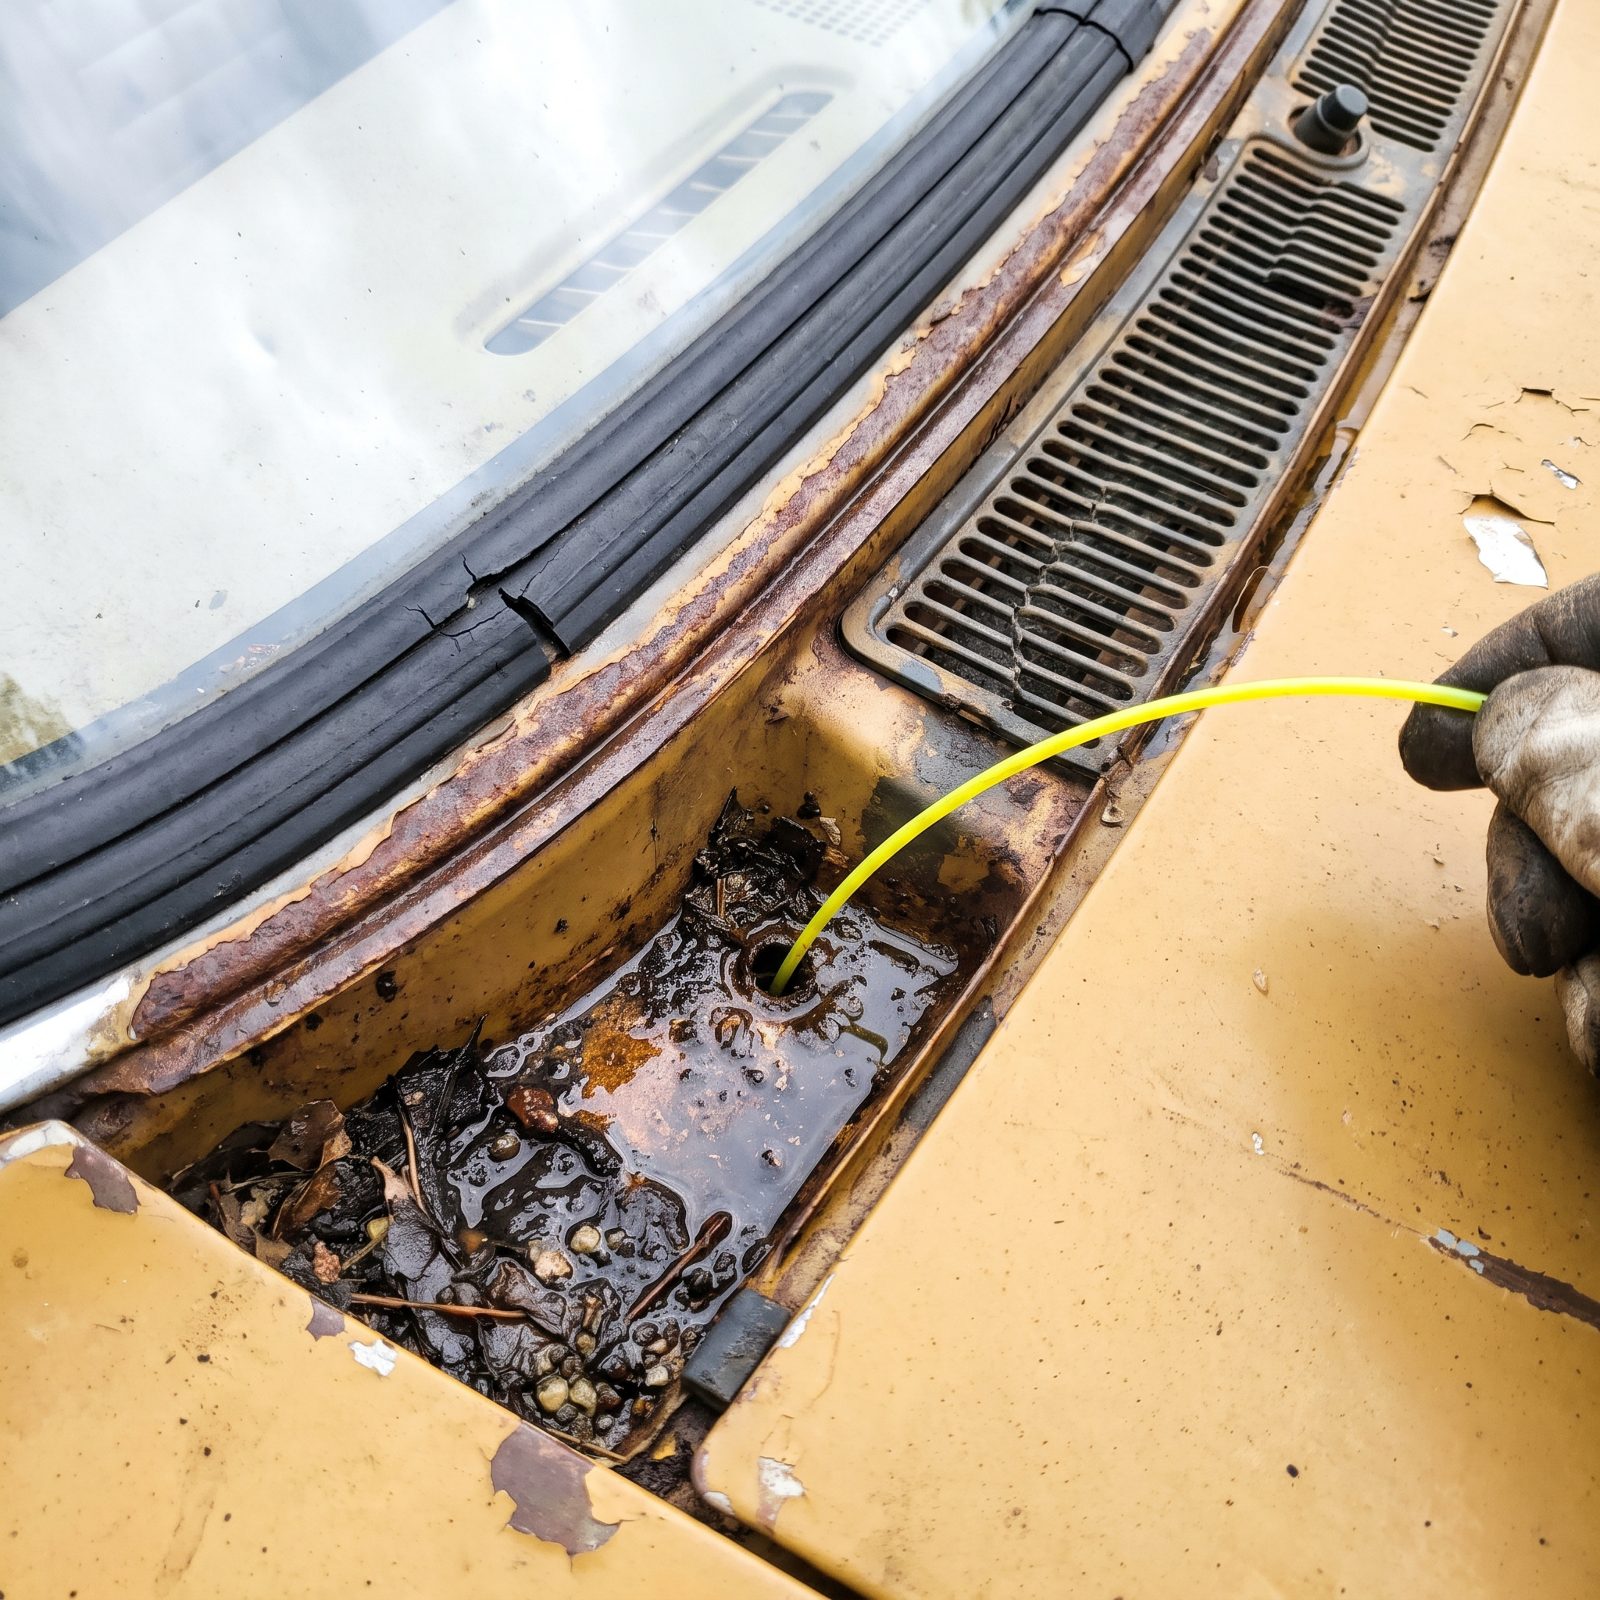
The channel at the base of the windshield fills with leaves, pine needles, and grit every single season. Clog its drains and that trough holds water against the firewall and the lower windshield corners, which is precisely where old bodies rot and where cabin leaks begin.
Forget coat hangers. They scratch, they snag. A length of flexible nylon trimmer line feeds right through the drain passages and clears the gunk without gouging anything. Do it in fall after the leaves drop. Five minutes now against a firewall repair later is not a close call.
27. Probe Door Drain Holes Before Water Collects Inside the Seams
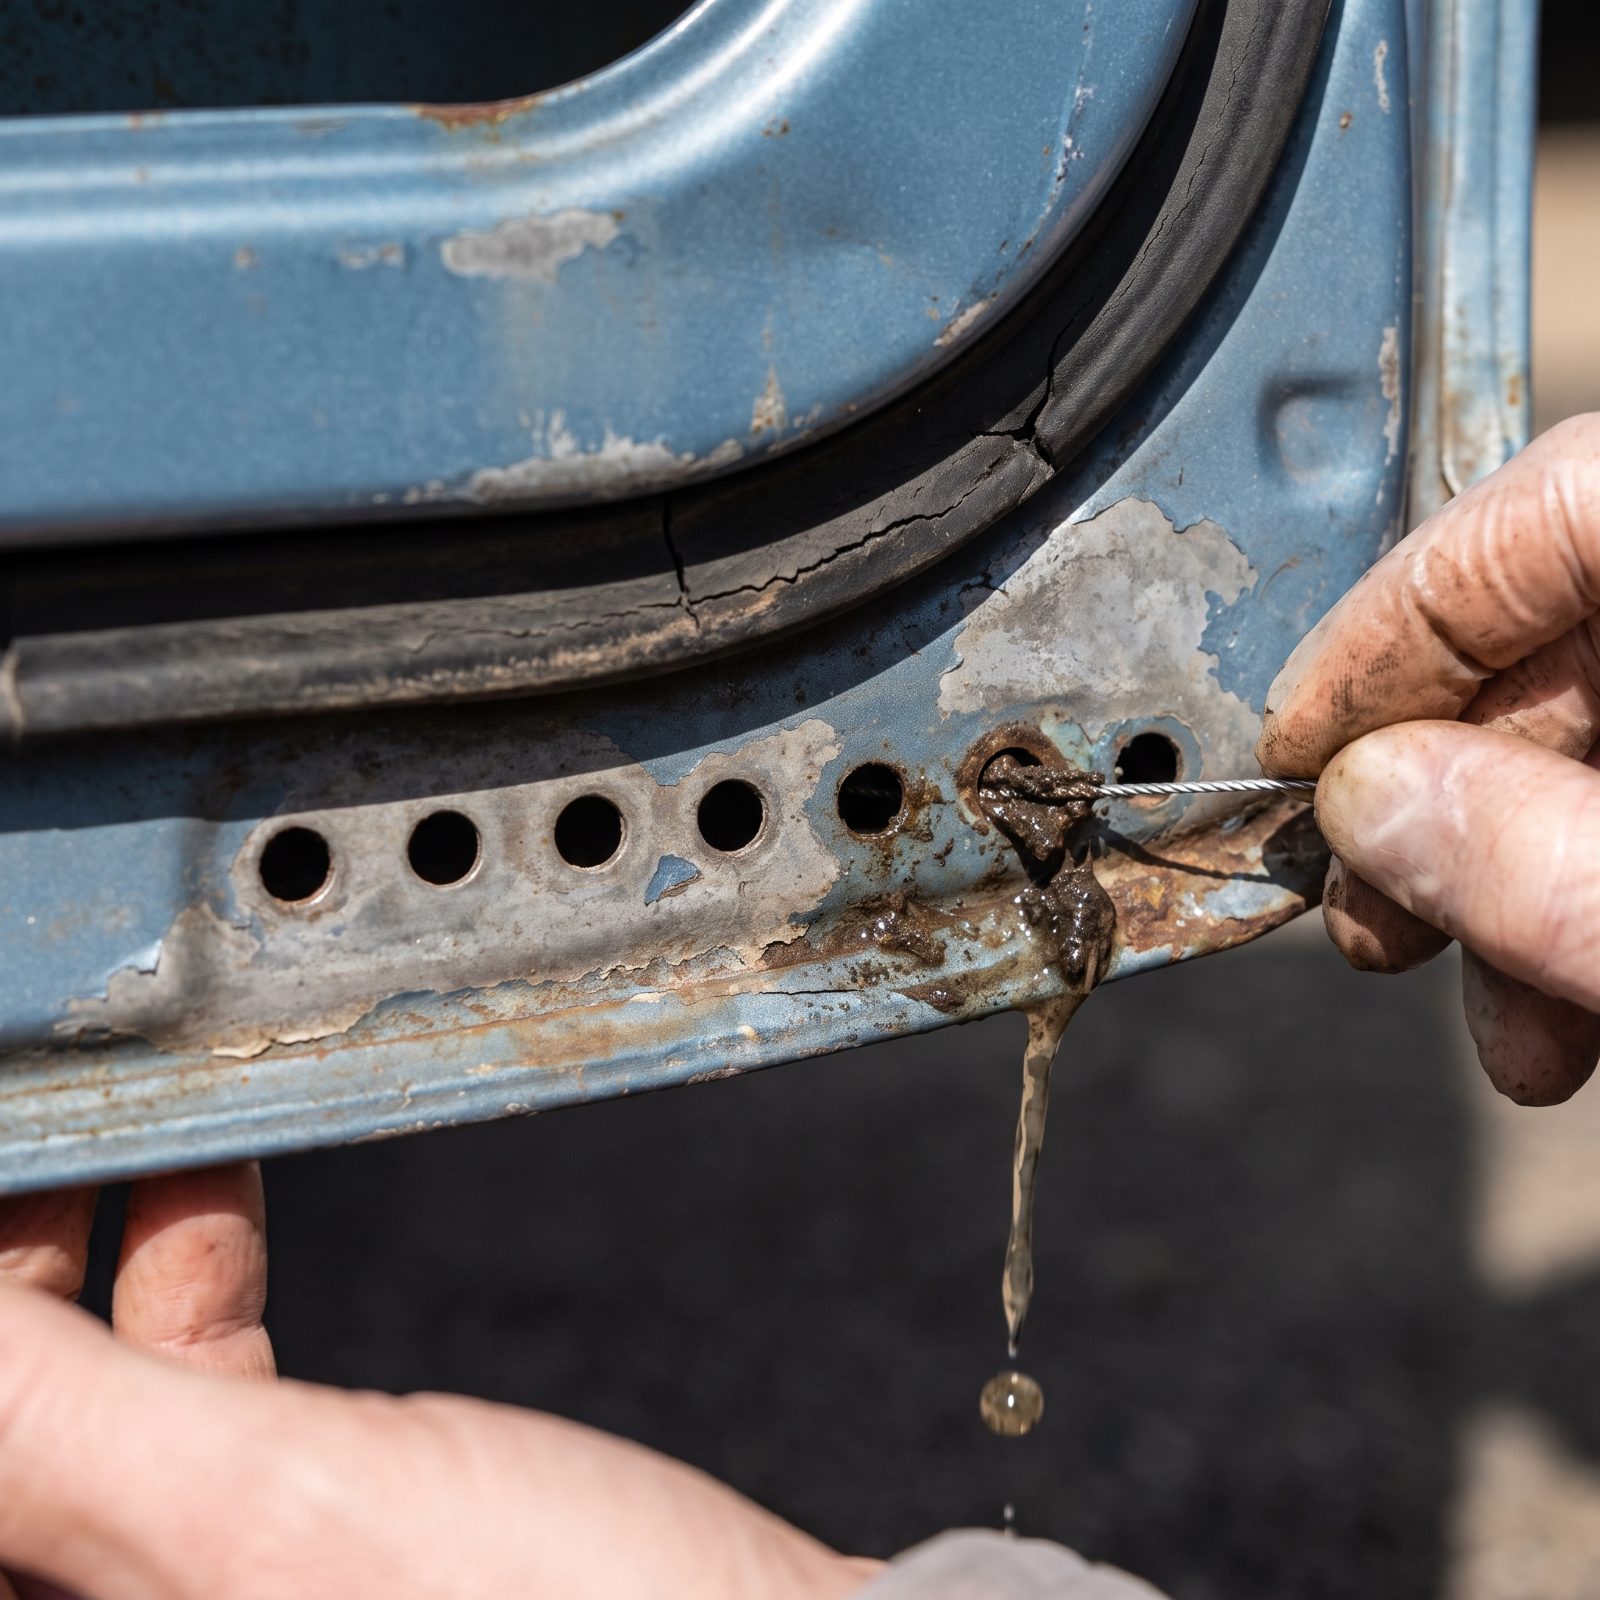
Look at the bottom edge of any door and you’ll find a row of little slots. Those are drains. Water runs down inside the door every time it rains or the window goes up damp, and when the slots pack with dirt, that water has nowhere to go.
So it sits in the bottom of the door shell and eats the metal from inside, which is why the lower corners of old doors bubble and blister first. Run a pipe cleaner or soft wire through each hole twice a year. If dirty water trickles out, congratulations, you just saved a door.
26. Remove Packed Mud From Wheel-Well Lips Before It Holds Moisture
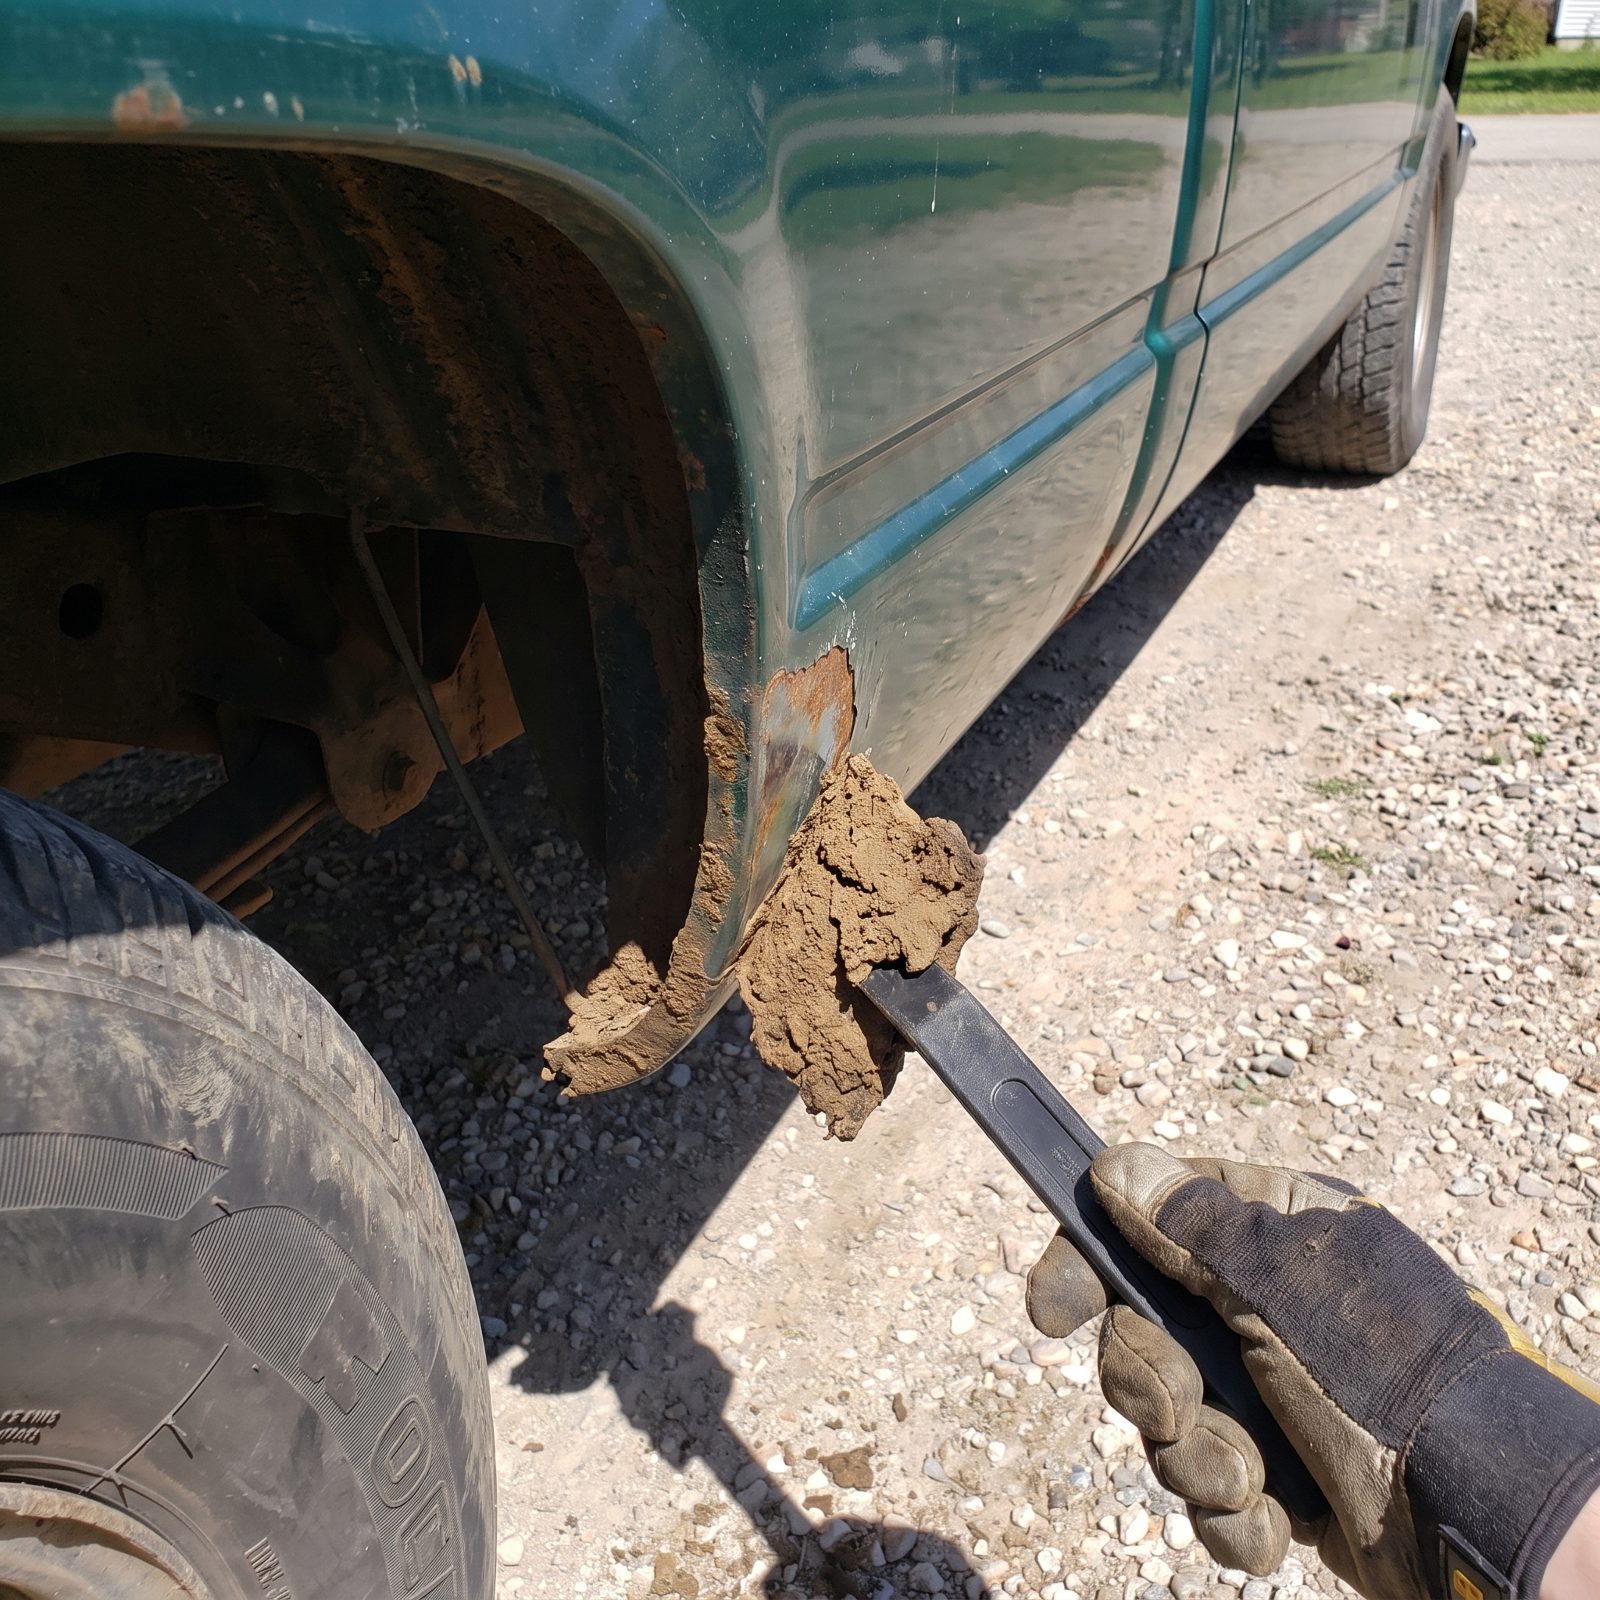
That hardened cake of mud wedged against the inner lip of a wheel well isn’t dirt. It’s a sponge. It stays damp long after the road dries and holds that wet grit tight against painted steel, where you can’t see the damage happening until it’s done.
Dig it out with a putty knife, working gently and keeping the blade flat so you don’t score the paint. Trucks and wagons are the worst offenders because the deep wells trap the most of it. Clear the lip, let the area dry, and touch up any bare spots you uncover before they spread.
25. Rinse Road Salt Off Twice, After Exposure and Again After the Thaw
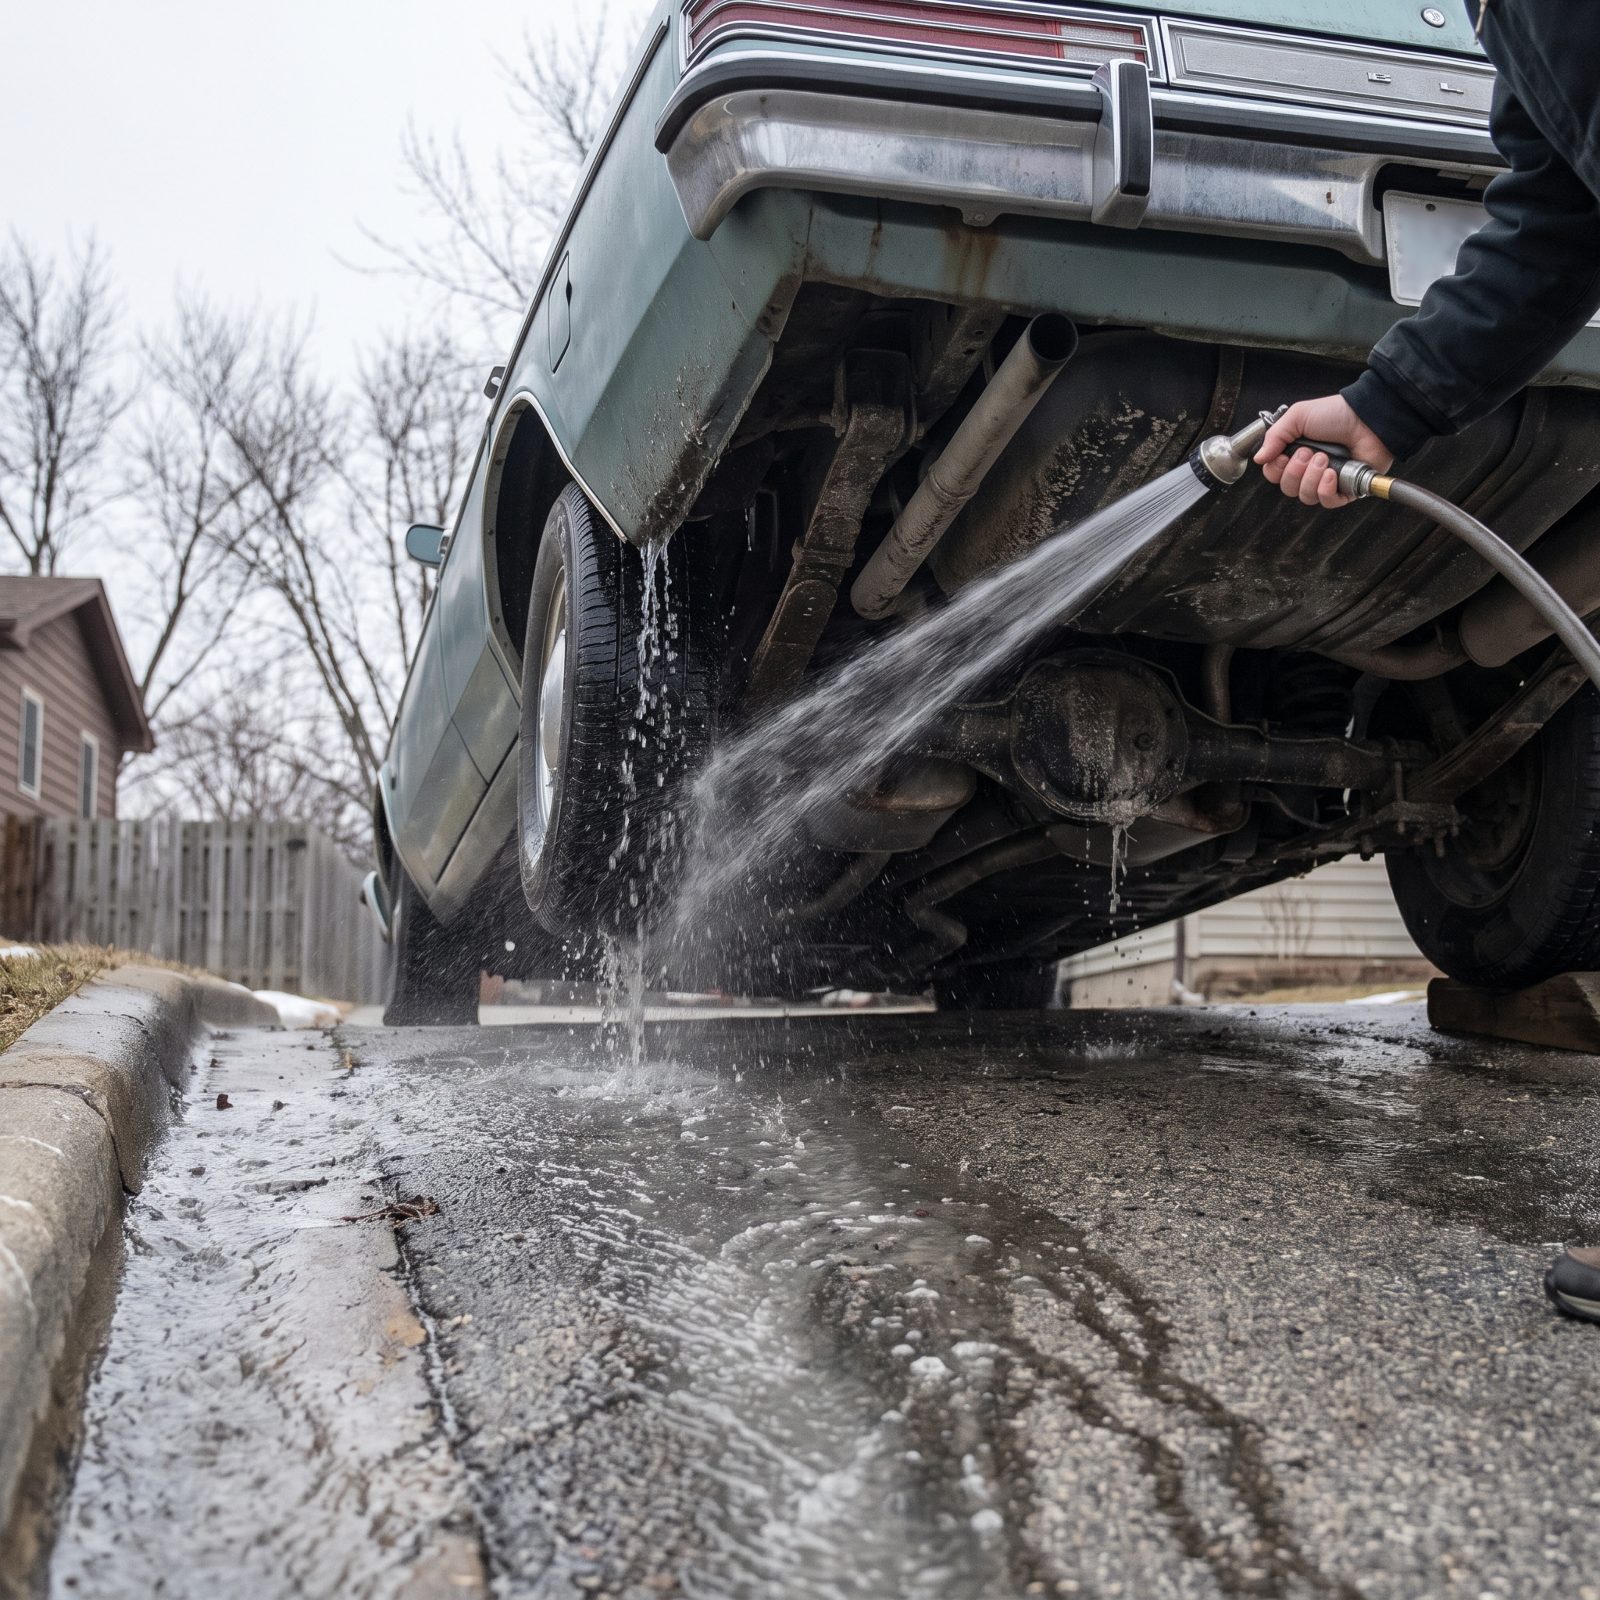
Everybody knows to wash off road salt. Almost nobody does it twice. The first rinse, soon after you’ve driven salted roads, gets the fresh brine off before it sets. Obvious enough.
It’s the second rinse that matters, and it’s the one people skip. A warm spell melts the frozen slush packed up in the frame rails and body cavities, releasing trapped salt you couldn’t reach while everything was frozen solid. Hit the underbody again after the thaw, aim up into the crevices, and you flush out the salt that would otherwise sit and work away all spring.
24. Apply Cavity Wax Inside Doors, Rockers, and Boxed Frame Sections
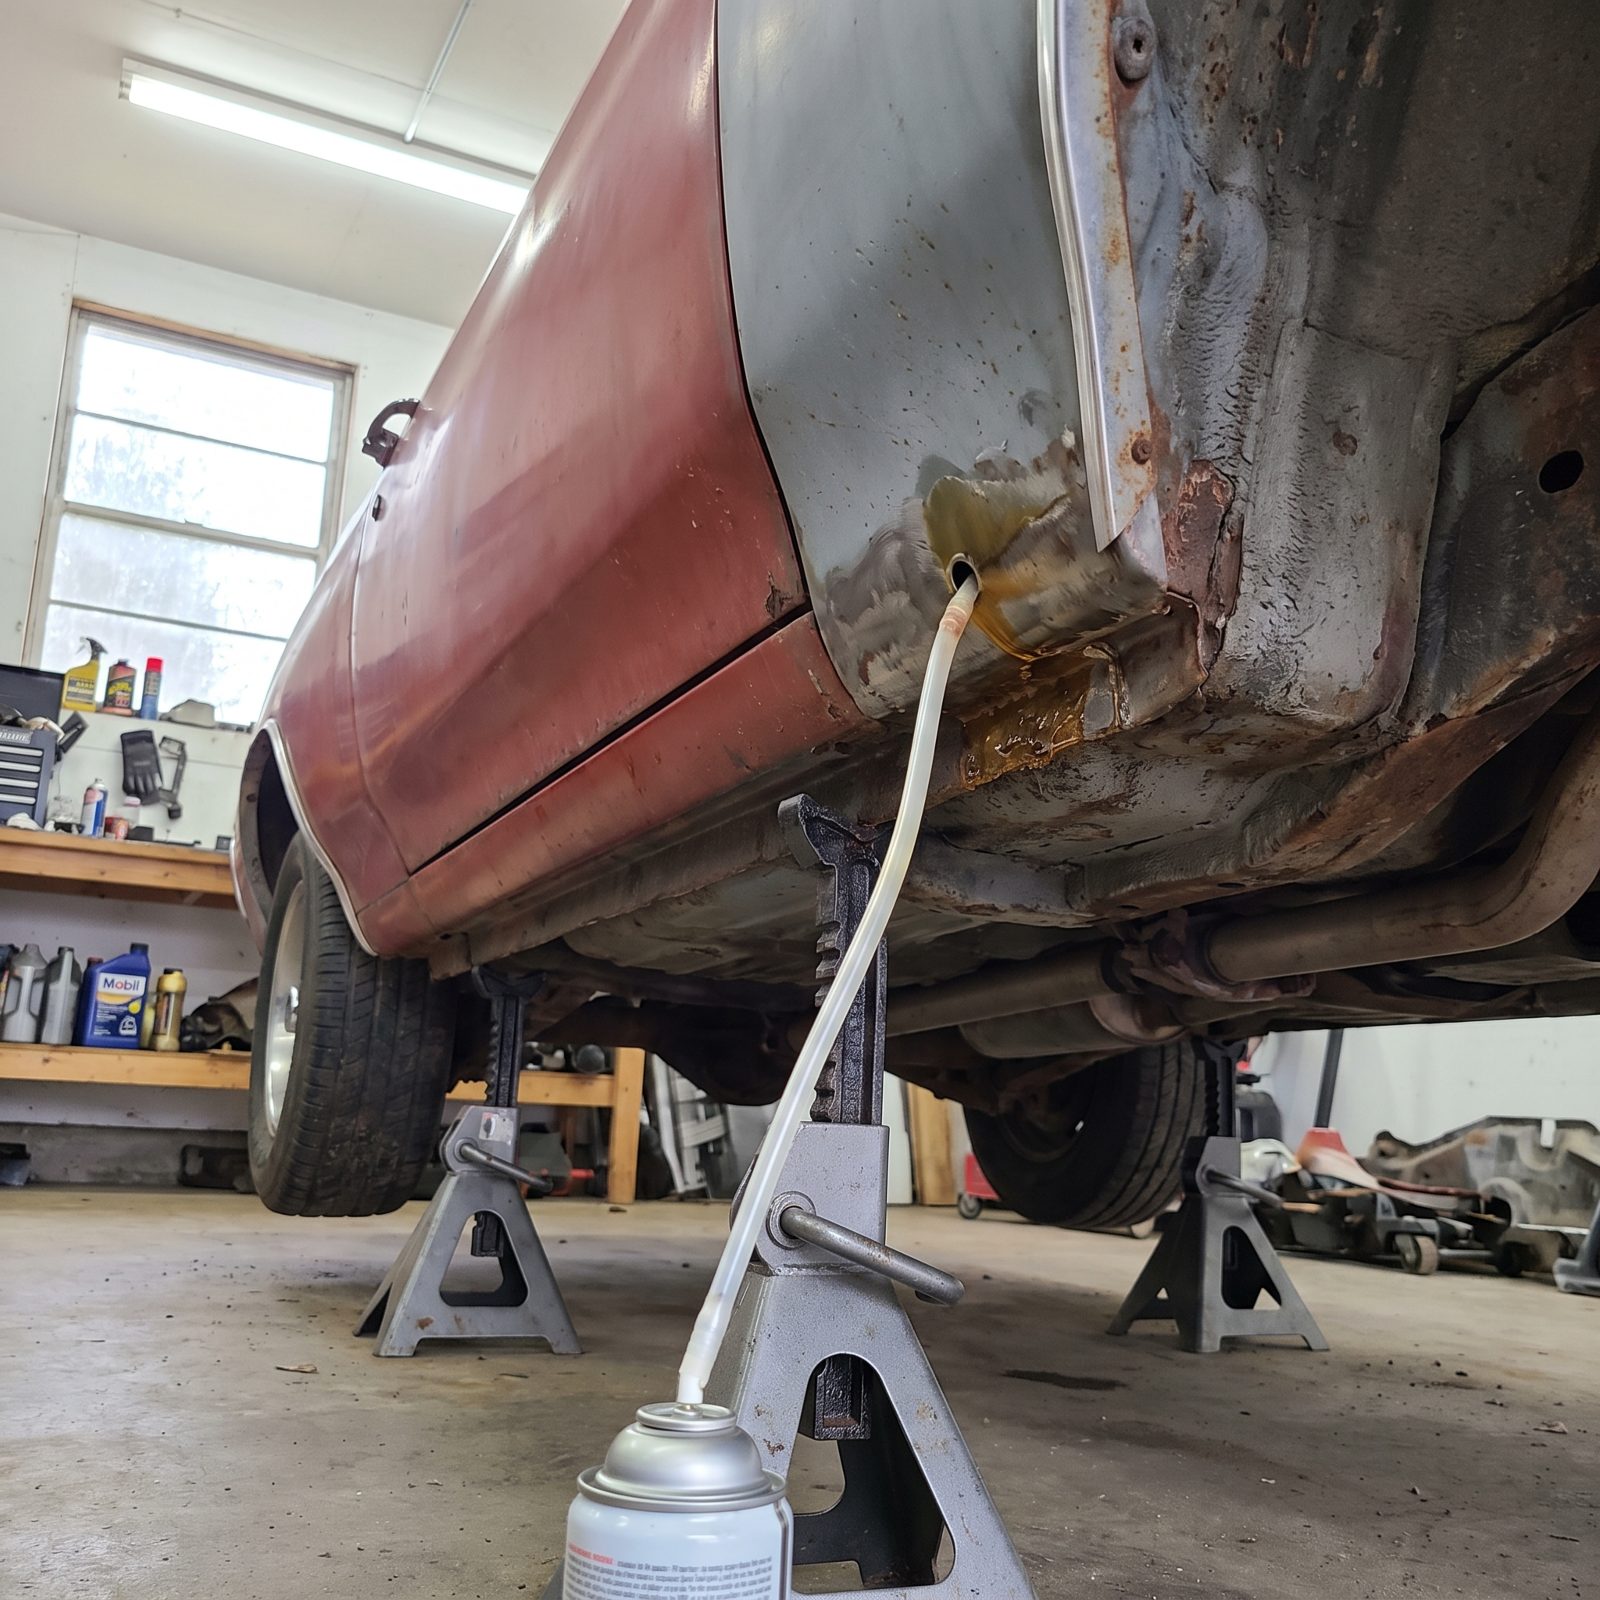
The rust that kills a car grows where you’ll never scrub: inside the doors, inside the rocker panels, down in the boxed frame sections. Surface wax and undercoating do nothing for those hidden cavities.
Cavity wax solves it. It’s a waxy, creeping oil you spray through access holes with a long wand, and it fogs the inside of the panel and seeps into every seam. It stays flexible, blocks moisture from reaching bare steel, and gets to the exact places corrosion loves. Done every few years, it’s about the most effective thing you can do to keep an old body alive. One warning: work on properly placed jack stands, never a jack alone. Ever.
23. Treat Weatherstripping With Silicone to Prevent Cracks and Leaks
Would you like to save this?
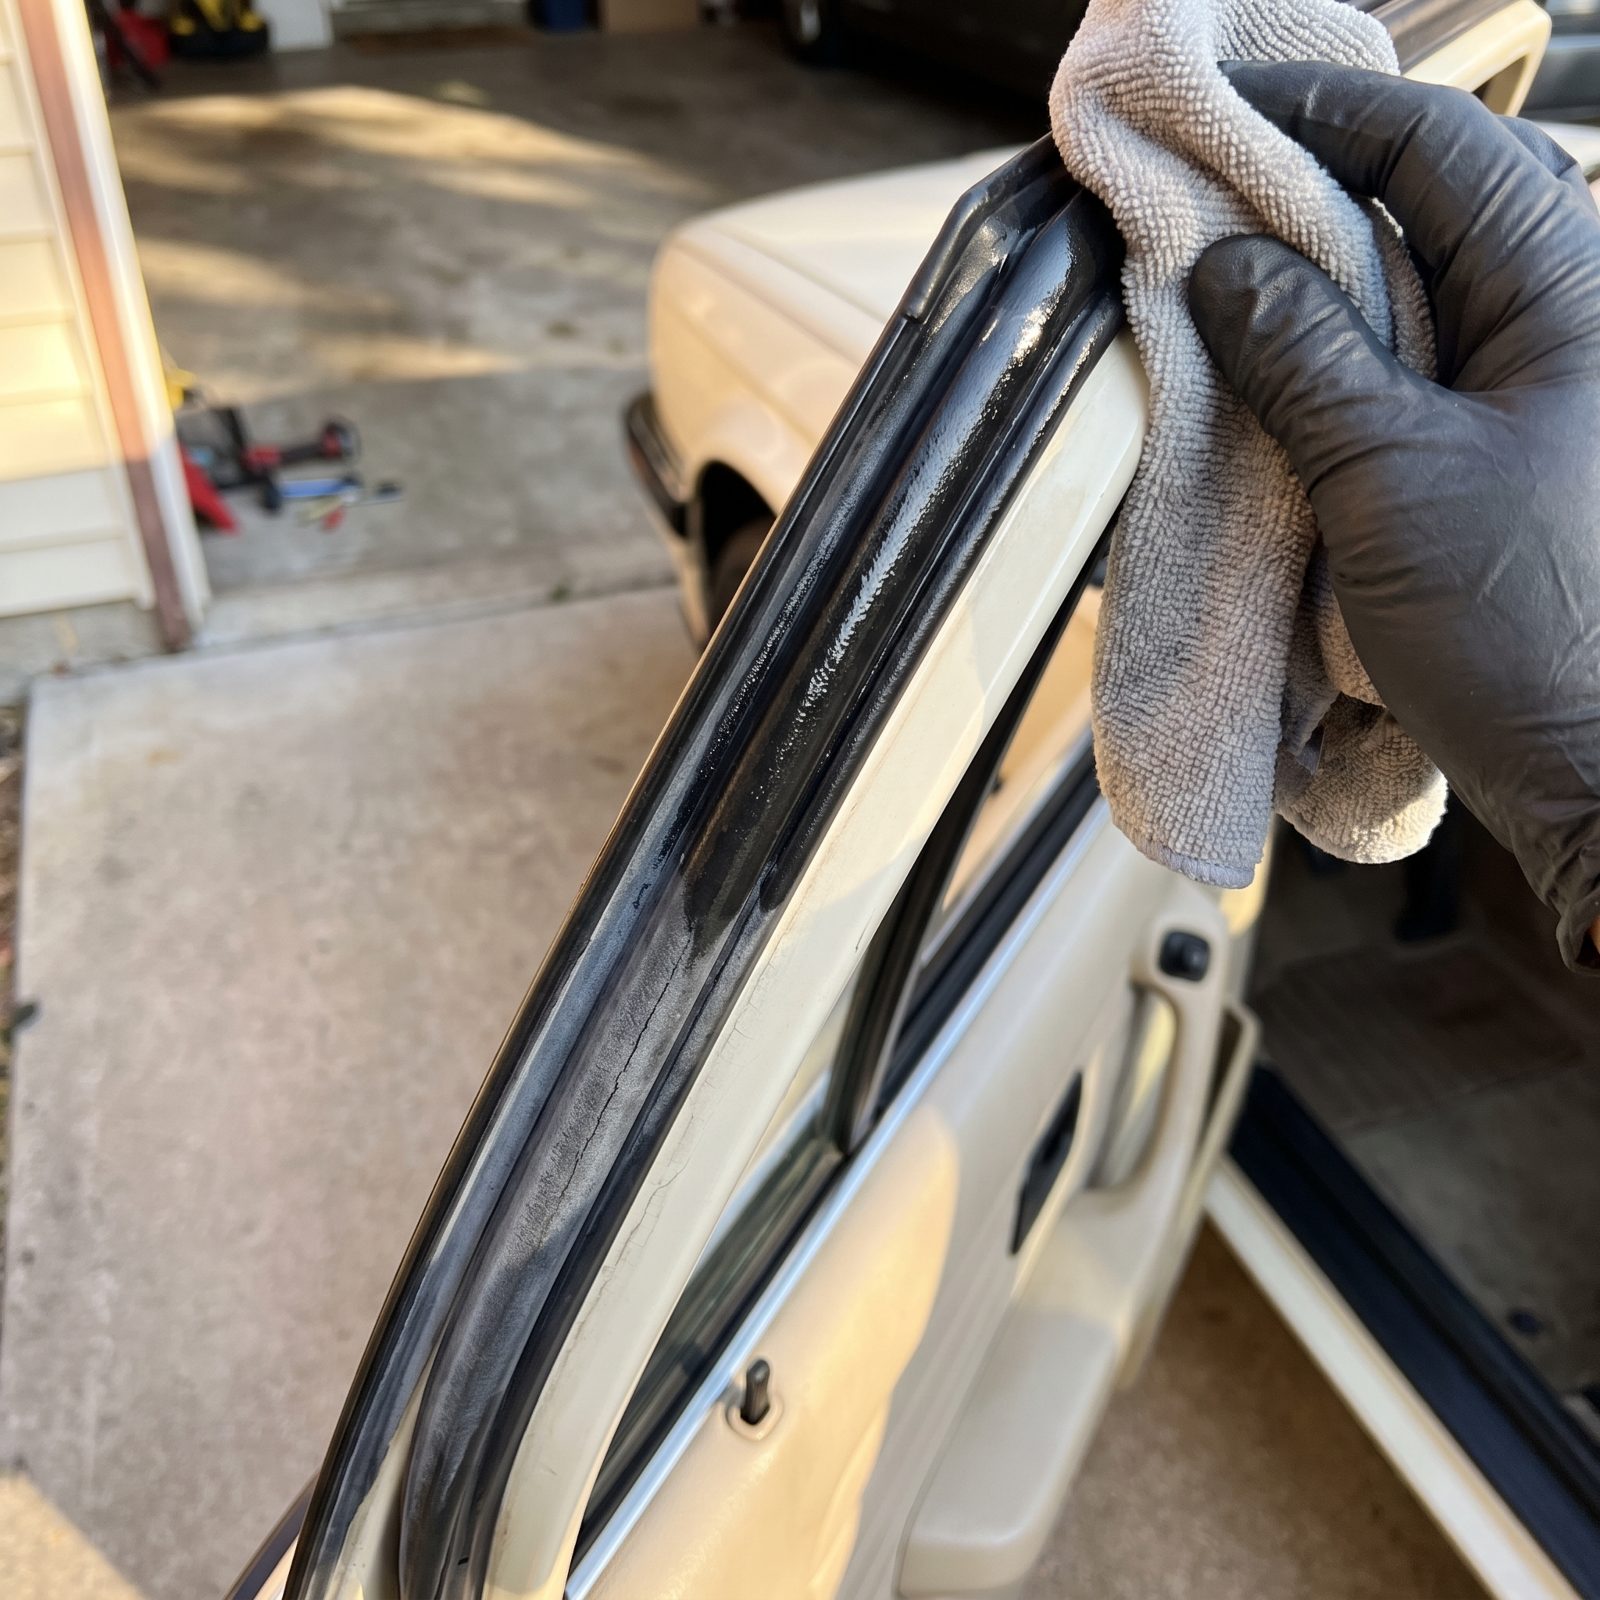
Dry weatherstripping is a slow betrayal. It hardens, shrinks, and cracks, and then the wind noise and the water leaks and the door that freezes shut in winter all show up at once.
A wipe of silicone a couple times a year keeps the rubber soft and sealing. It also stops doors and trunk lids from sticking to their seals and tearing when you yank them open on a frozen morning. Use silicone, not petroleum-based dressings, which swell and degrade the rubber over time. New weatherstripping for an old car runs expensive and is sometimes flat-out impossible to find, so keeping the original pliable is money in the bank.
22. Run the Air Conditioner During Winter to Keep Seals Lubricated
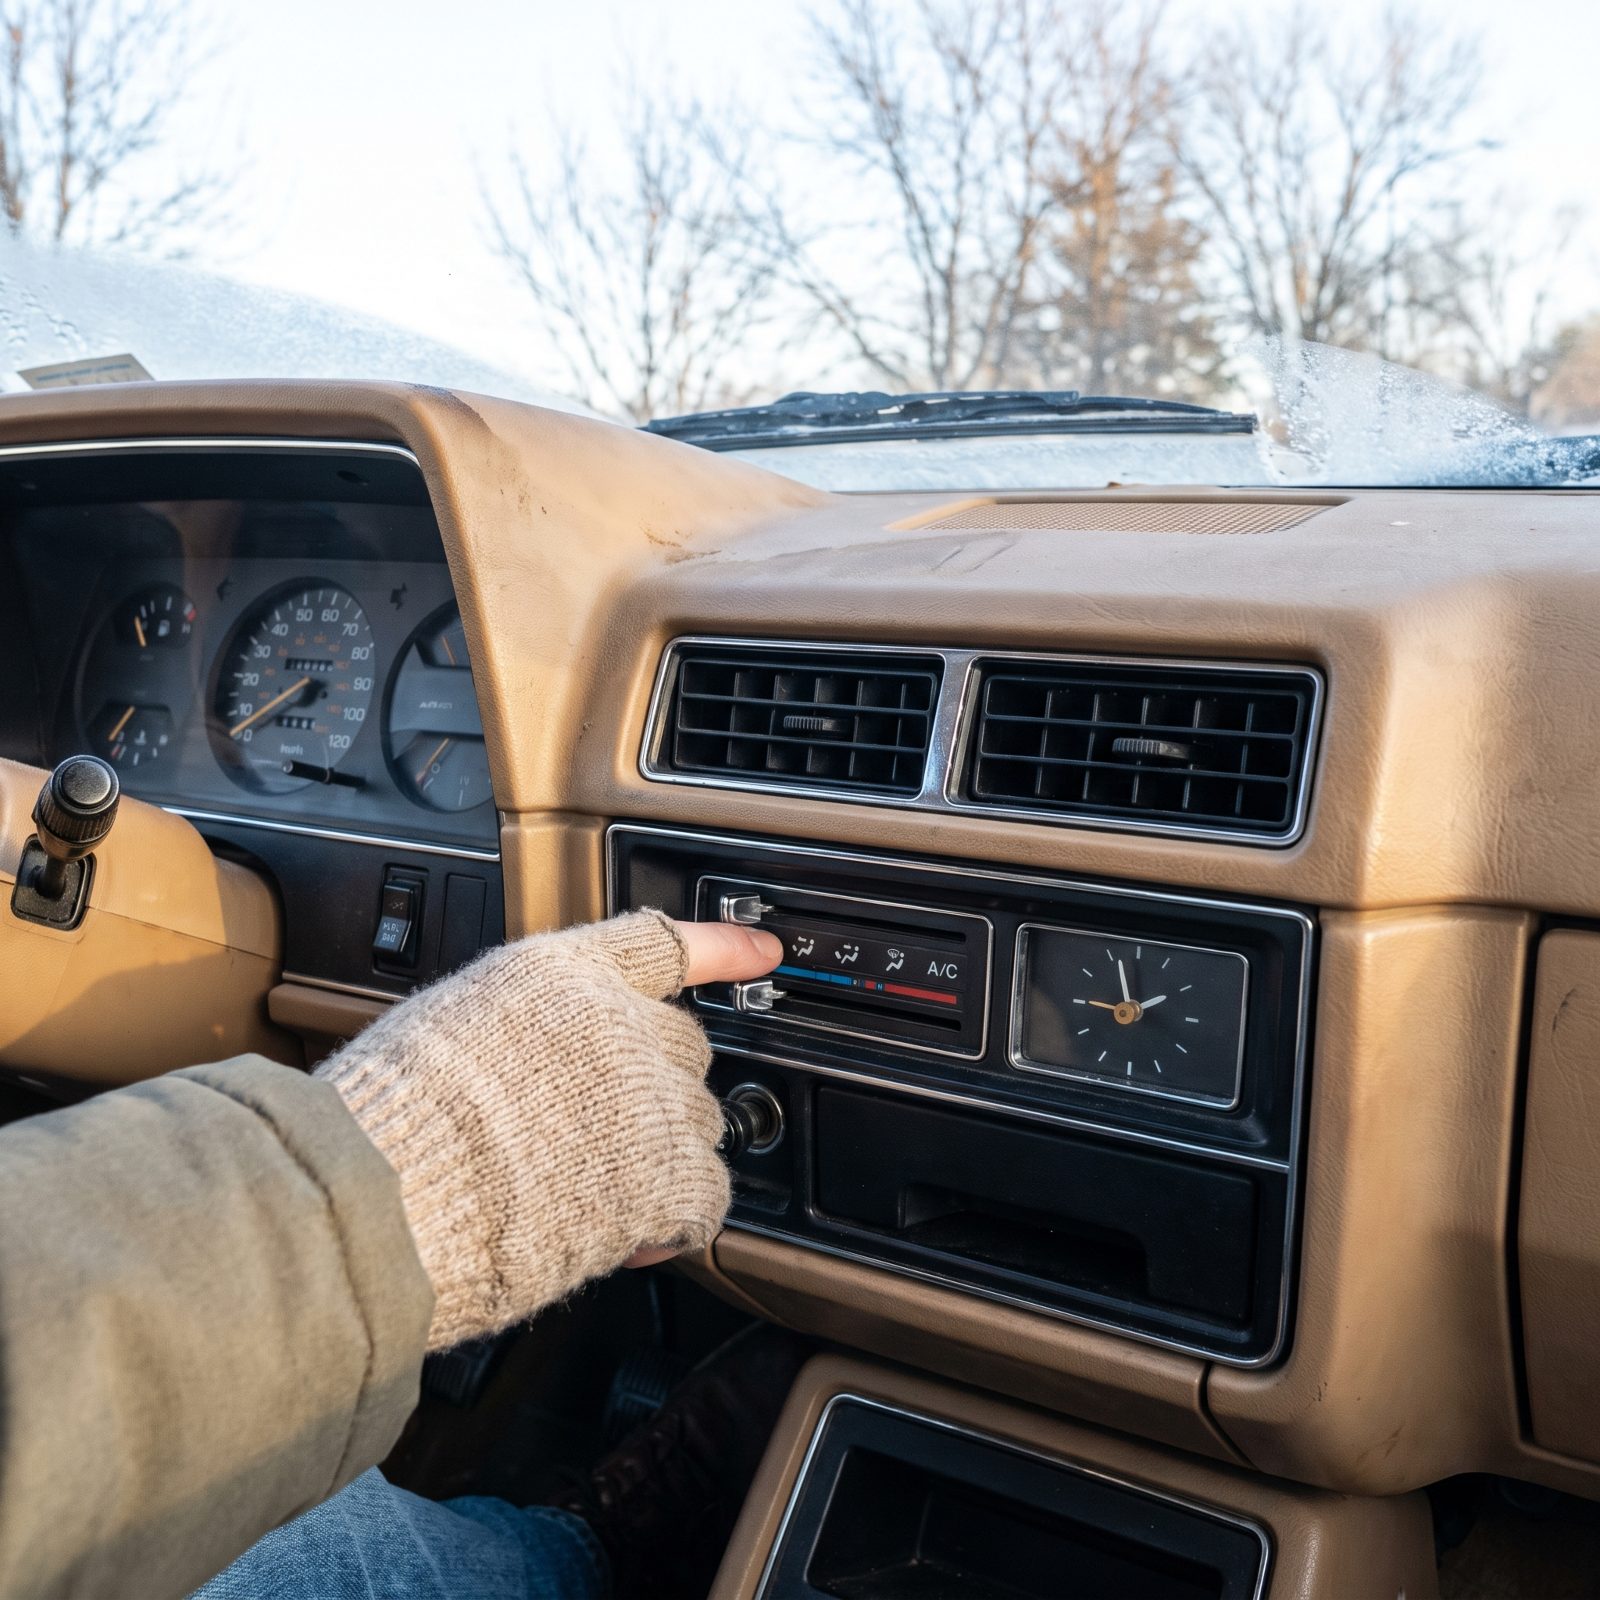
Switching the air conditioning on in January sounds backwards. It isn’t.
An A/C system that sits unused all winter lets the compressor seals and O-rings dry out while the refrigerant oil settles instead of circulating. Dried seals leak, and a leaked-down system is an expensive spring surprise. Run it ten minutes every couple of weeks, even with the heat on to keep the cabin warm, and the oil circulates and coats every seal. Most older systems with manual controls let you run A/C and heat together to defog the glass, which hands you a reason to do it anyway.
21. Run the Heater Controls Through Their Full Range Every Month
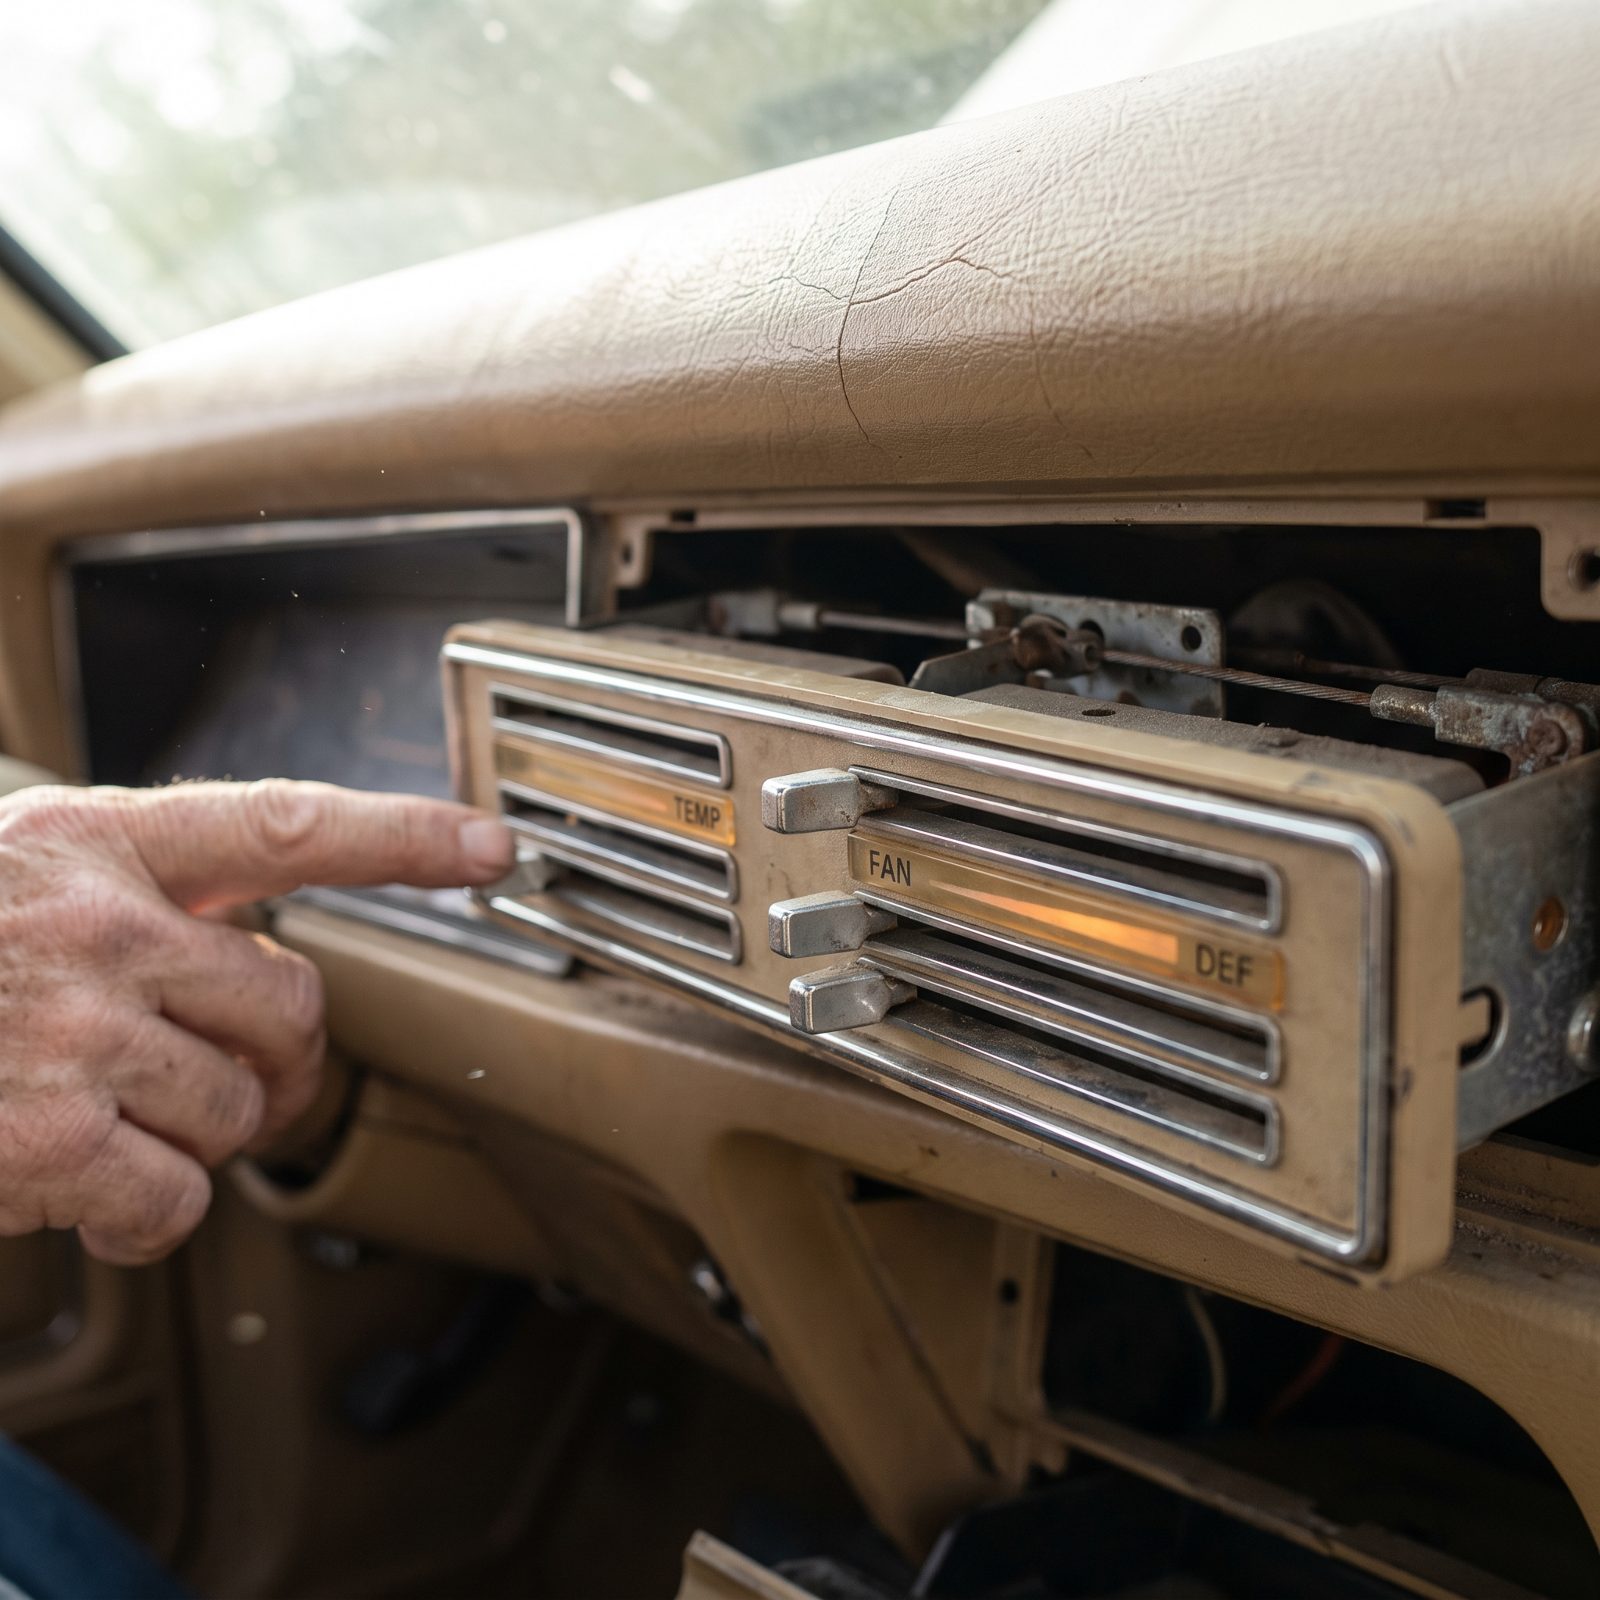
Heater controls on an old car work through cables and little vacuum actuators tucked behind the dash. Leave them parked in one spot for two seasons and the cable seizes in its housing while the blend door sticks, so one day you shove the lever and it goes nowhere. The repair means pulling the control unit out of the dash, with trim off and cables and brackets exposed. The prevention costs ten seconds.
Once a month, slide every control across its full travel. Temperature full cold to full hot. Fan off to high, and run through every vent position while you’re at it. You’re keeping the cables free and the actuators honest, and you’ll hear a sticky one before it becomes a dead one.
20. Work Every Keyed Lock You Own, Even the Ones You Never Use
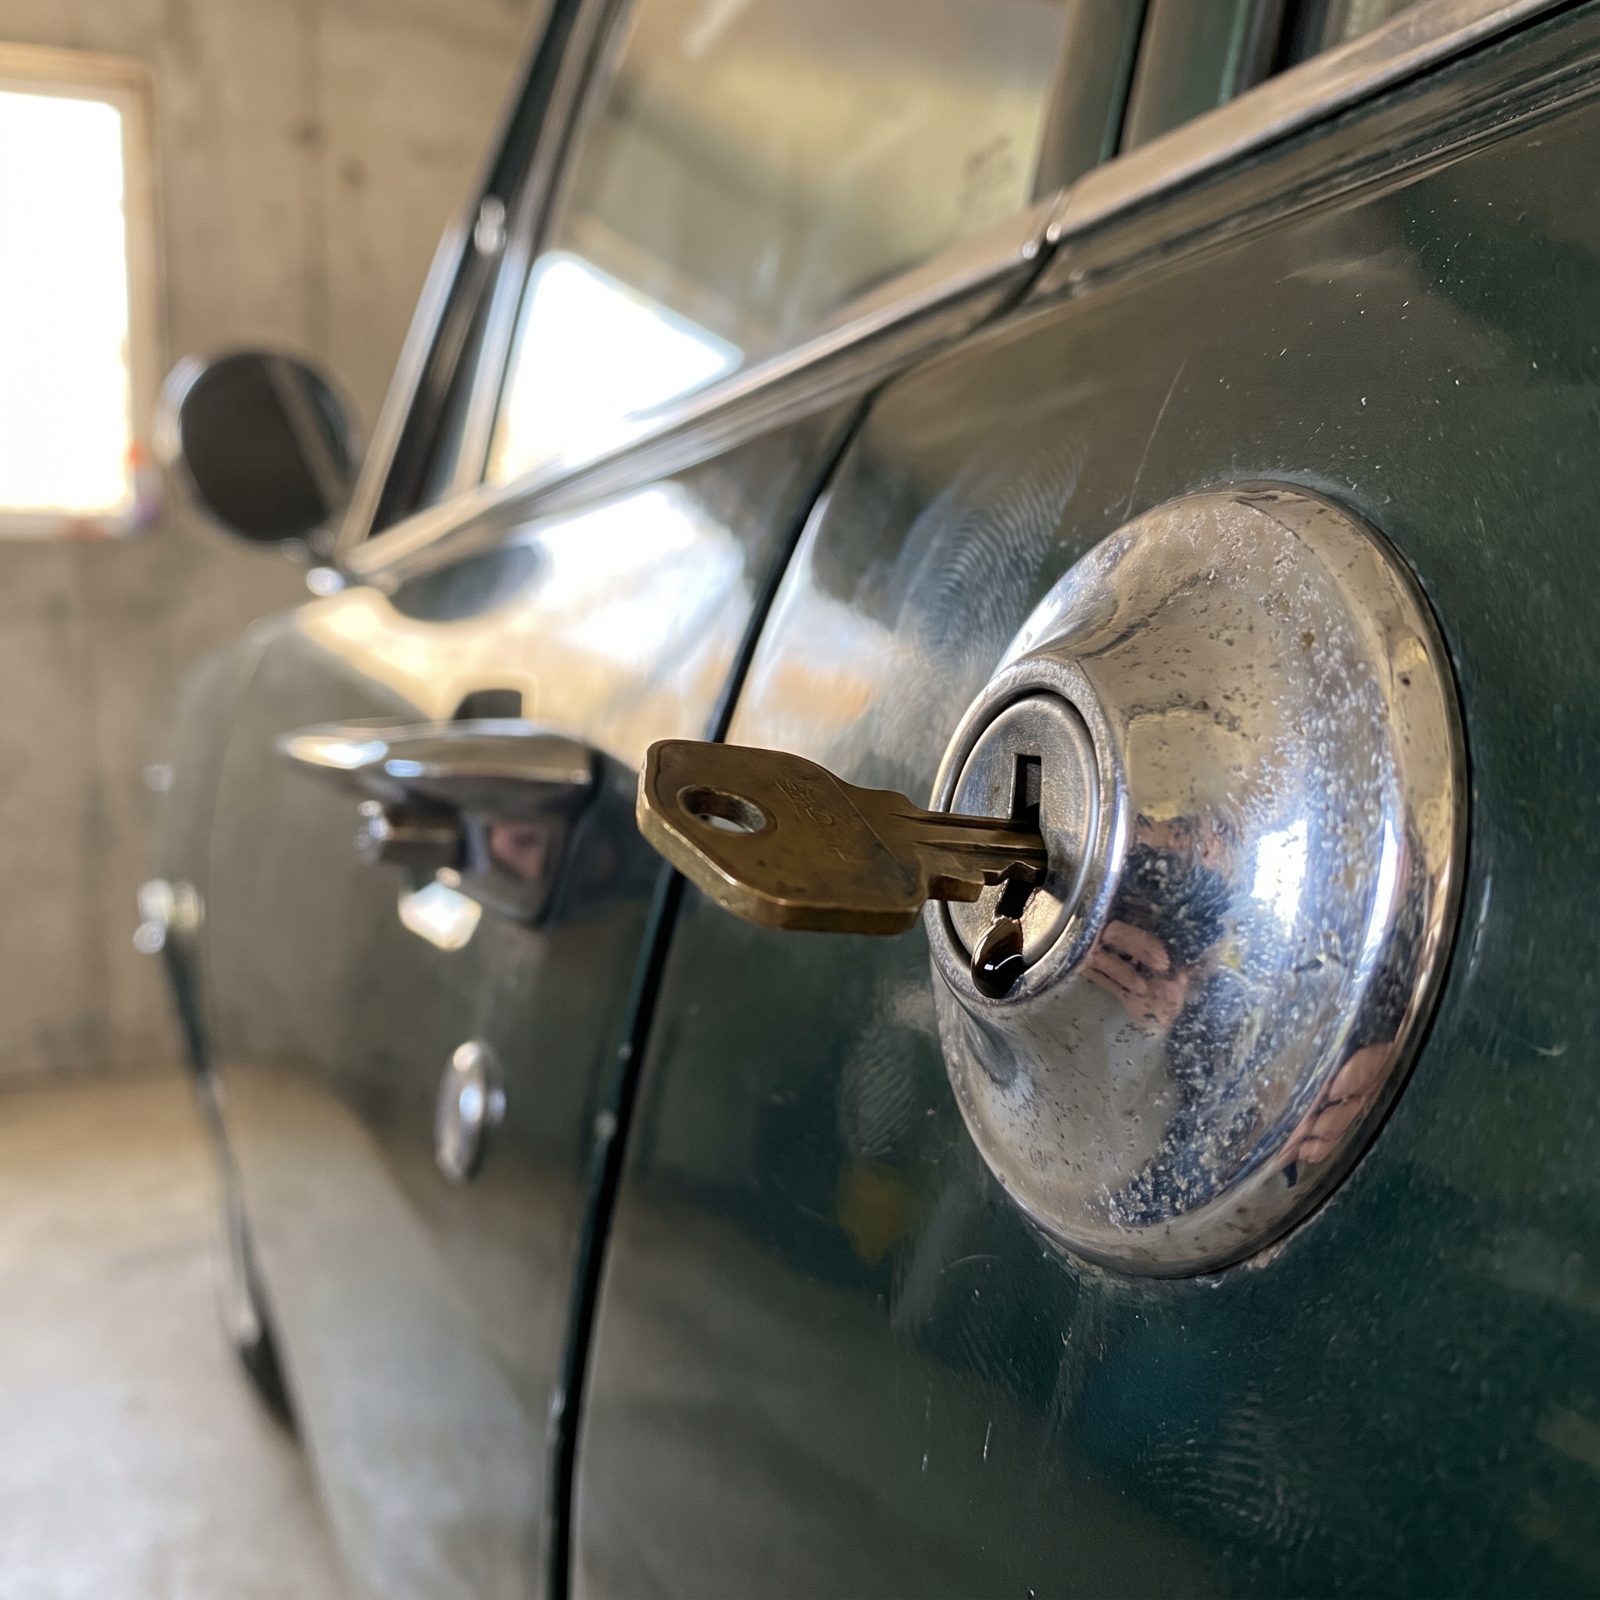
The trunk lock nobody opens is the one that seizes. Same with the glovebox, the passenger door, the gas cap on cars that have one. Cylinders are full of tiny wafers and springs, and they rust or gum up when they sit untouched for a year.
So every now and then, put the key in every lock on the car and turn it. Gritty? A puff of graphite brings it back — not oil. Squirt oil in and it weeps back out dark and grimy, dripping down the trim and door and collecting grit as it goes. Catch a stiff cylinder early and it’s a free fix. Wait until it snaps the key off, and now you’re drilling a lock out of a car you love.
19. Set and Release the Parking Brake Weekly So the Cable Never Freezes
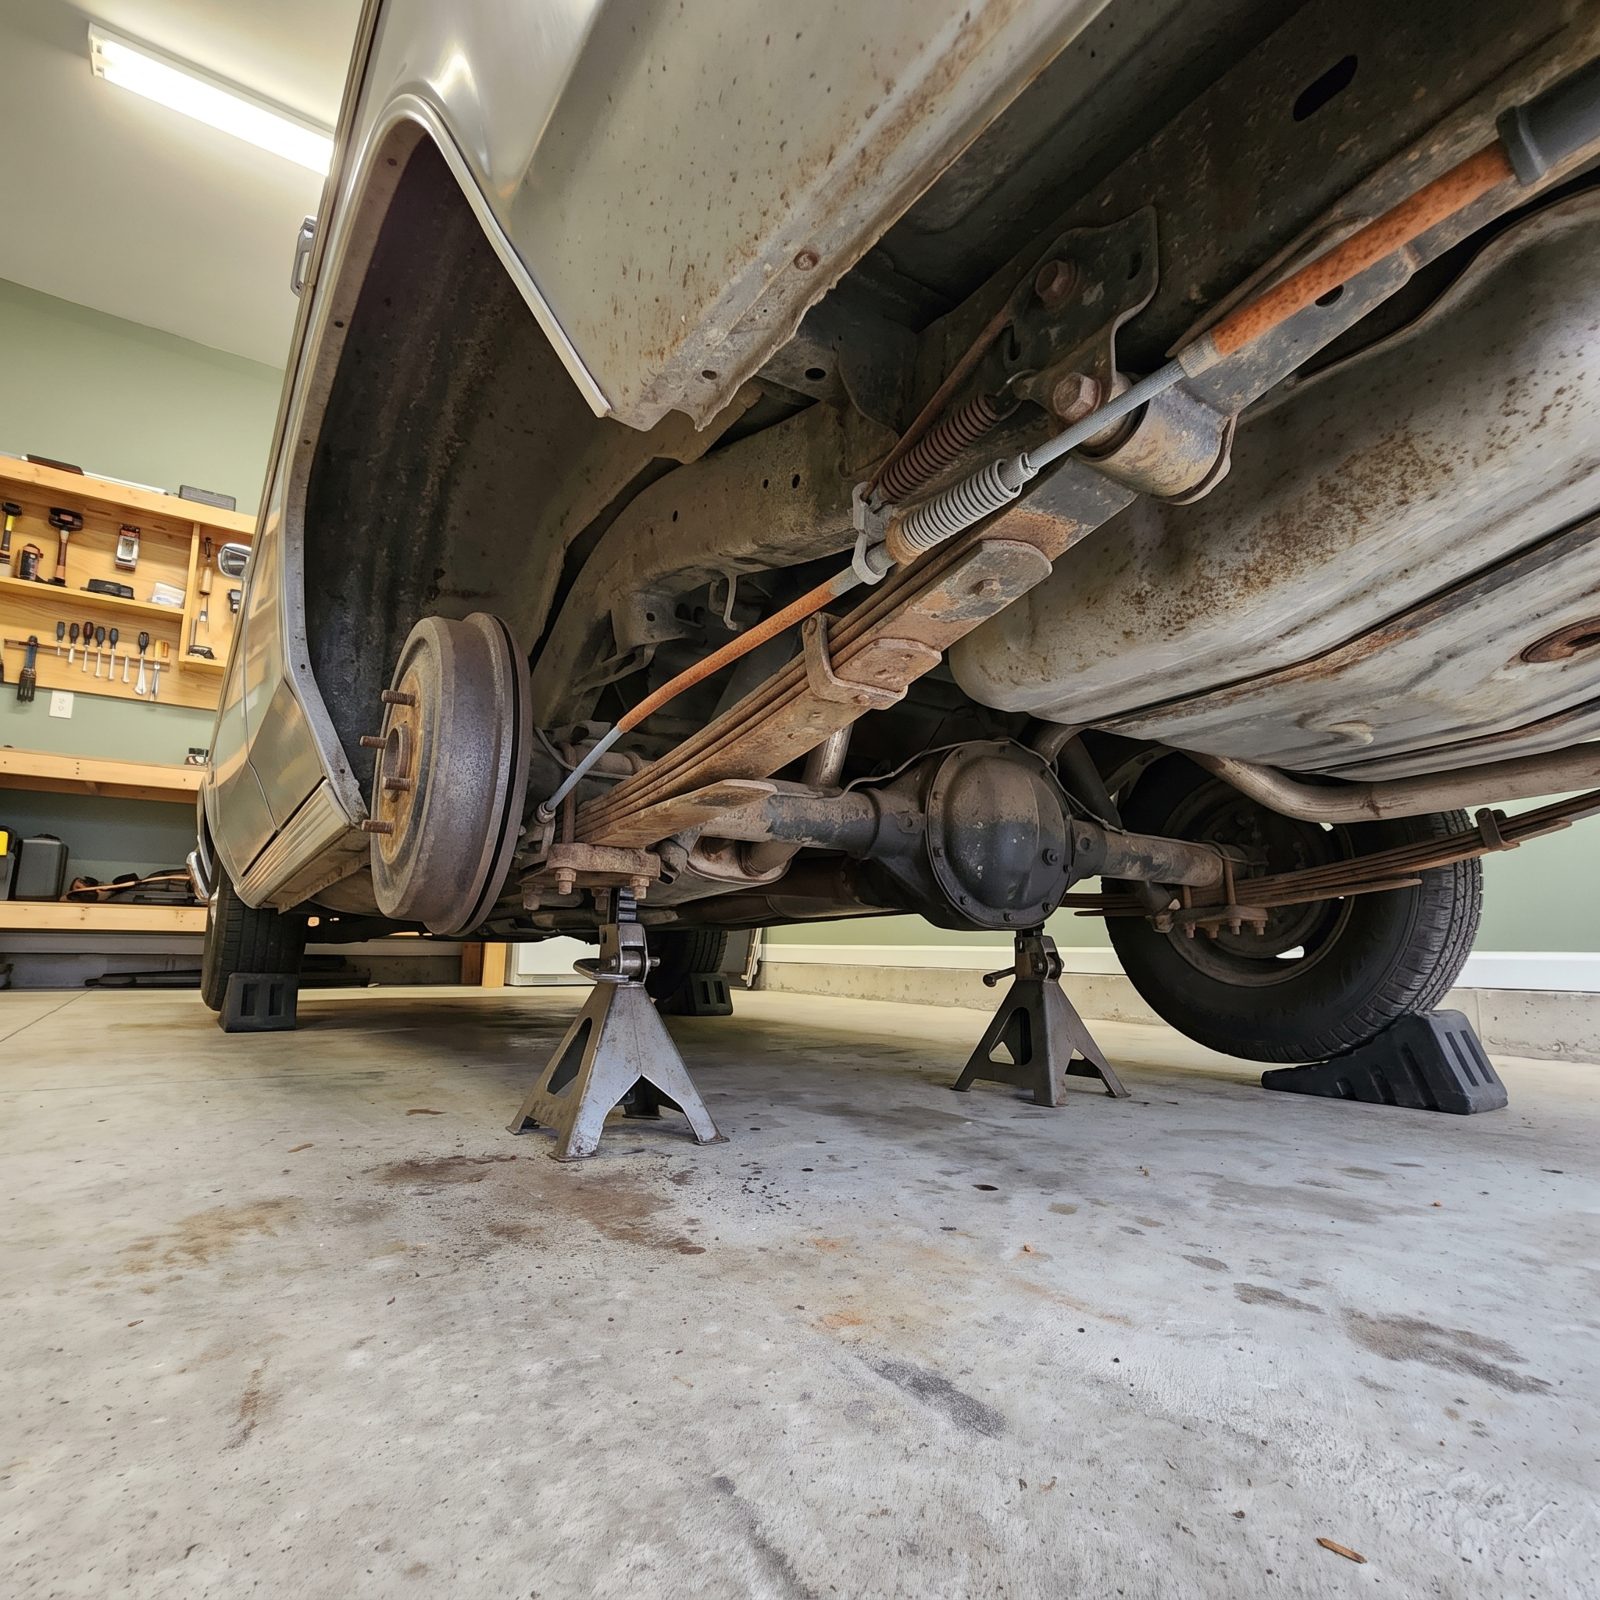
A parking brake you never use is a parking brake that rusts solid inside its cable housing. The classic failure goes like this: you finally pull the lever for an inspection, it sets, and then it won’t release. Now the shoes are dragging and you’re splitting a drum to free it.
Pull it and drop it once a week, even on a car that lives in a flat garage. The cable stays free, the self-adjusters stay working, and you confirm the thing actually holds. On a manual especially, a healthy parking brake is the difference between a rolled-away car and a story you never want to tell.
18. Let the Fuel Pump Prime Before You Crank a Fuel-Injected Car
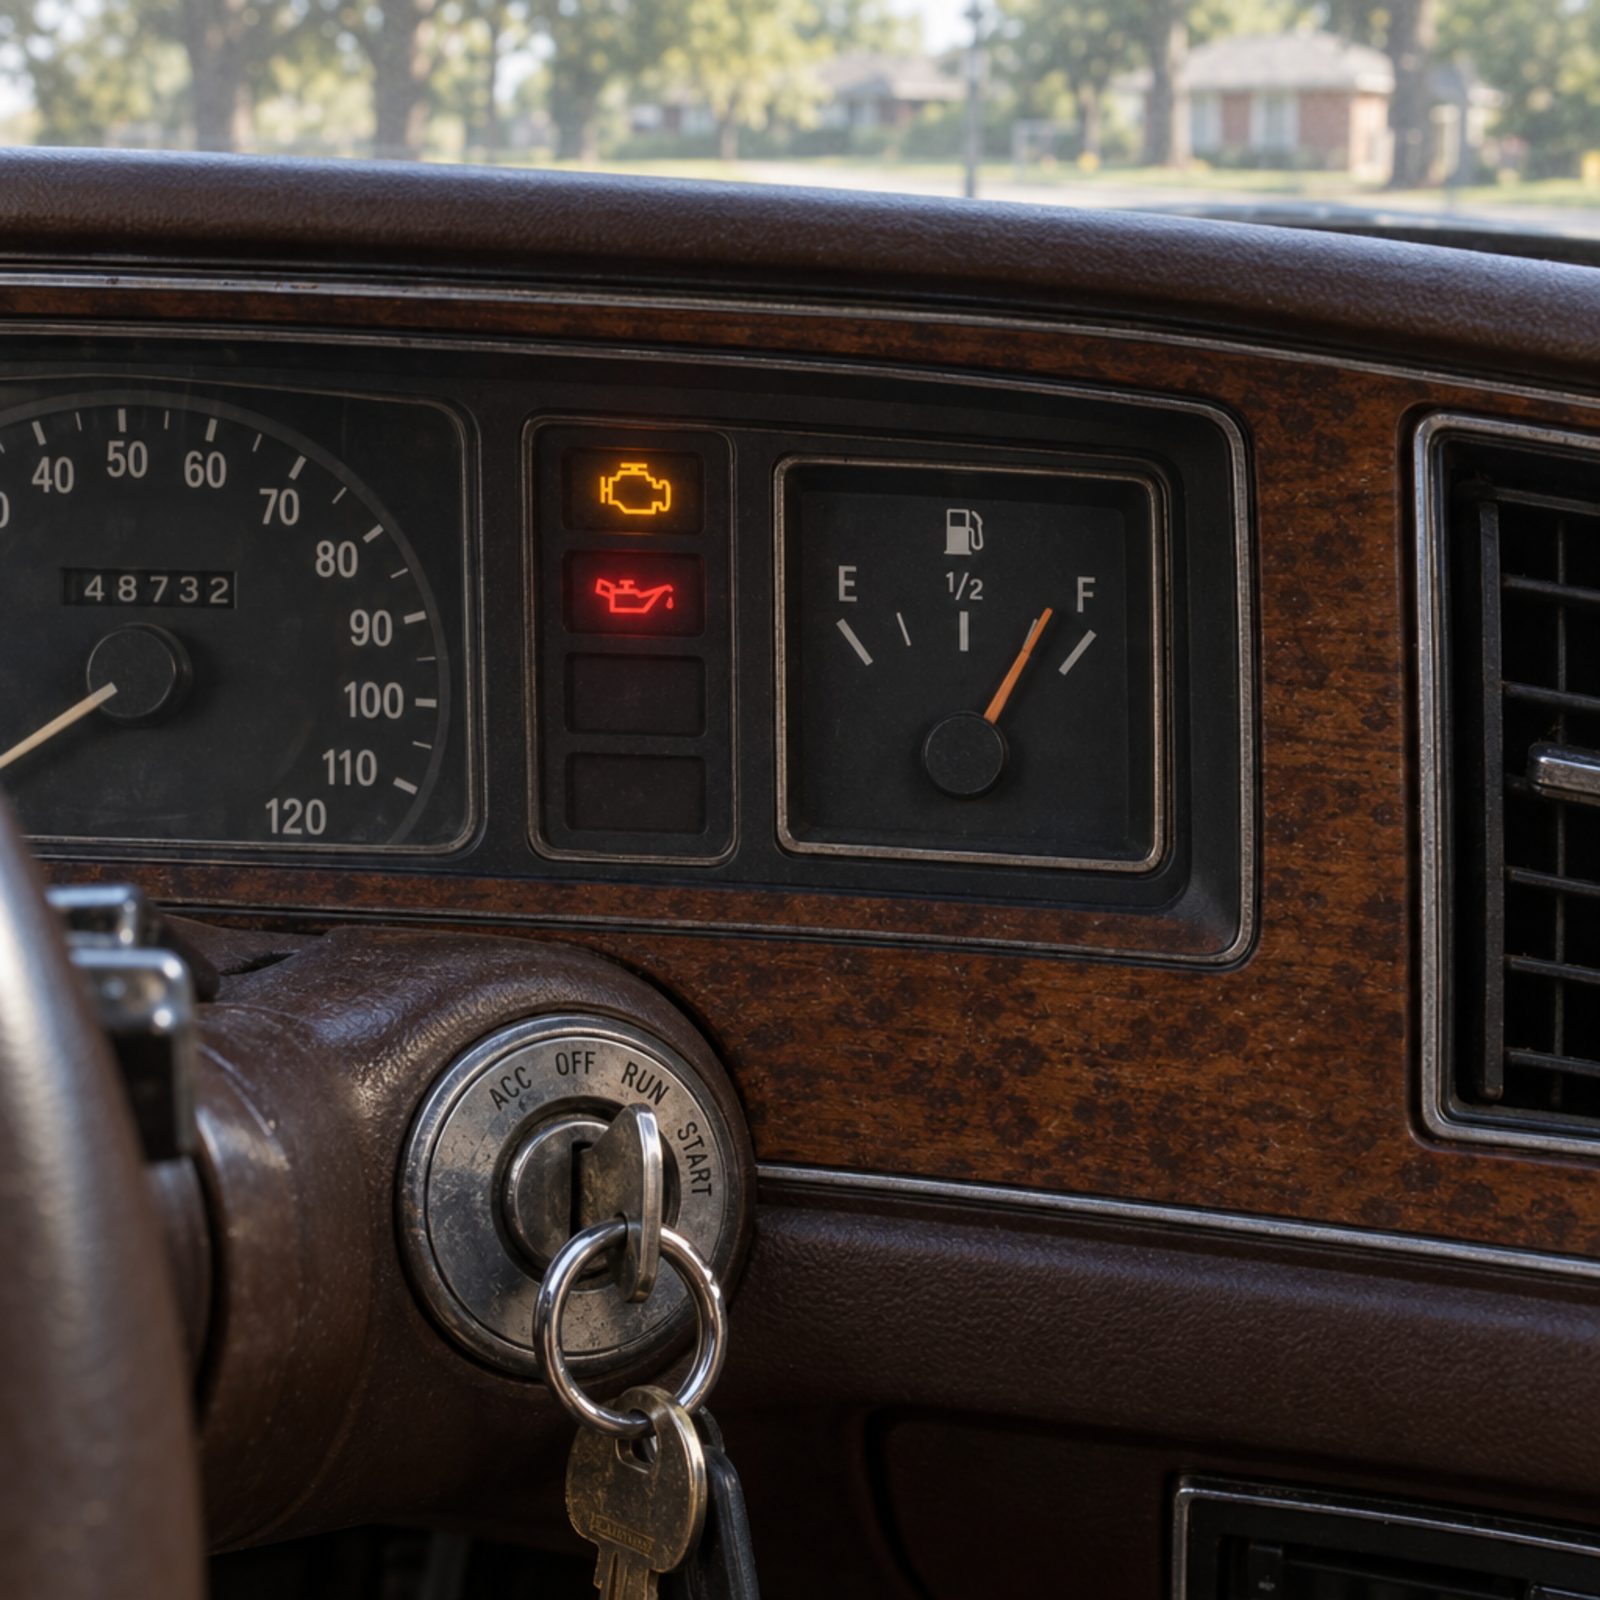
On any car with an electric fuel pump, turning the key to run spins the pump for a second or two and pressurizes the fuel rail before the engine ever turns. Crank the instant you touch the key and you’re spinning a dry engine, washing oil off the cylinder walls while the pressure builds.
Turn the key to run. Listen for the pump’s short buzz under the back seat or near the tank. When it stops, the rail is ready — then crank. On a worn pump, that buzz is also your early warning: gets longer, gets whiny, gets quiet, something’s going. Free diagnostic every single morning.
17. Build Oil Pressure Before the First Start After Long Storage
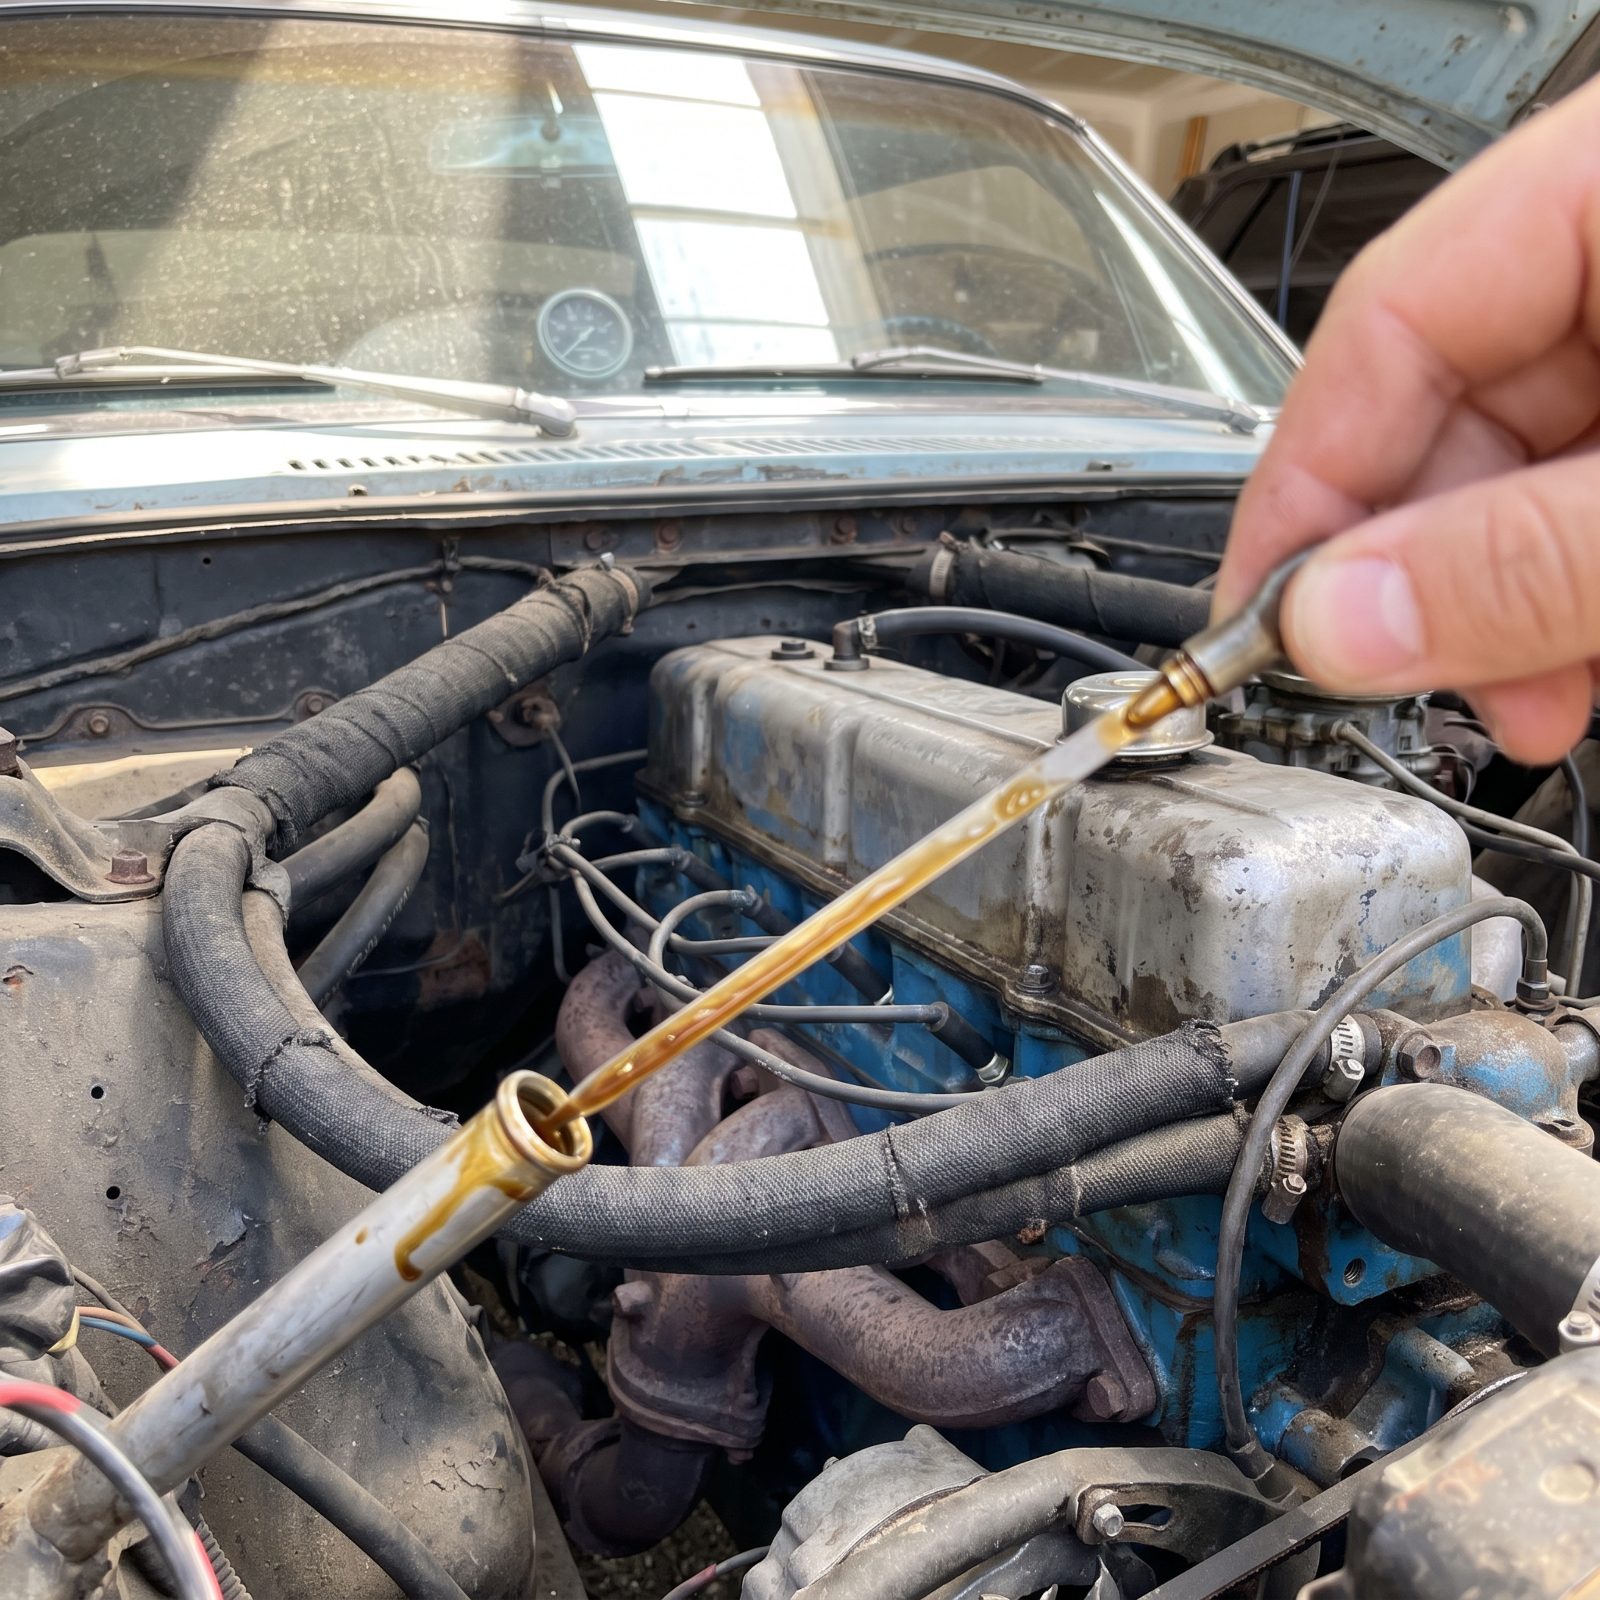
A car that sat all winter has oil pooled in the pan and bare metal everywhere the oil drained off. Fire it up cold and you’ve got a few seconds of metal-on-metal grinding before pressure reaches the top of the engine. That’s where most storage wear happens, not out on the road.
On engines that allow it, disable the ignition or fuel and crank in short bursts until the oil pressure gauge lifts, then start normally. No gauge? Just let it idle gently the moment it catches and keep your foot off the pedal. The first thirty seconds after six months of sleep matter more than the next six months of driving.
16. Push the Car for a Thirty-Second Move Instead of Starting It
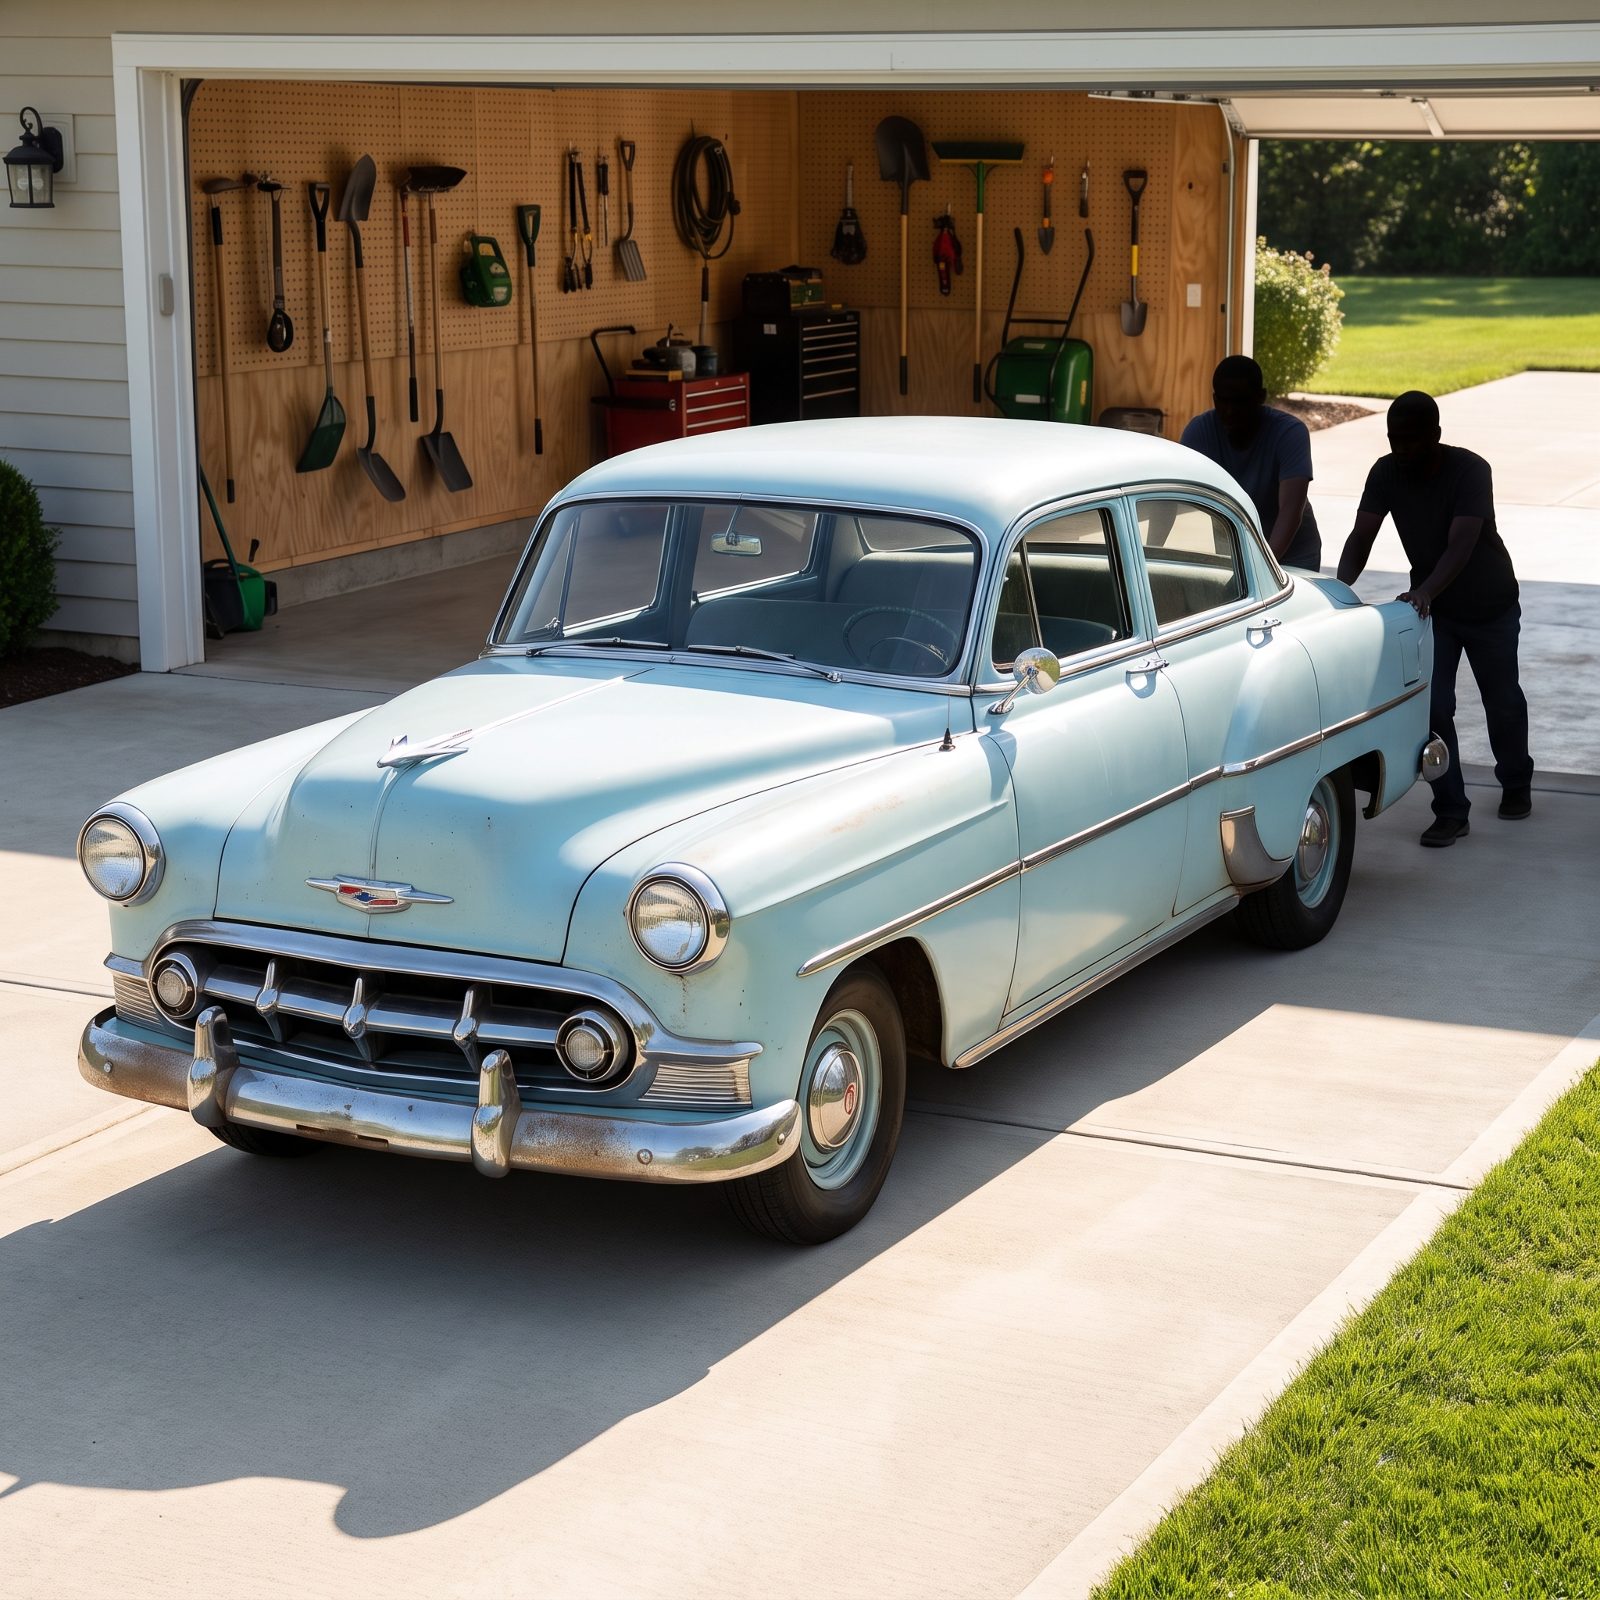
Cold starts are brutal. The first few seconds burn fuel the engine can’t fully use, dump raw gas past the rings, and run with zero oil pressure up top. Do all that just to roll the car six feet out of the way and you’ve paid full cold-start wear for nothing.
If you only need to move it a car length — to wash the other side, to reach a tool, to let someone out — push it. On a flat drive with the key off and the steering unlocked, an old car rolls easier than you’d think. Your back will complain. Your engine will thank you, and so will the fuel you didn’t waste down a cold intake.
15. Drive Easy Until the Oil Is Warm, Not Just the Coolant Gauge
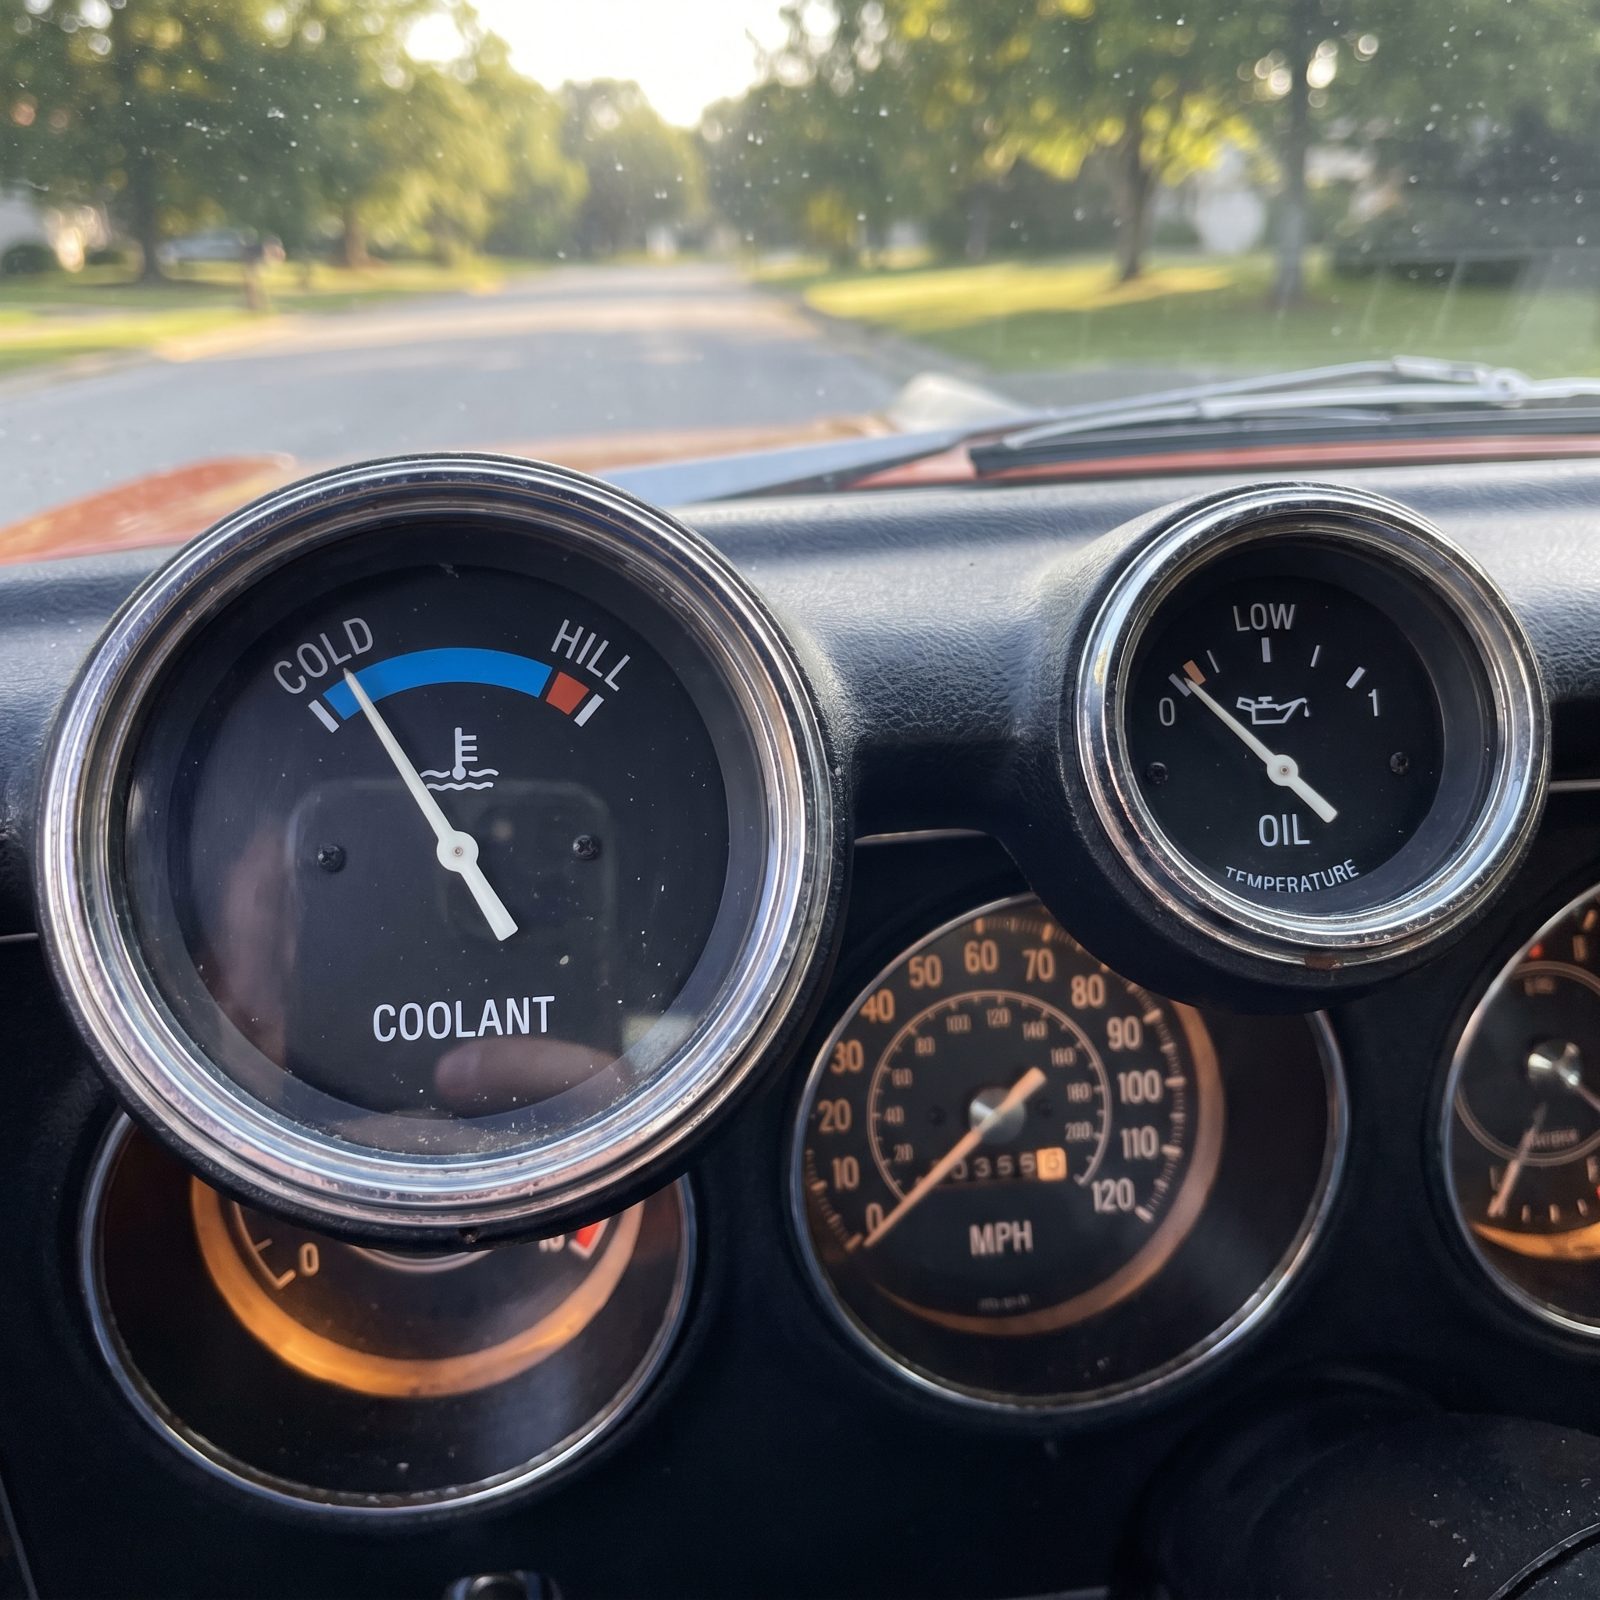
Here’s what fools people. The coolant gauge hits normal in a couple of minutes, so they figure the engine’s warm and get on it. But the oil will still be cold. It takes far longer to reach temperature than coolant does — a good chunk of your drive, sometimes — and cold oil is thick, slow, and doesn’t protect the way warm oil does.
Keep the revs modest and the throttle gentle until you’ve driven a few miles, no matter what the temp gauge claims. No hard pulls, no lugging, no cold-and-pinned anything. The engine that gets babied for the first five minutes outlives the one that got flogged the second the needle moved.
14. End a Turbo Drive With an Easy Mile to Cool the Bearing
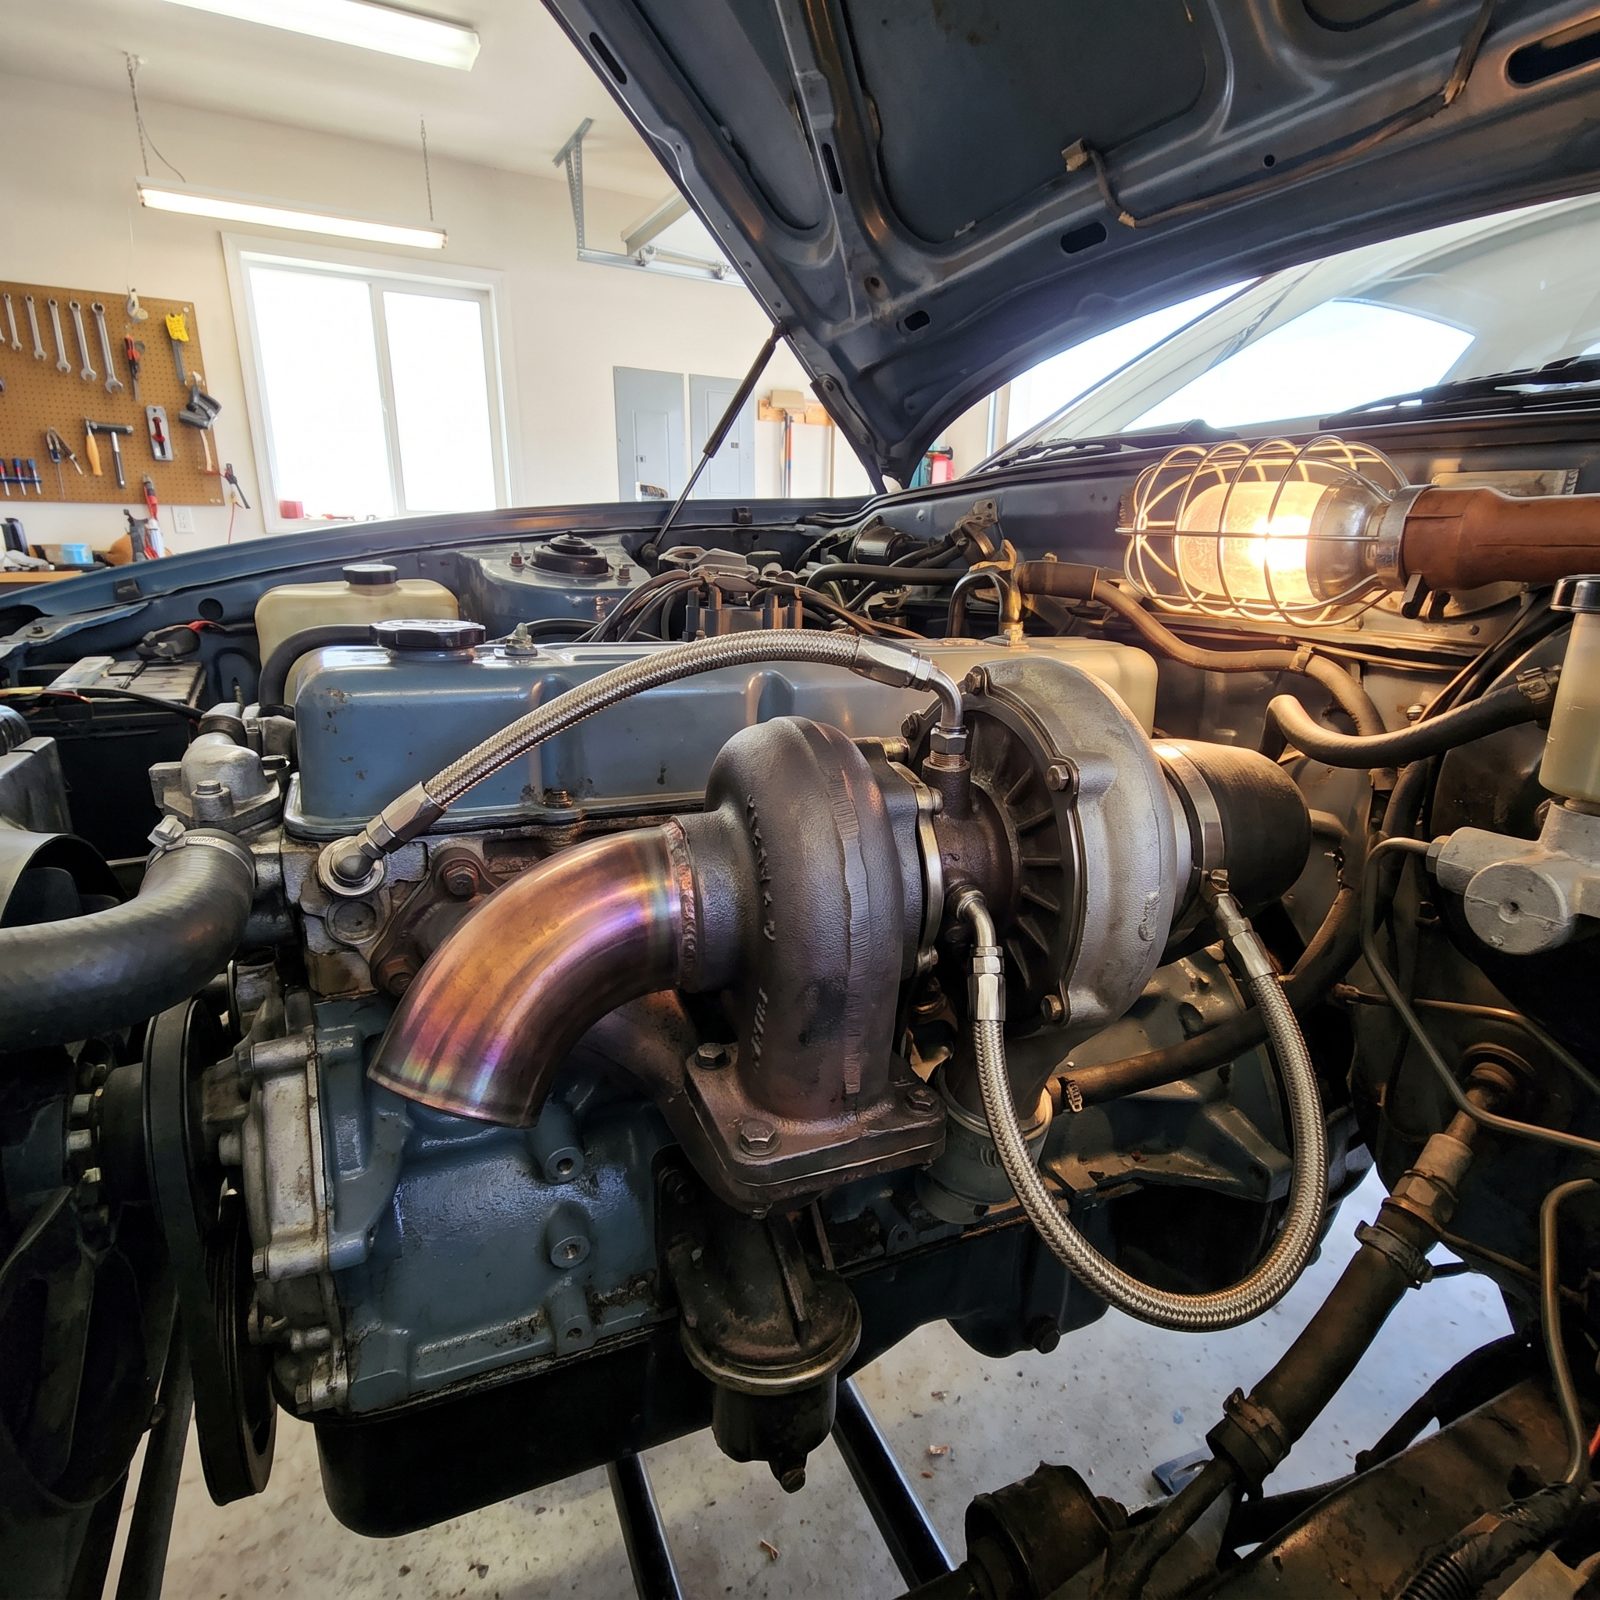
A turbo spins to a blistering RPM and gets red hot. Shut the engine off right after a hard run and the oil stops flowing while the center bearing is still glowing. The oil sitting in there bakes into carbon, the bearing cooks, and that’s how turbos die young.
Spend the last mile going easy. Light throttle, low boost, let the whole thing shed heat before you park. If you were really leaning on it, idle another thirty seconds in the driveway. People used to bolt on turbo timers for exactly this. You don’t need the gadget — you need an easy mile and a little patience.
13. Flex Every Fuel and Vacuum Hose to Find the Cracks You Can’t See
Would you like to save this?
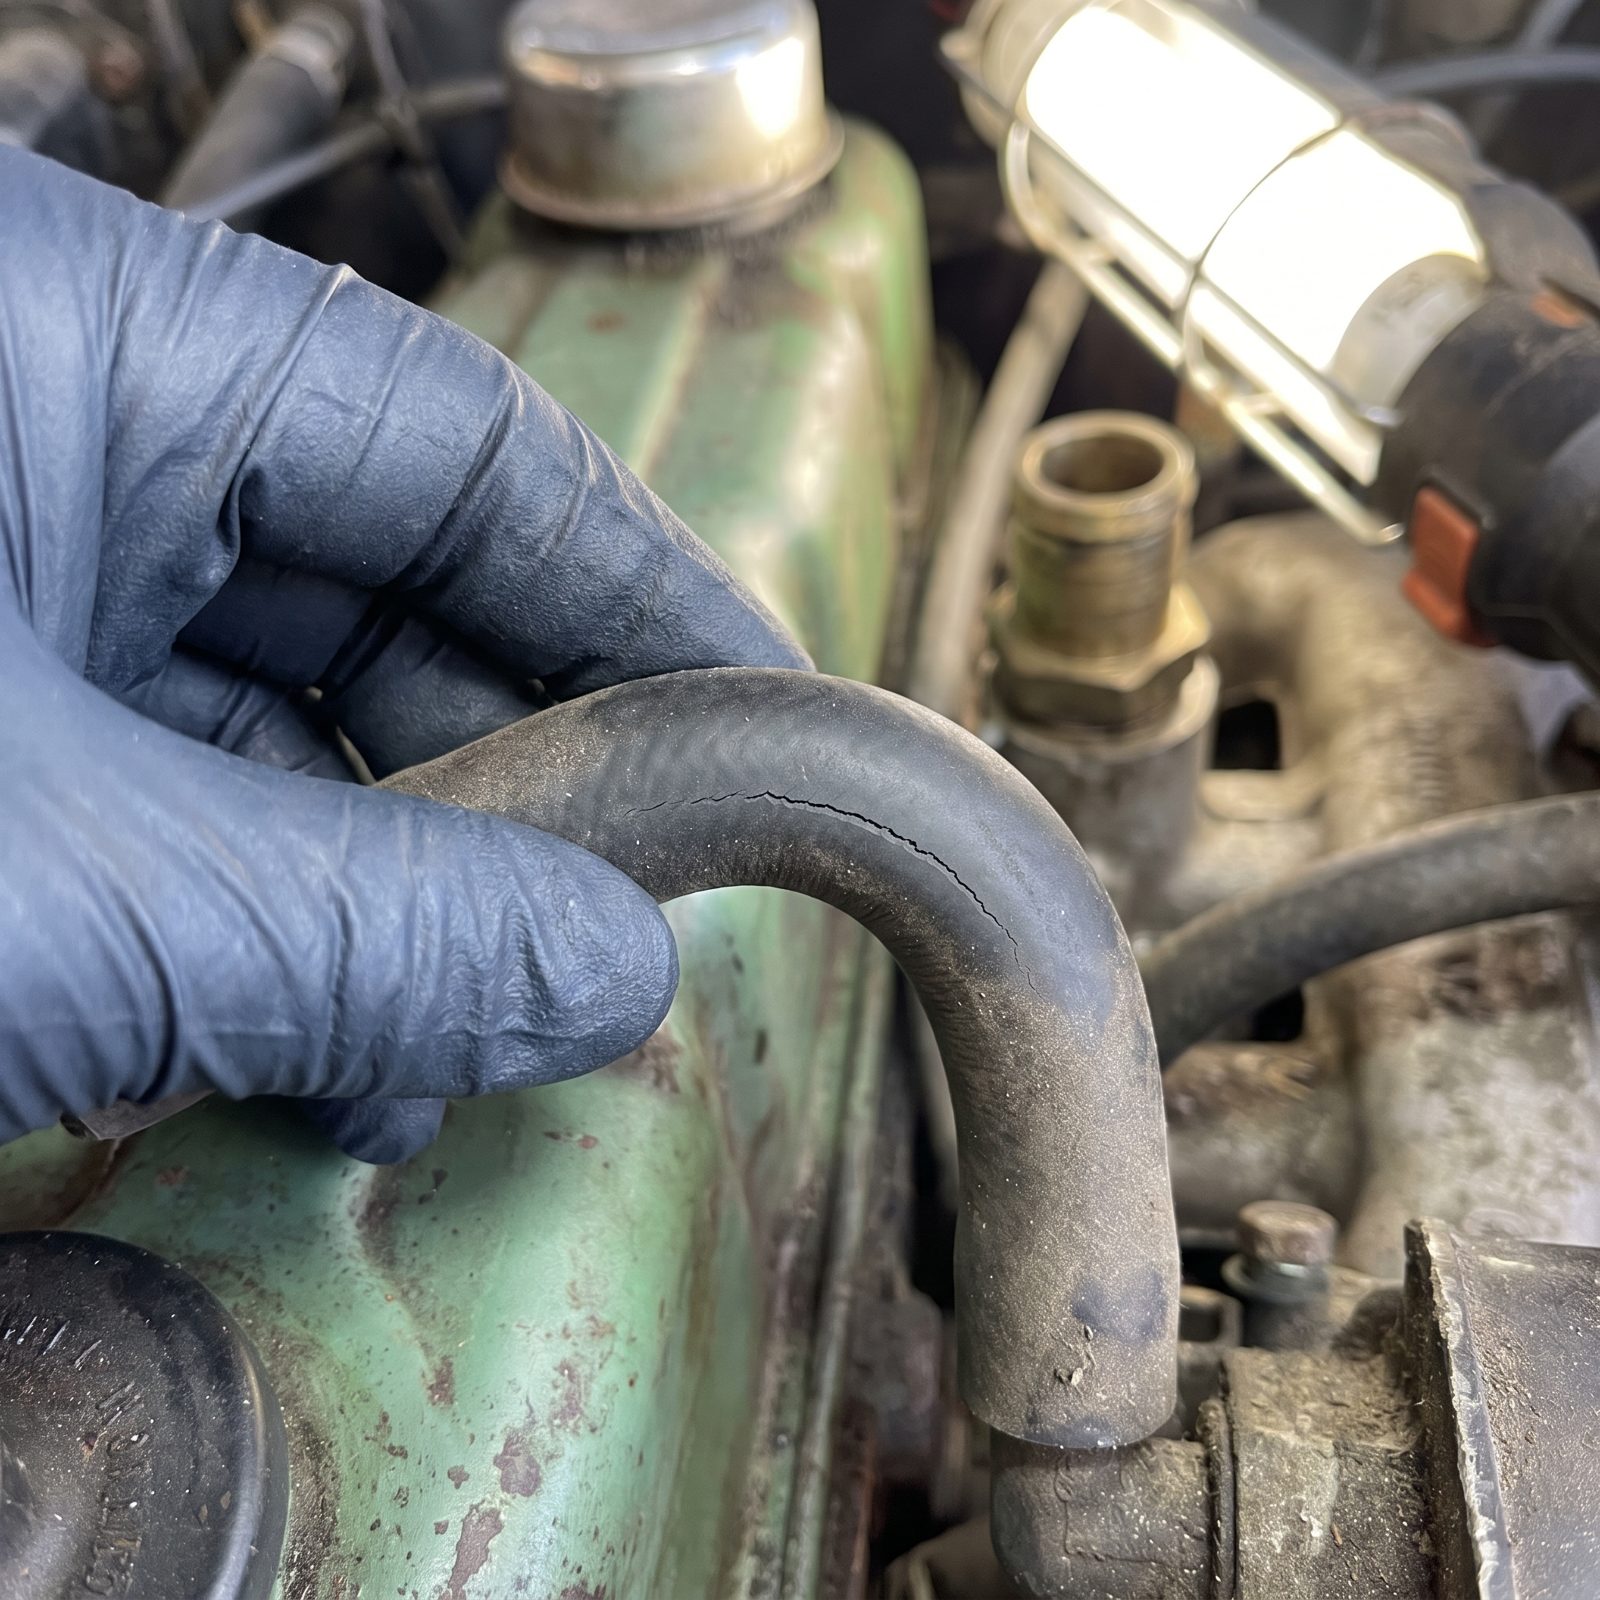
Rubber hoses crack from the inside and on the bends, right where you can’t see it standing over the engine. A hose that looks fine at a glance can be hiding splits that only open up when it’s hot and flexing, and then you get a fuel smell you can’t chase or a vacuum leak that drives you nuts at idle.
With the engine cold, pinch and bend every fuel line and vacuum hose along its length. Watch for cracks that appear only when you flex it. Feel for hard, brittle sections that should still be soft. A hose that crackles under your fingers is already failing, and a fifty-cent length of rubber beats a fire or a roadside stall every time.
12. Check the Radiator Cap Seal and Filler Neck for Lost Pressure
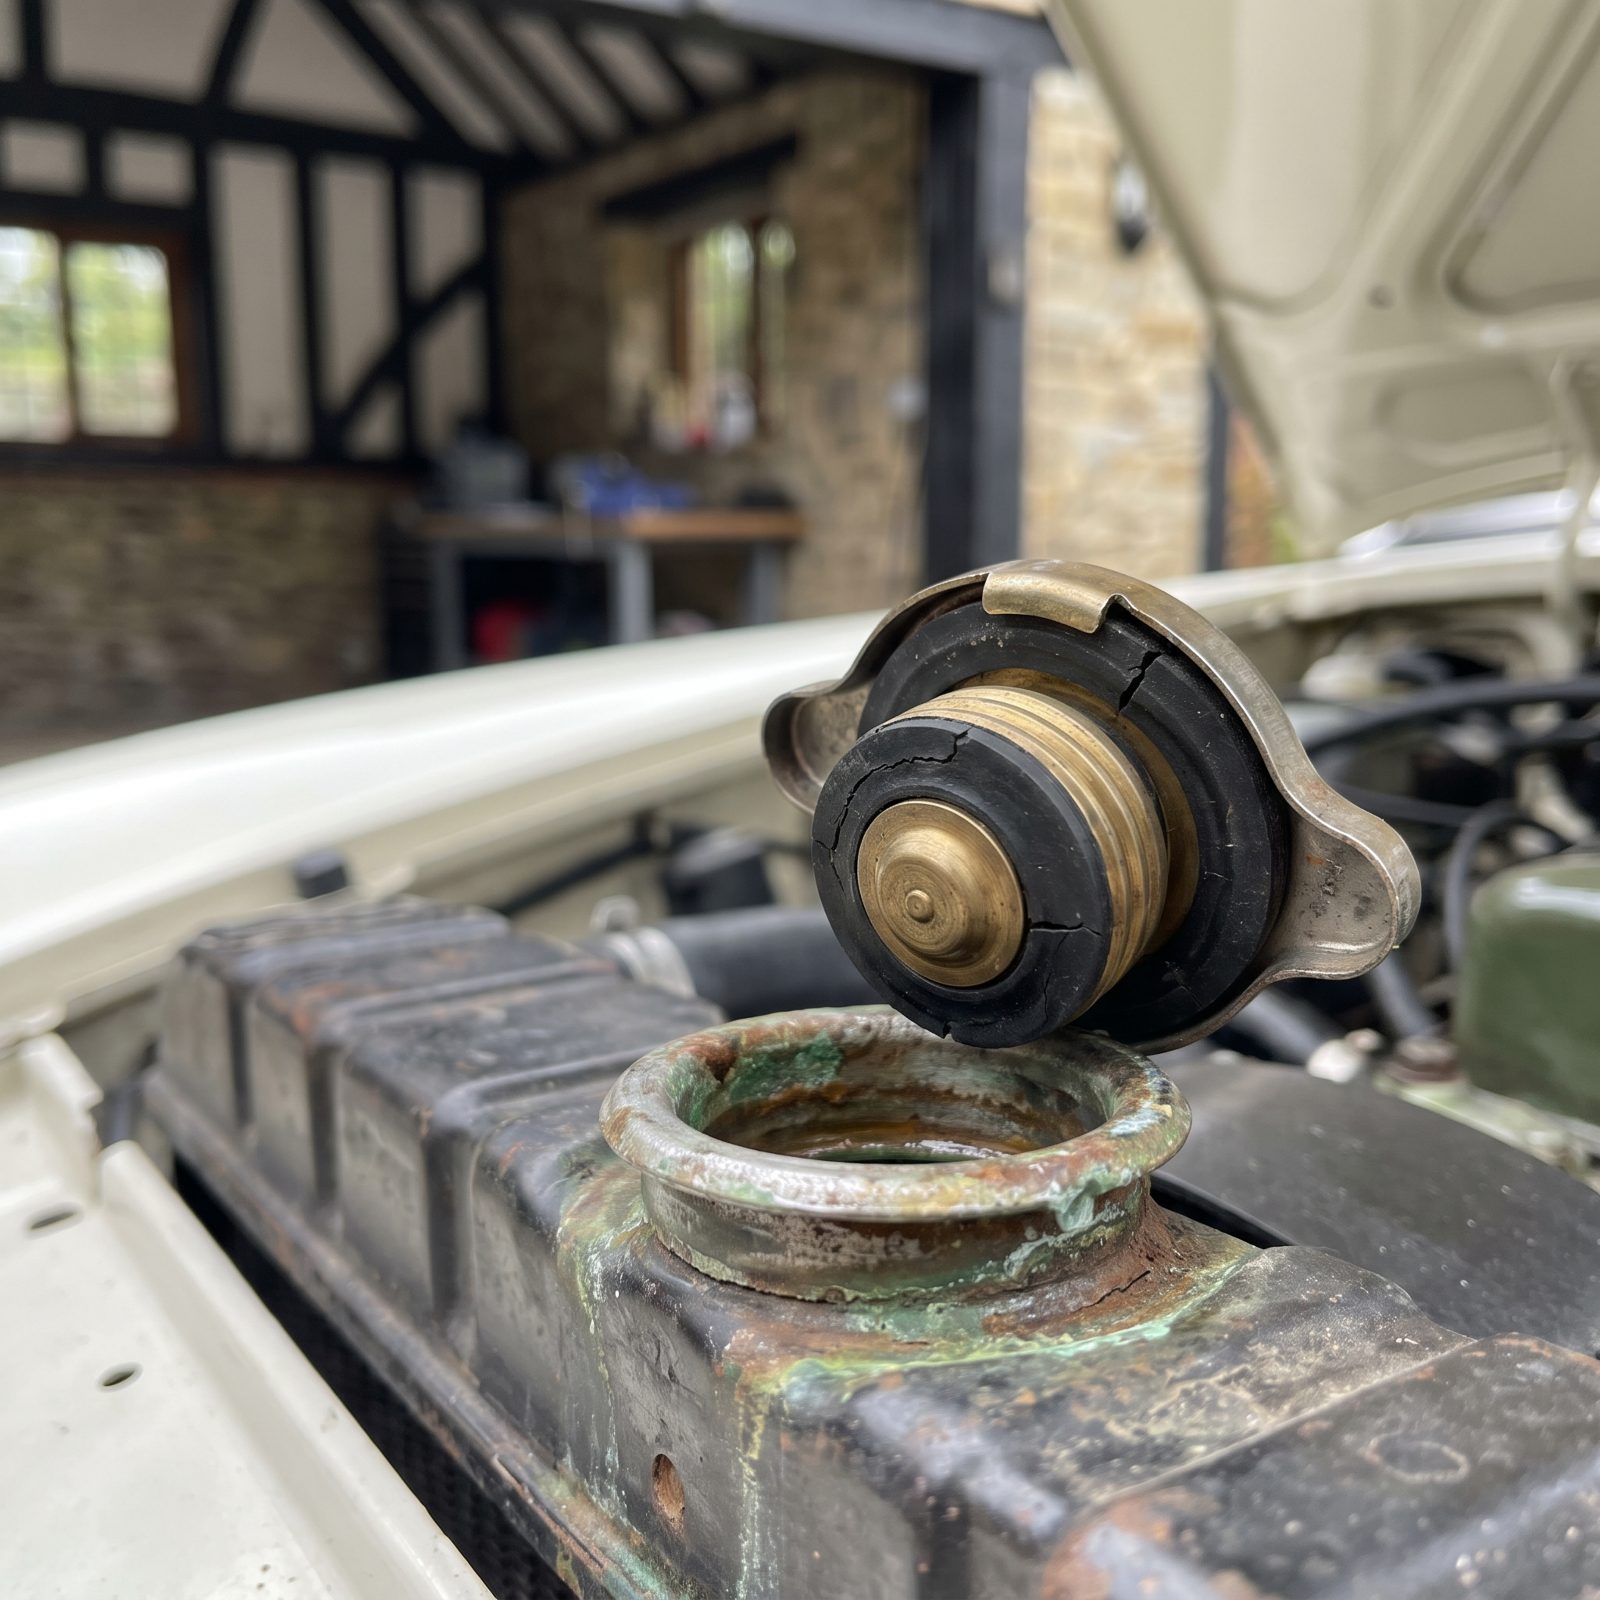
The radiator cap is a pressure valve, not just a lid. A cooling system runs under pressure so the coolant can get hotter without boiling. Let that cap’s rubber seal harden, or let the filler neck’s sealing edge corrode, and the system can’t hold pressure anymore. Now it boils over on a hot day for no reason you can see.
Pull the cap when the engine’s dead cold and look at the rubber gasket on the underside. Cracked, flattened, or brittle means it’s done. Run a finger around the filler neck’s sealing surface and feel for pits or crust. A cap is a few dollars. An overheated engine on a summer road is not.
A radiator cap that looks fine and seals fine are two different things. The rubber underneath is the whole job.
11. Check the Water-Pump Weep Hole Before a Small Leak Becomes a Roadside Failure
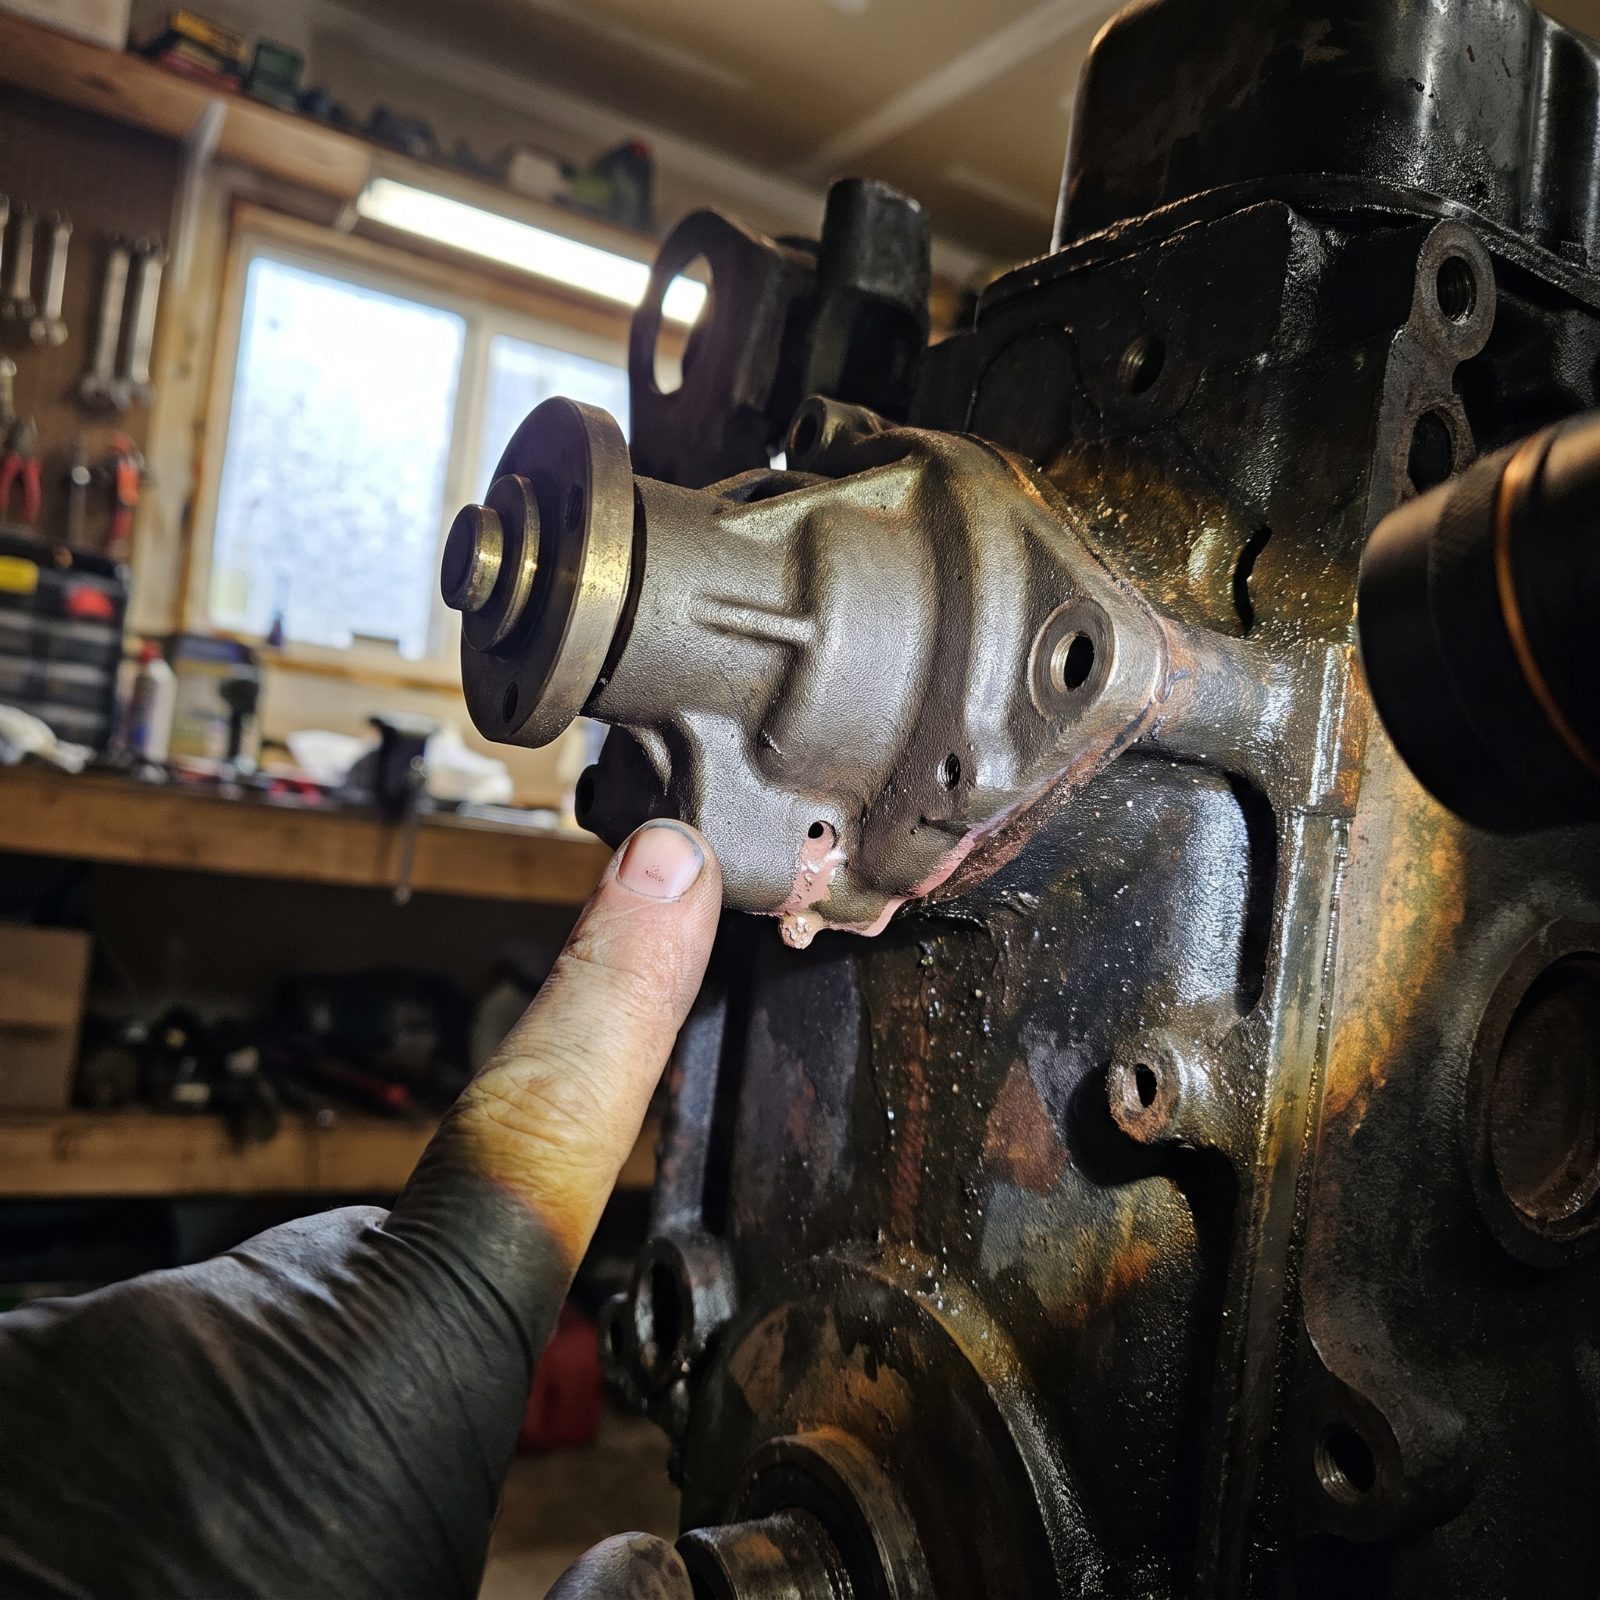
That little hole on the underside of the water pump isn’t a defect. It’s an early-warning system the factory built in on purpose. When the internal seal starts to go, coolant seeps out through the weep hole long before it ever reaches the bearing, so a dry crusty stain there means the pump is telling you it has maybe a few thousand miles left — not that it already failed.
Most people never look. They wait for the dash light or the puddle on the garage floor, and by then the bearing is howling and the fan is chewing the shroud. Wipe the weep hole clean with a rag, drive a week, check it again. A fresh damp ring is your cue to order the pump now, on your schedule, in your own driveway.
10. Clean Radiator Fins From the Engine Side to Push Debris Back Out the Way It Came
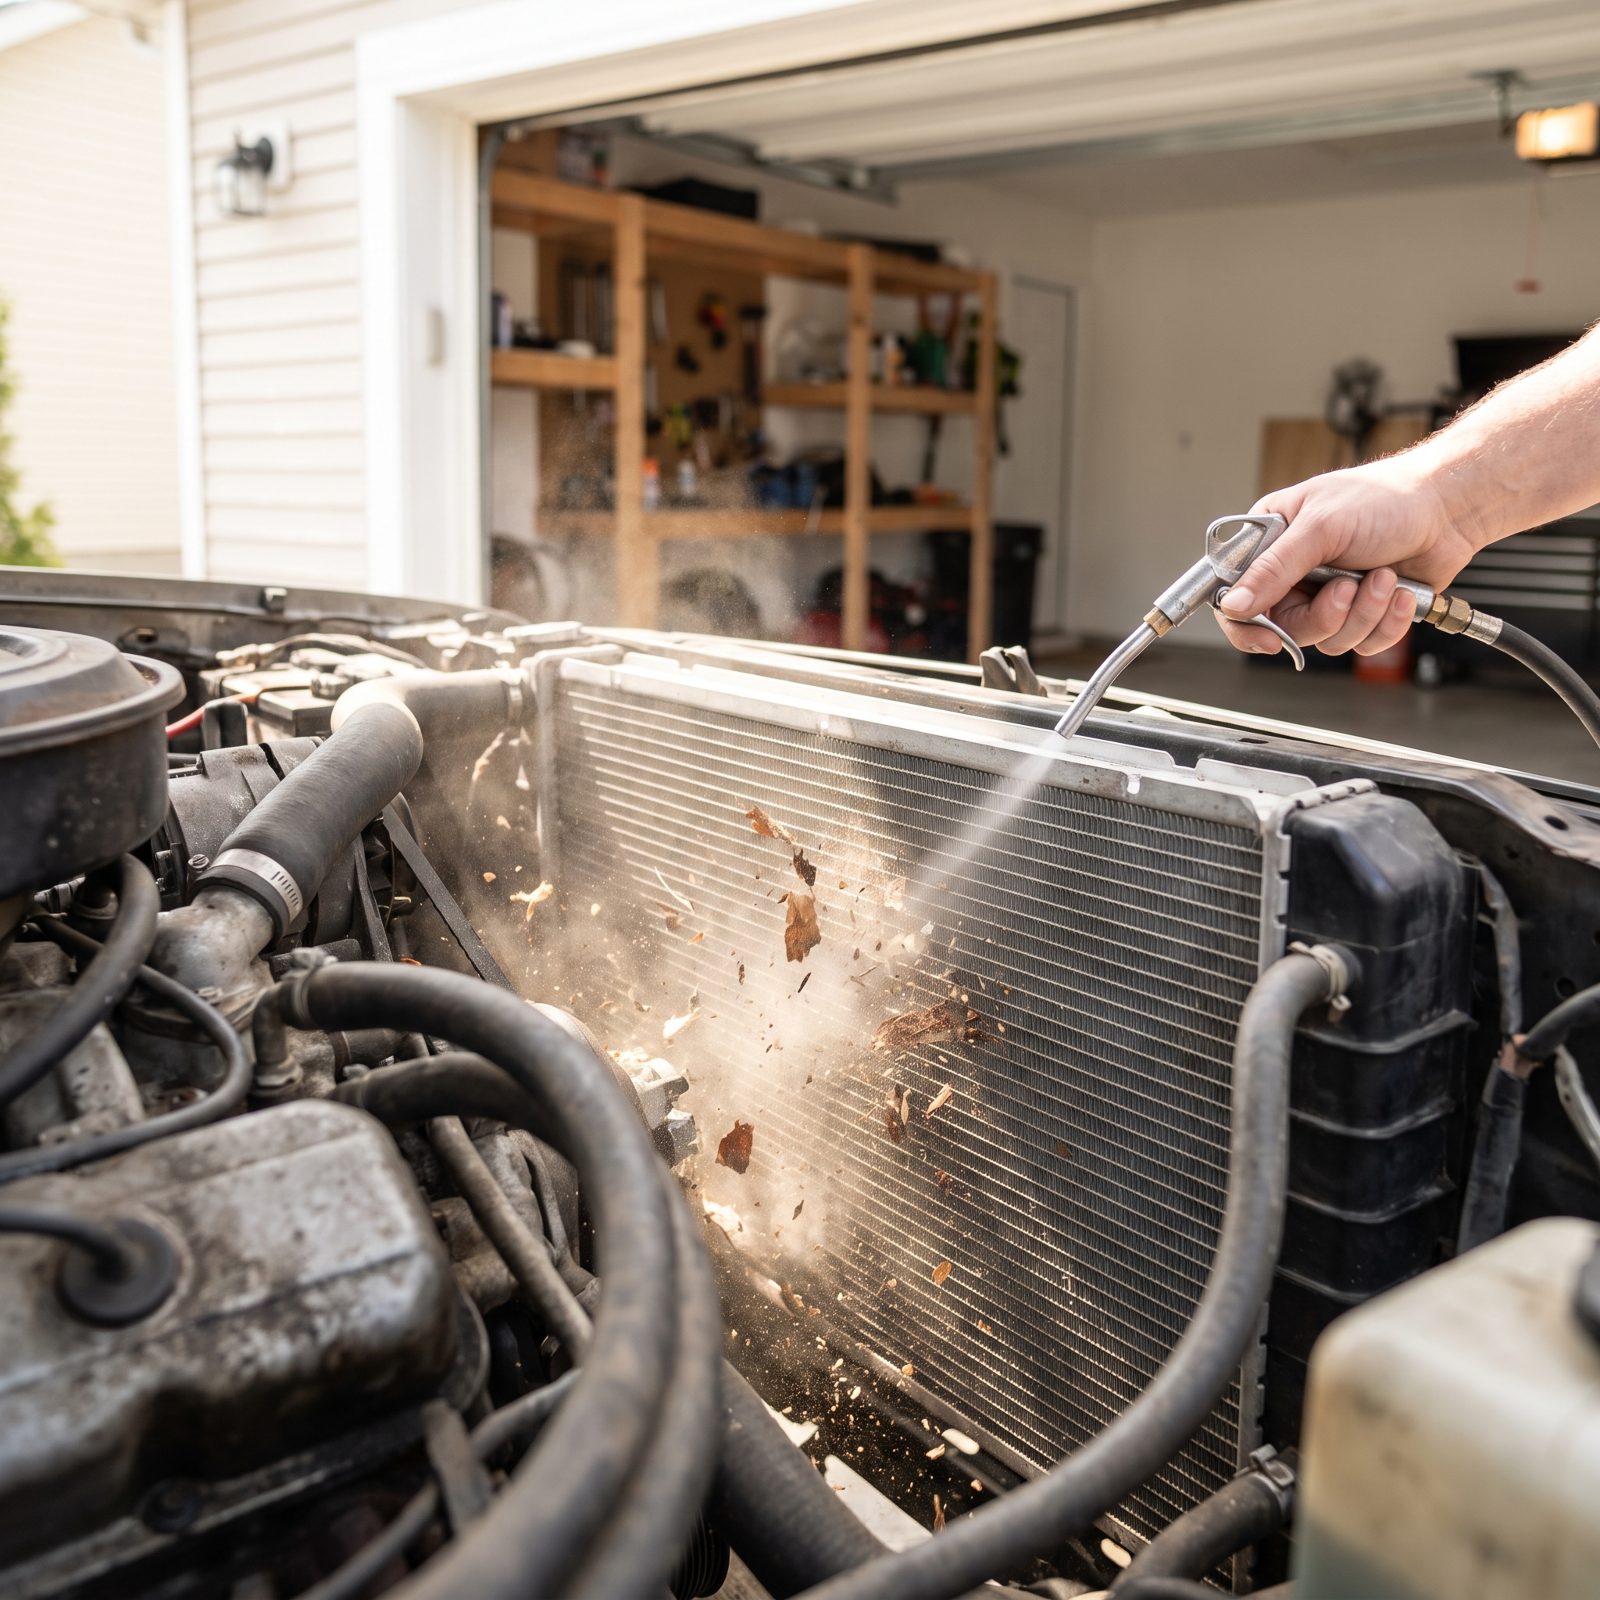
Bugs, leaves, and road grit get packed into radiator fins from the front as you drive, and blowing air from the front just drives them deeper. Clean from the engine side instead, pushing all that trash back out the way it entered. Low-pressure air or a gentle hose stream, angled down across the fins from above, with the pressure kept light so you don’t fold them over.
Here’s the sneaky part. A radiator that looks spotless from the front can still be half-blocked right through the middle of the core — which is exactly why an old car runs fine around town, then creeps toward the red on a long summer grade. Nobody suspects the radiator because it looks clean from the outside.
9. Voltage-Drop-Test Your Ground Straps Instead of Trusting How They Look
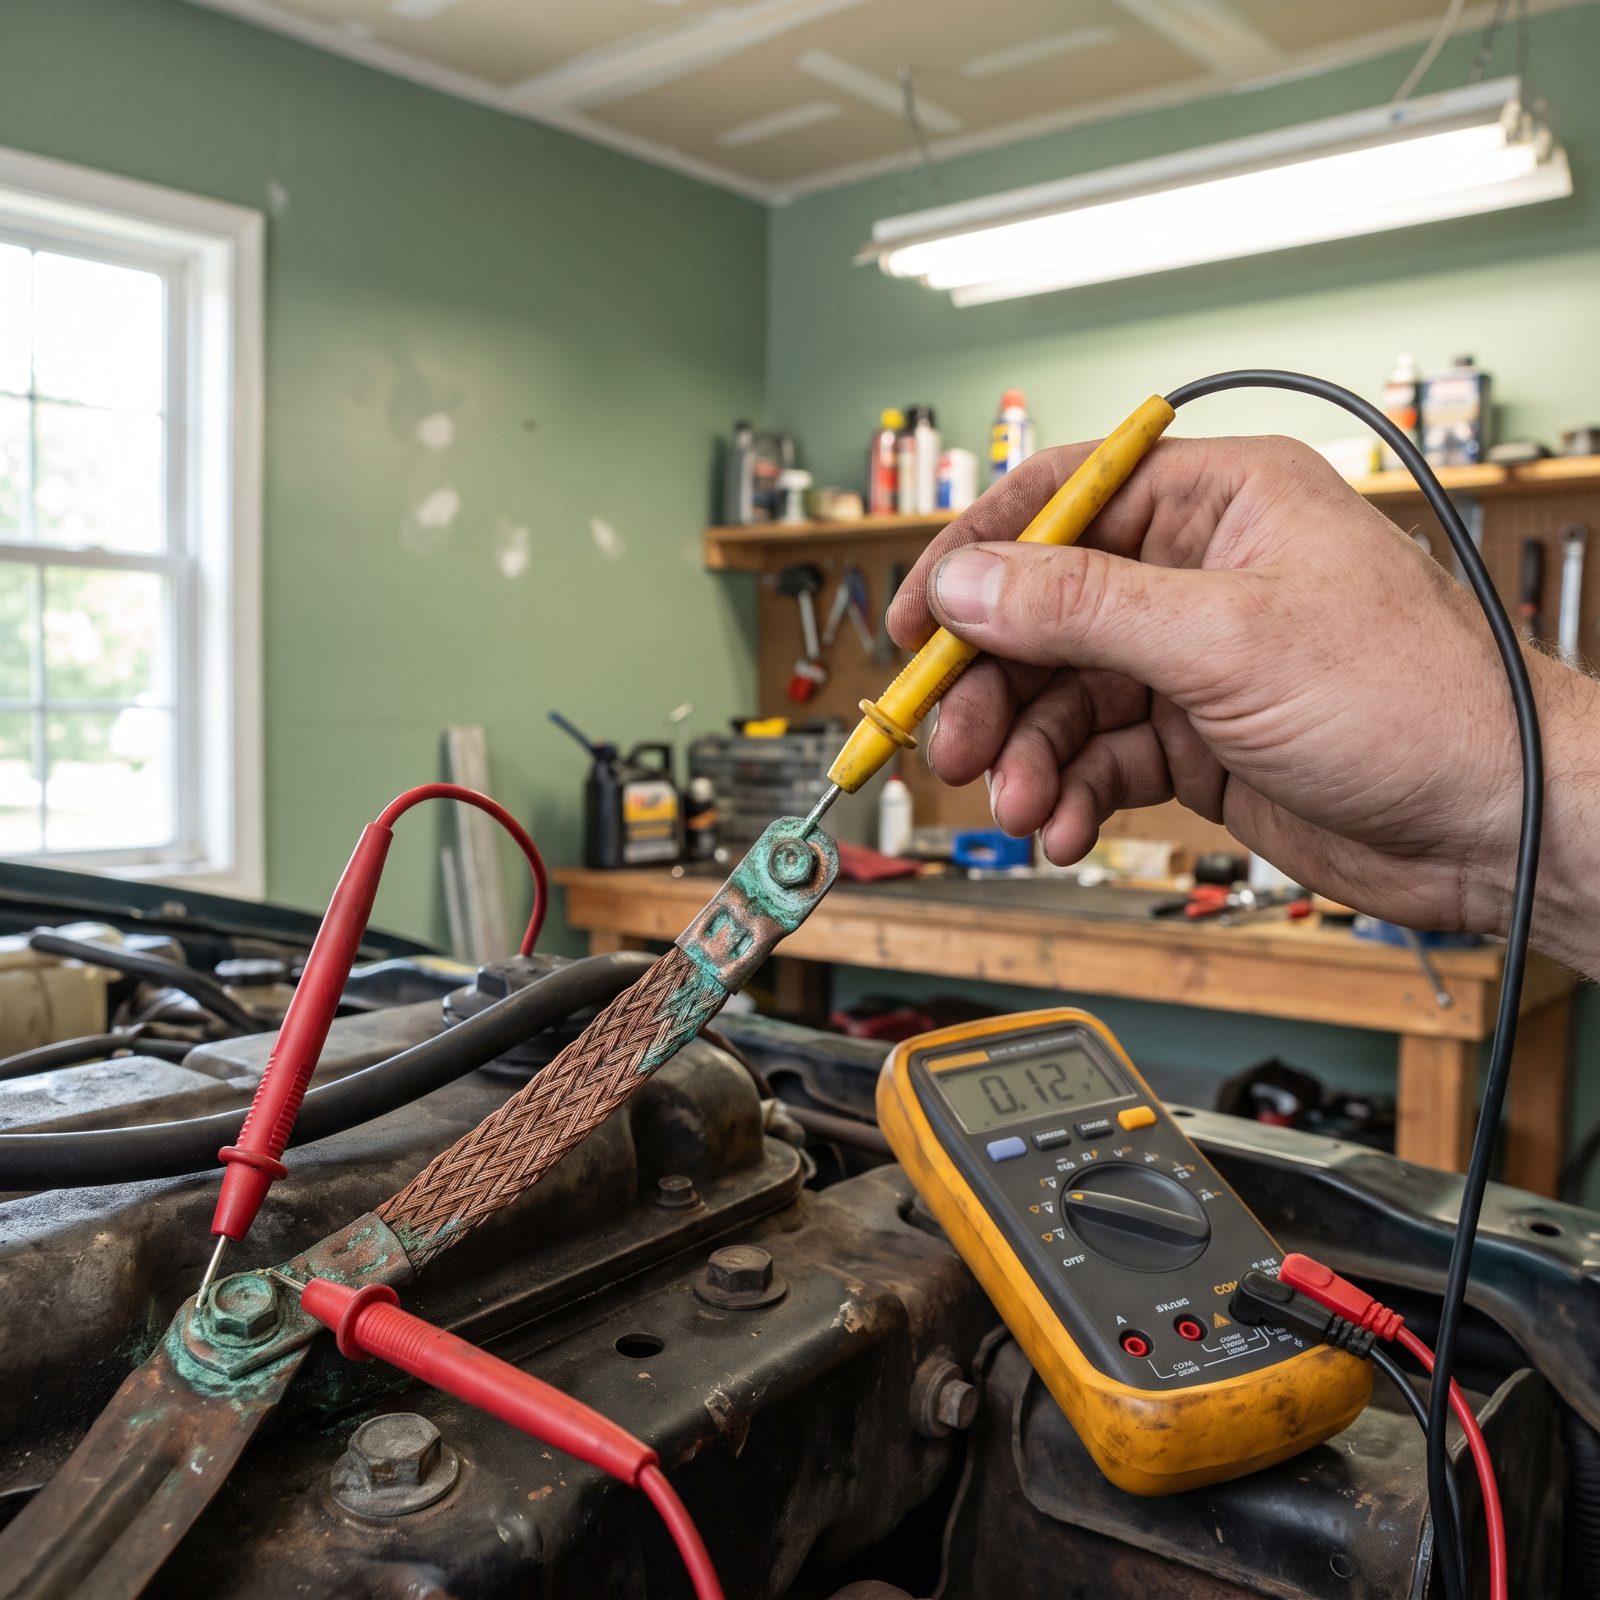
A ground strap can look like it just needs a little cleanup and still be strangling your electrical system. The green corrosion crusting the terminals and braid is only the part you can see; the worst of it hides inside the terminal crimp. The bolt looks tight, and meanwhile you’re chasing phantom gremlins: flickering lights, slow cranking, a charging gauge that wanders.
So put the meter on it. Set to DC volts, put a probe on the strap’s bolted terminal, check it against the strap’s other end under load, and read the drop. More than a couple tenths of a volt and that ground is choking current no matter how passable it looked.
Half the “haunted” old cars out there are just a bad ground nobody bothered to measure.
This single test solves more old-car electrical mysteries than any part you could buy. Grounds are free to clean and almost never the first thing anyone checks.
8. Keep the Factory Heat Shields That Protect Your Wiring, Floors, and Fuel Lines
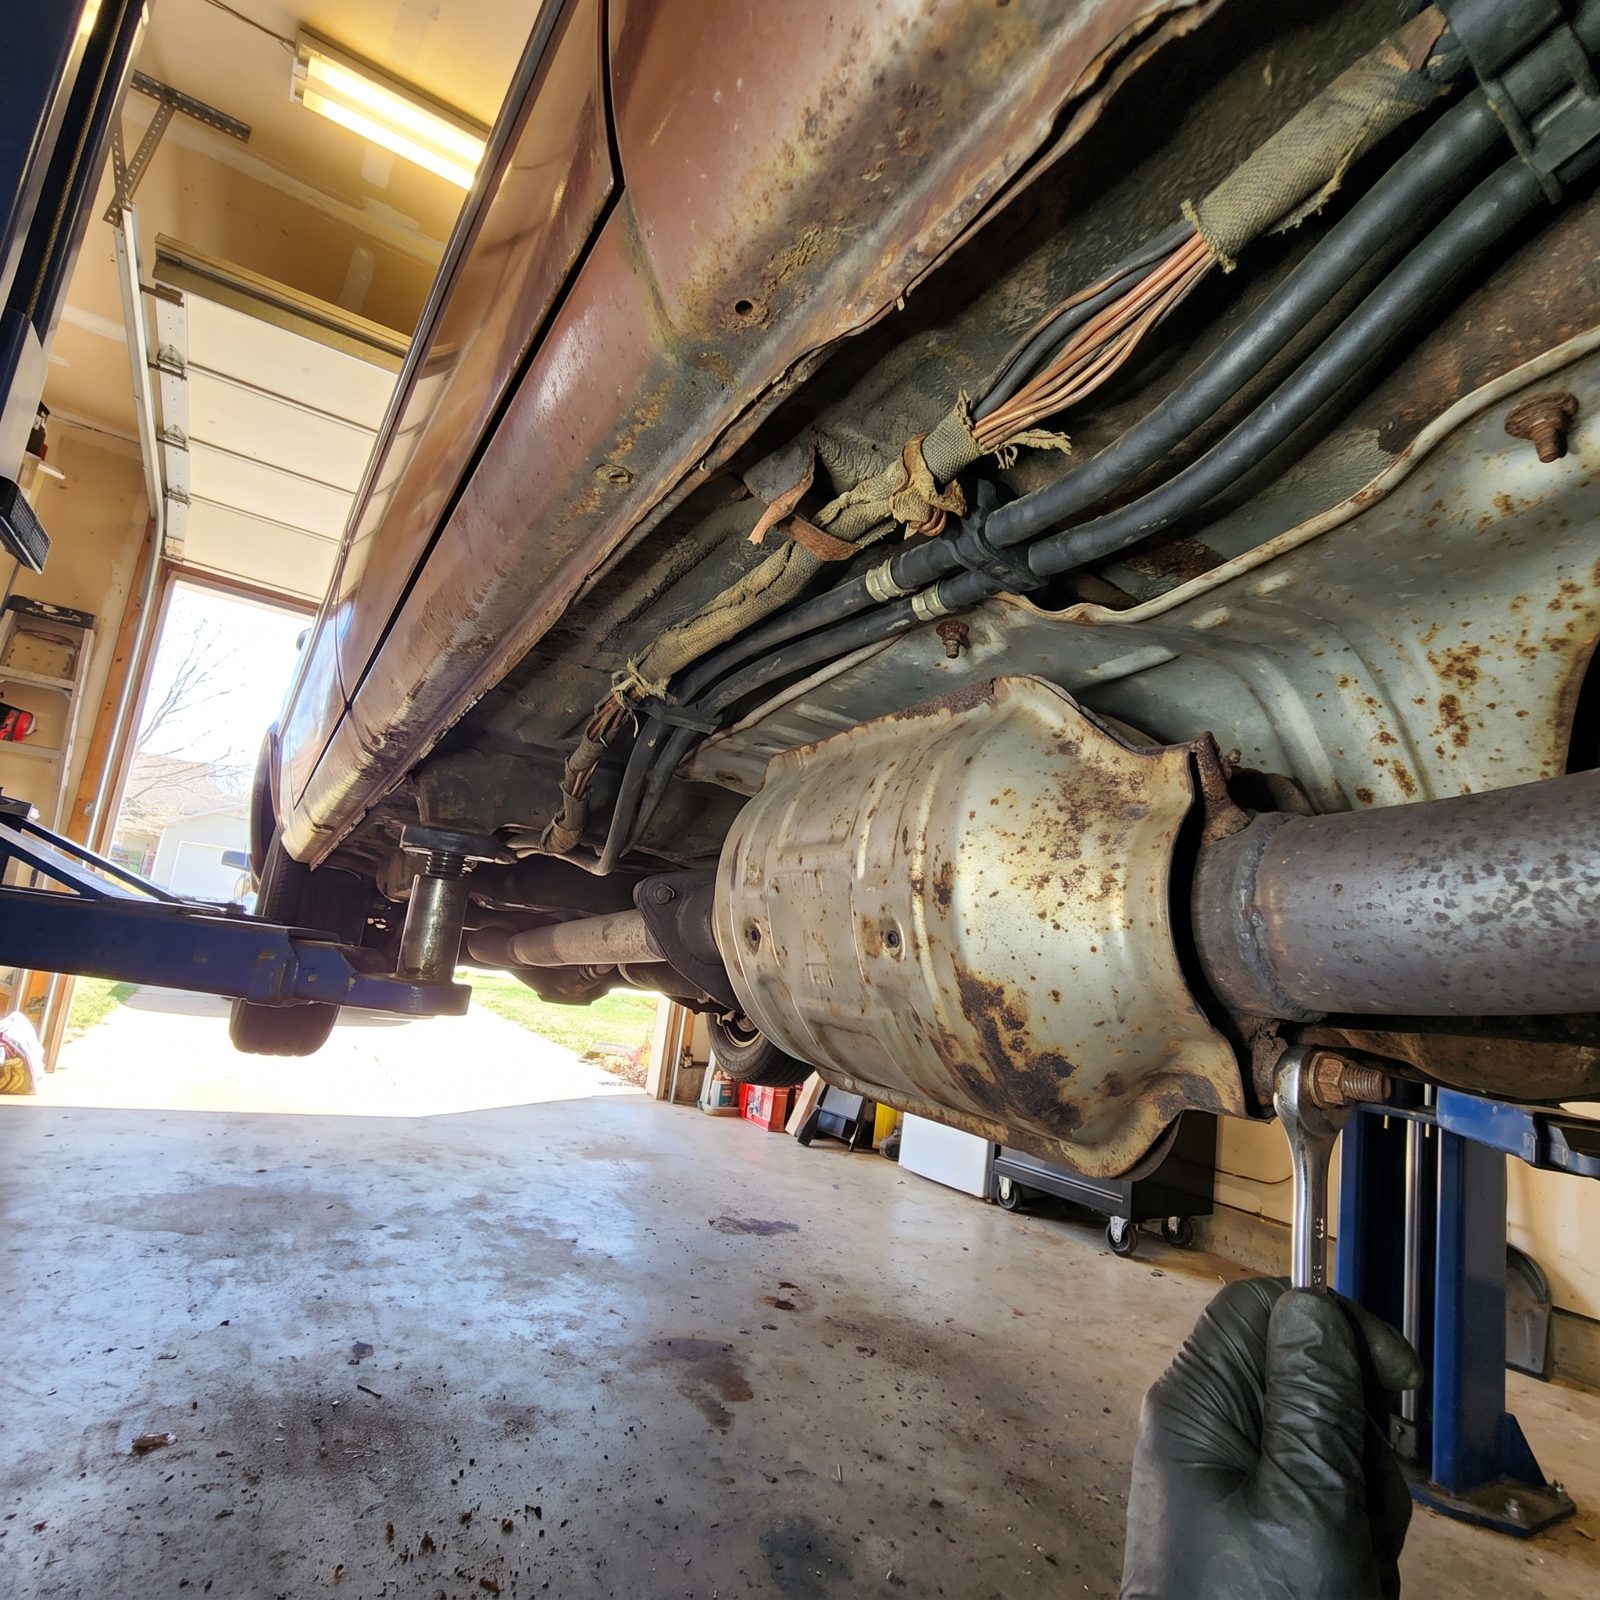
Heat shields get tossed the moment they start to rattle. The noise is maddening and the shield looks like a cheap afterthought, so off it comes — and a year later a fuel line goes hard and cracks, or the wiring insulation turns brittle right above the exhaust, and nobody connects the dots.
Those stamped-steel panels aren’t decoration. They hold radiant heat off the exact components that fail from heat: rubber, plastic, and wire. Reattach a loose one with a stainless clamp. Don’t throw a party when it comes off.
7. Replace the Timing Belt by Age Even When the Odometer Says You Have Miles Left
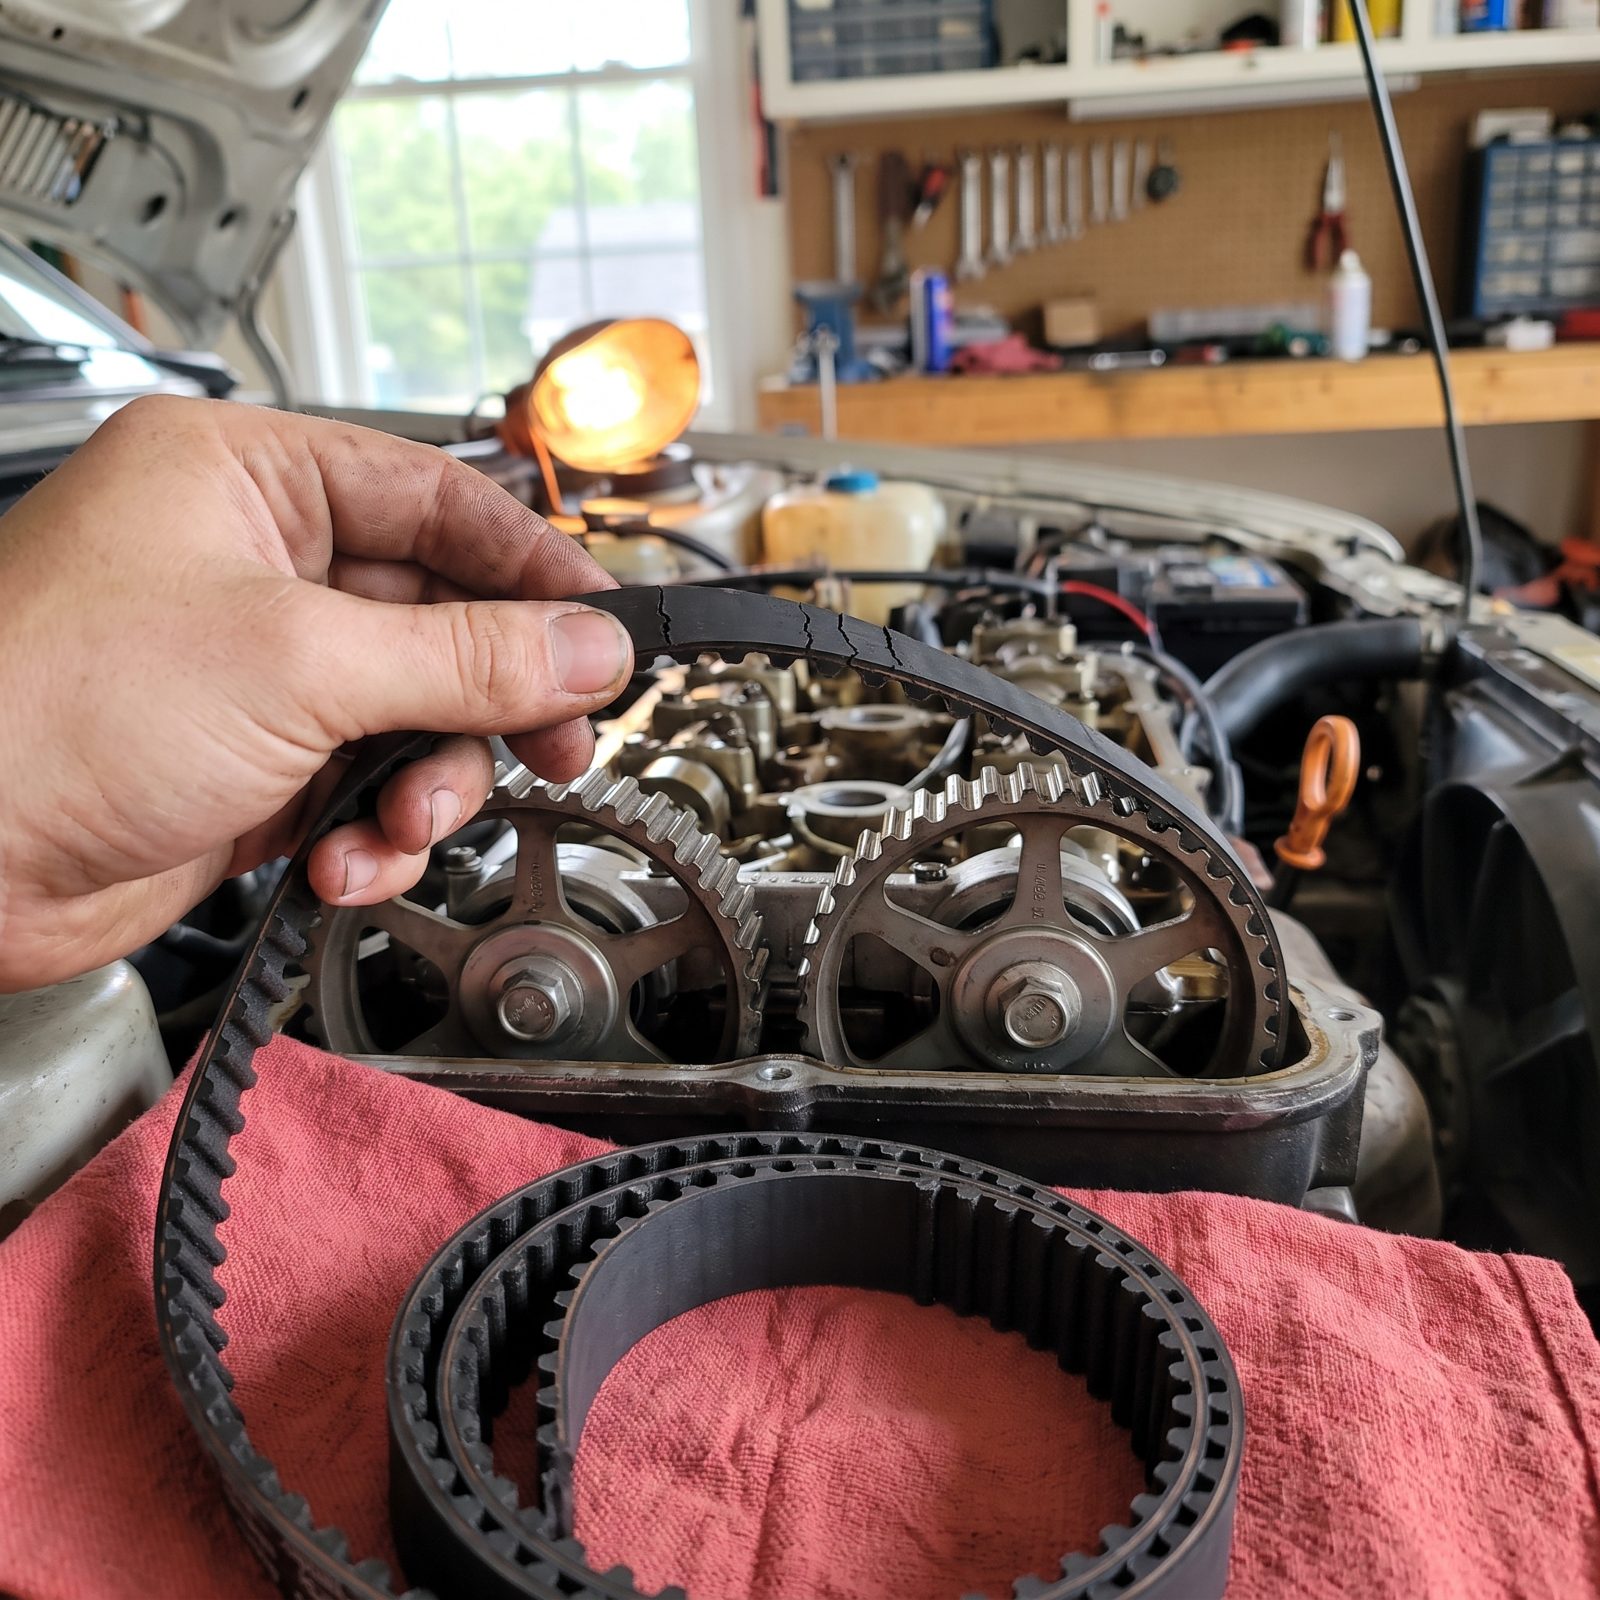
Rubber doesn’t care how little you drive. A timing belt on a low-mileage car still ages, dries, and cracks sitting in a hot engine bay. Garage queens and weekend cars are the classic victims — low odometer, happy owner, and a belt quietly going hard.
On an interference engine a snapped belt bends valves and turns a cheap job into a full rebuild. Go by the years on the sticker, not just the miles. Seven to ten is a common window depending on the car, and if you don’t know when it was last done, assume it’s overdue.
6. Set the Valve Lash Before Tight Clearances Quietly Burn Your Exhaust Valves
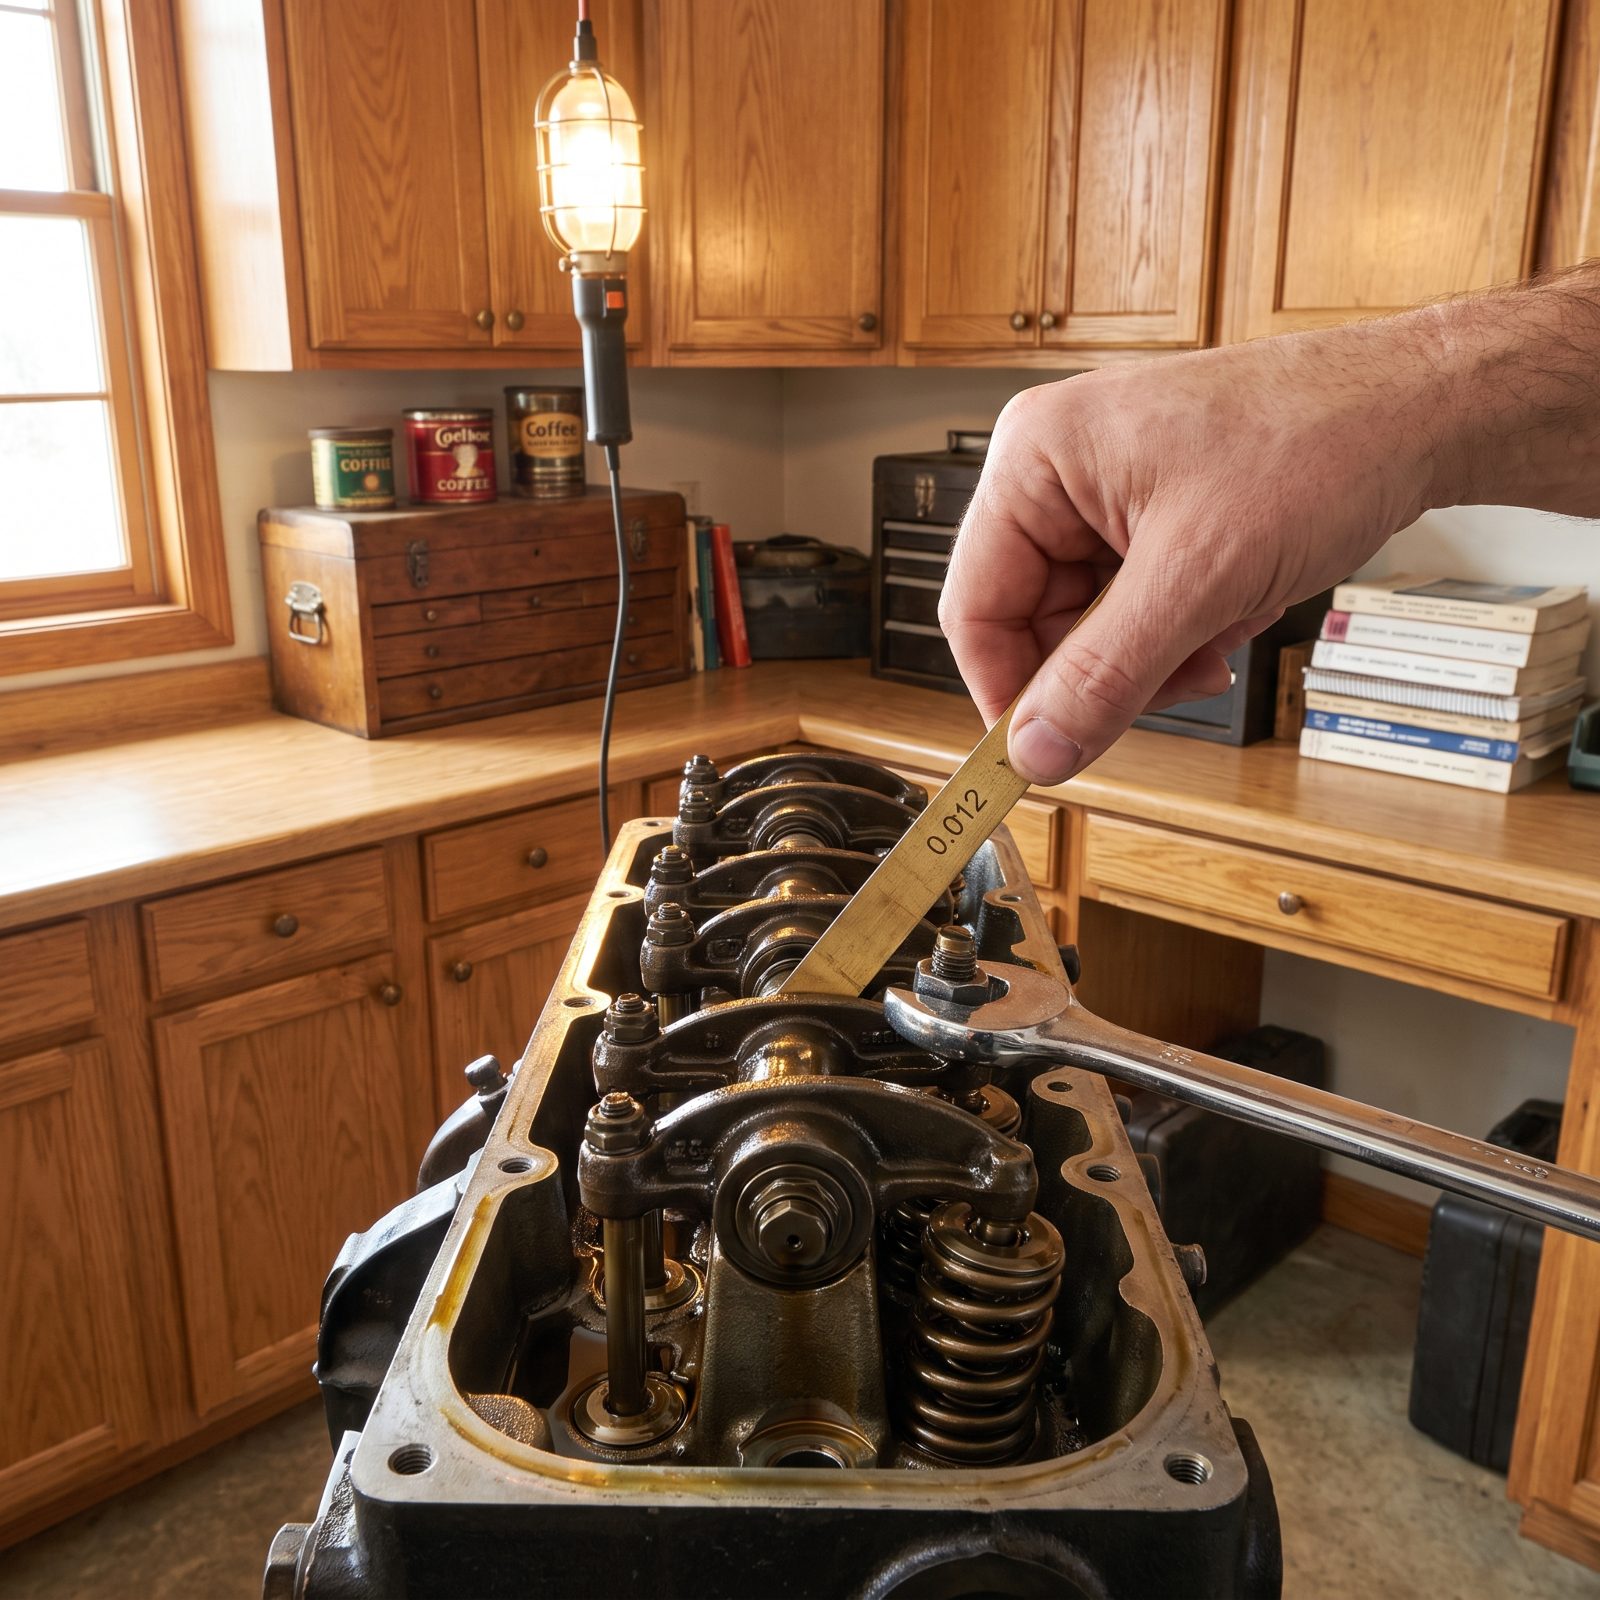
Everybody worries about loose valves because they tick. But the dangerous direction is the opposite one. Valves that run too tight never close all the way, so hot combustion gas blows past the seat and torches the edge — no noise, no warning, just a slow burn until a cylinder loses compression.
On engines with solid lifters, checking lash at the recommended interval catches this early. A tight exhaust valve costs you a feeler gauge, a wrench on the adjuster nut and an hour. A burned one costs you a valve job. Guess which problem nobody notices until the engine starts stumbling at a light.
5. Service the PCV System Before Sludge and Crankcase Pressure Blow Out Your Seals
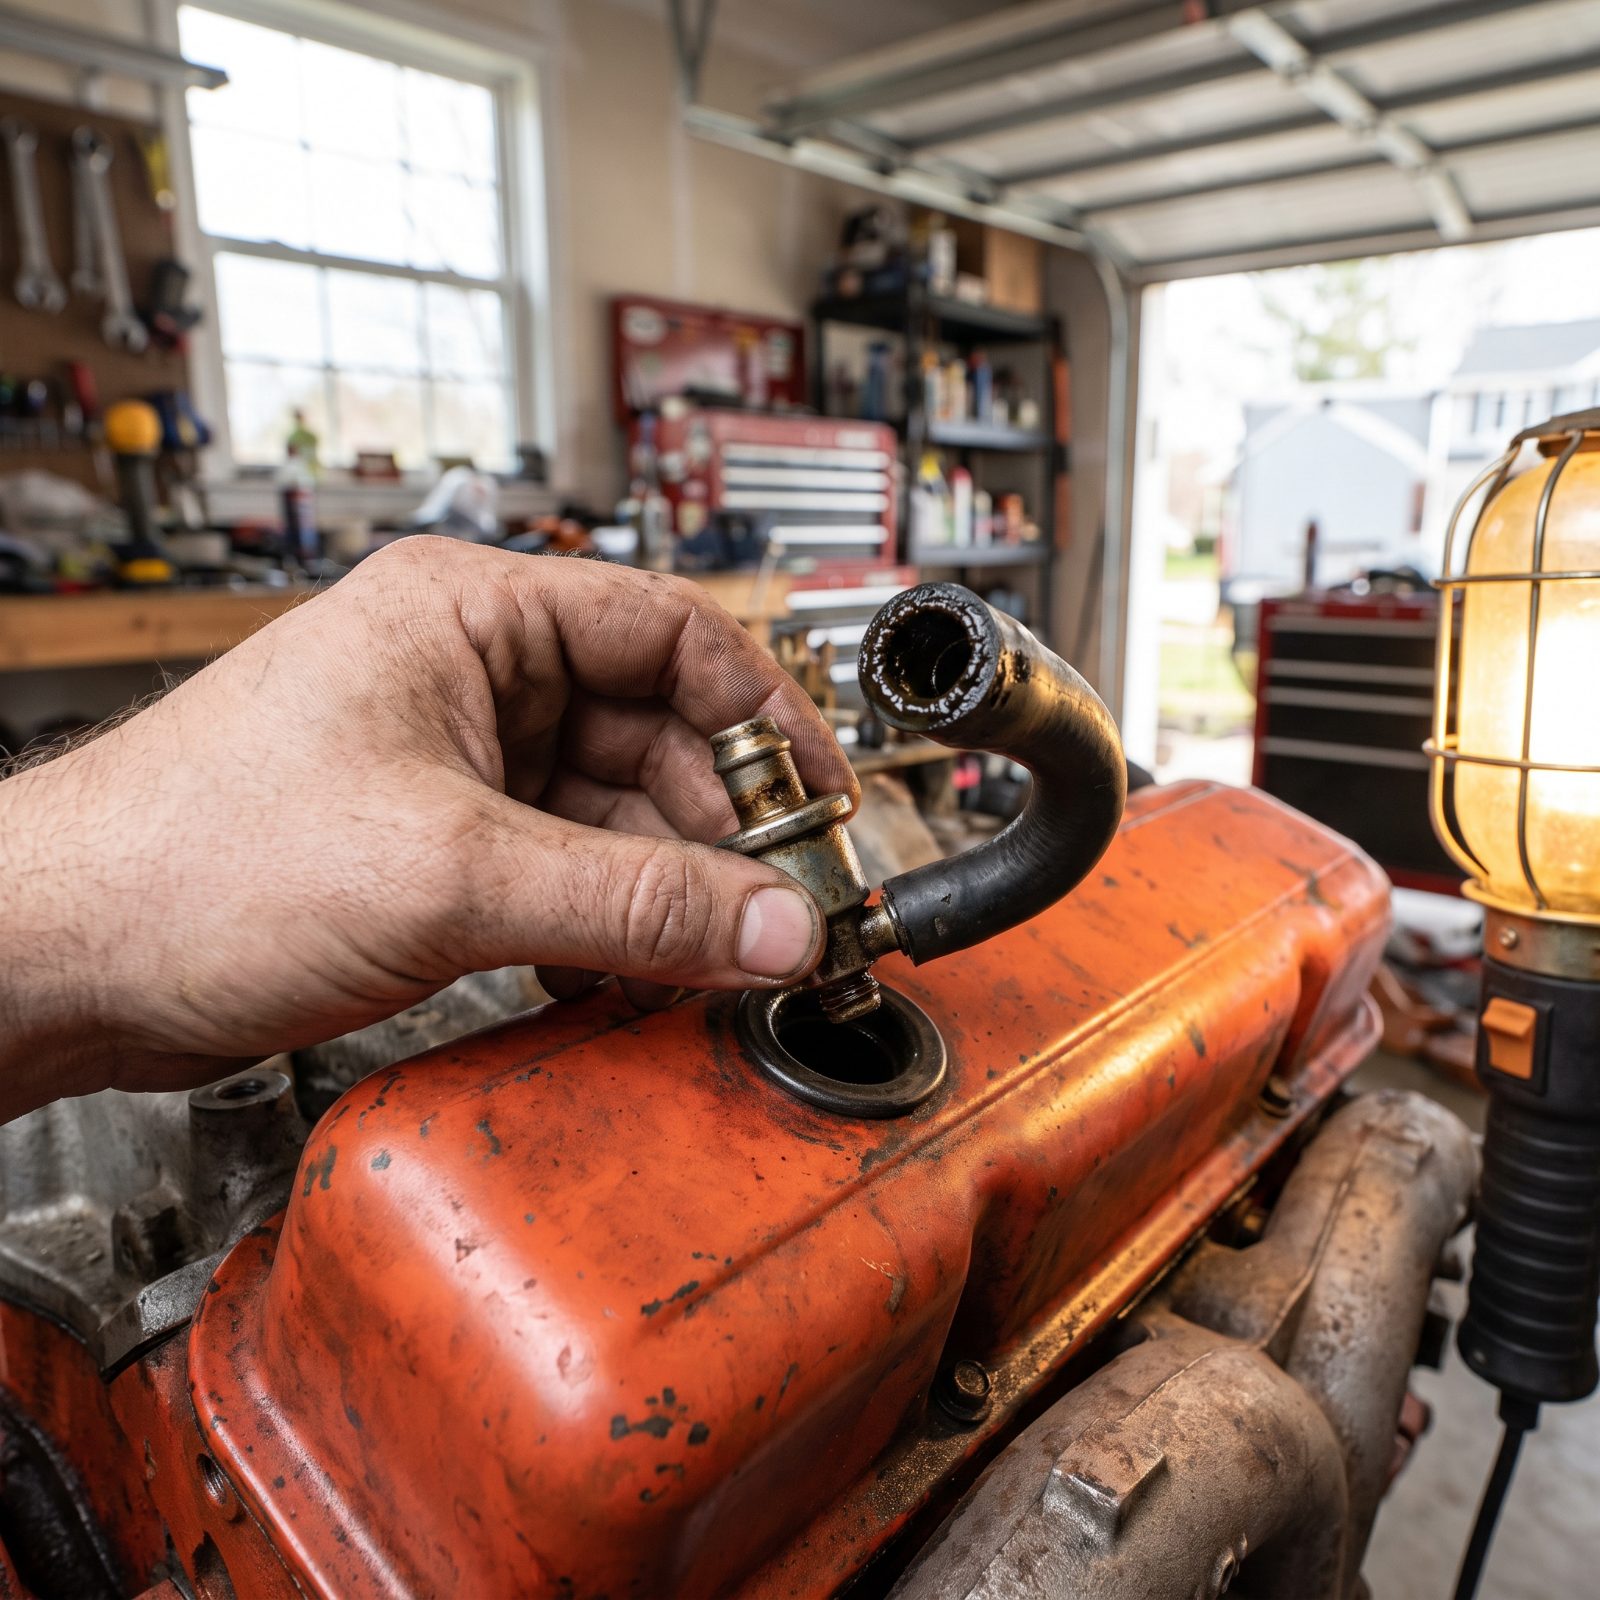
The PCV valve is a cheap little part that protects a very expensive engine, and almost nobody services it. Its job is to vent crankcase vapors so pressure doesn’t build up inside the engine. When it clogs, that pressure has to go somewhere, and it finds the weakest seal and shoves oil right past it.
A plugged PCV system is behind a lot of “sudden” oil leaks on old engines. The valve cover gasket didn’t fail. It got pushed out by pressure the PCV should have relieved. Pull the valve, give it a shake, and listen for a rattle. No rattle means it’s stuck.
4. Use the Right Additive Package in Flat-Tappet Engines or Wipe Out a Cam
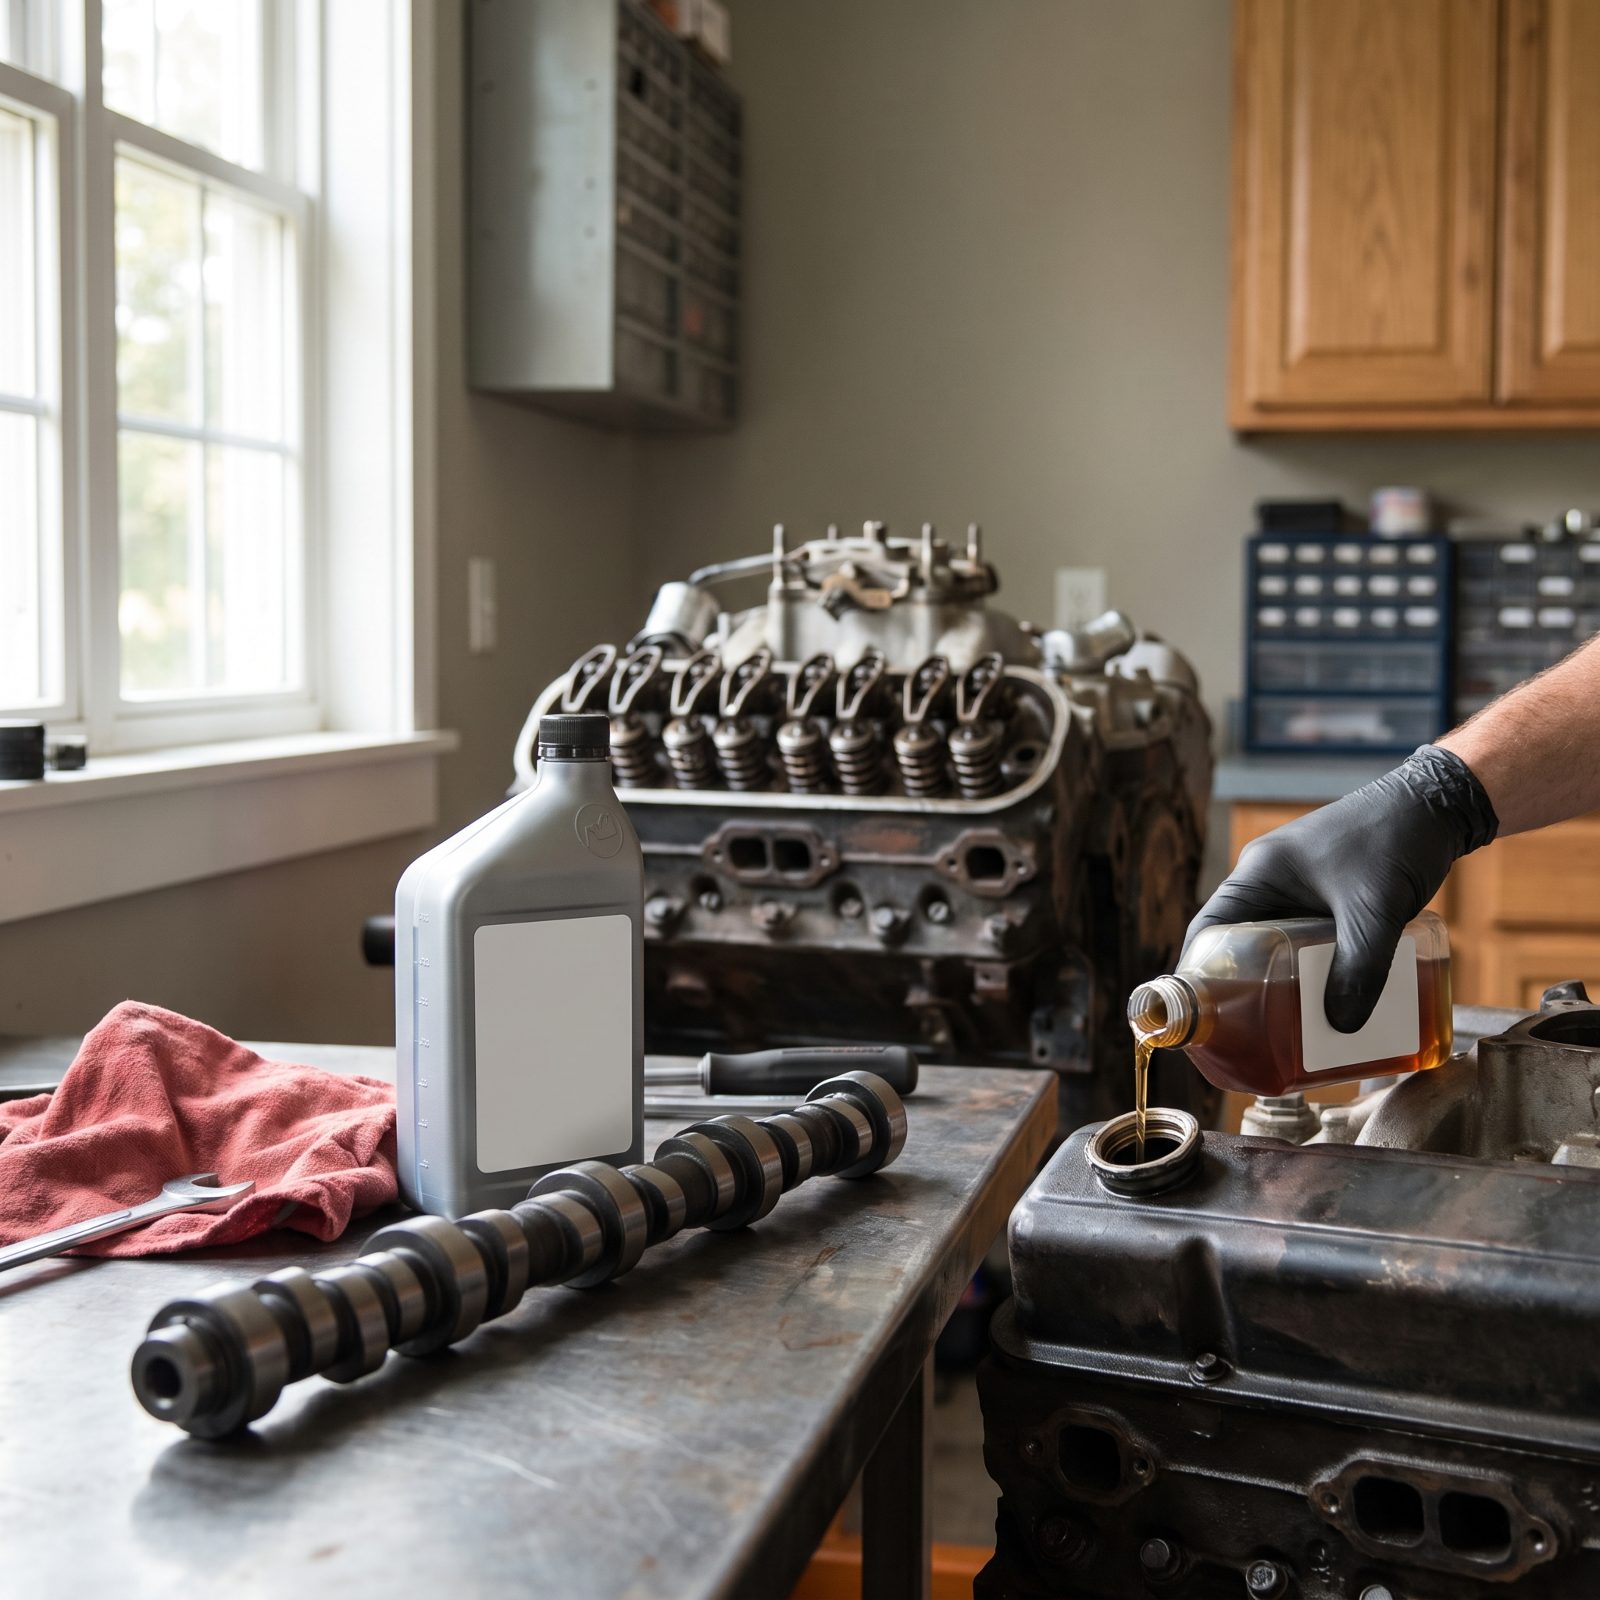
Modern engine oils had their zinc and phosphorus levels cut years ago to protect catalytic converters. Great for new cars. Bad for old flat-tappet engines that lean on that exact anti-wear additive to survive the brutal sliding contact between cam lobe and lifter.
Run modern low-zinc oil in a classic V8 and the cam can wipe a lobe flat in a few thousand miles. The fix is simple once you know it: use an oil formulated for older engines, or add a zinc supplement to the oil in the crankcase. Pouring it into the oil-fill opening of the valve cover on an assembled engine gets it into the crankcase where it can protect the cam. Skip this and you don’t find out until the engine develops a tick — and by then a lobe is already ruined.
3. Fill the Tank With Stabilized Ethanol-Free Fuel Before Long Winter Storage
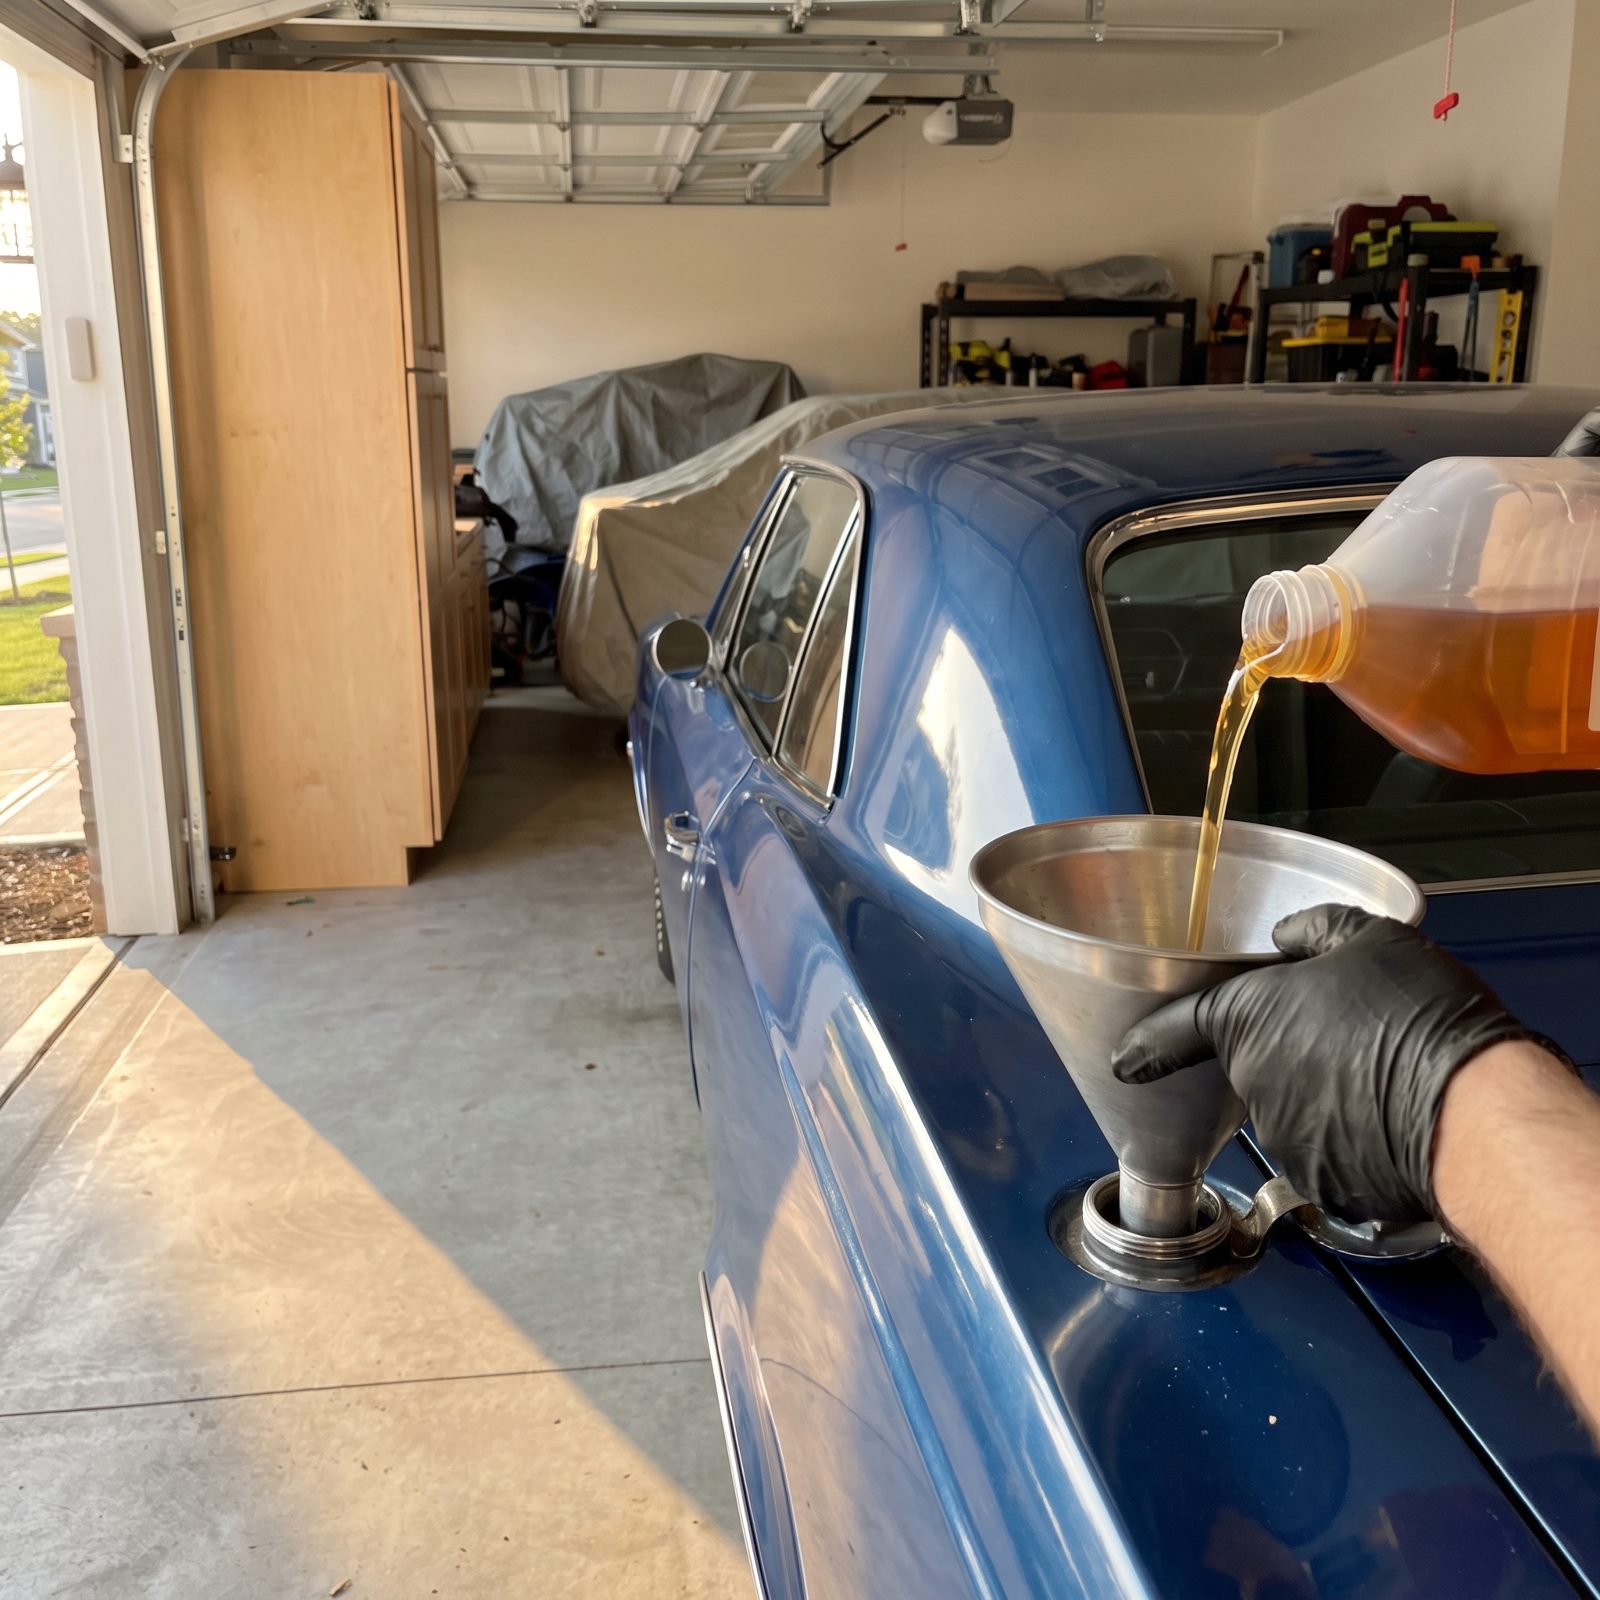
A half-empty tank over winter is how fuel systems rot. The empty space sweats condensation, water collects, and ethanol fuel pulls moisture out of the air like a sponge. Come spring you’ve got a varnished carburetor and a fuel pump full of corrosion.
So fill the tank nearly full to cut the air space, add stabilizer, and if you can get it, use ethanol-free fuel. Run the engine a few minutes so the treated fuel reaches the carburetor or injectors. The whole system sits protected instead of rusting from the inside while the car sleeps.
2. Seal the Intake and Exhaust With Brightly Tagged Plugs So You Never Forget Them
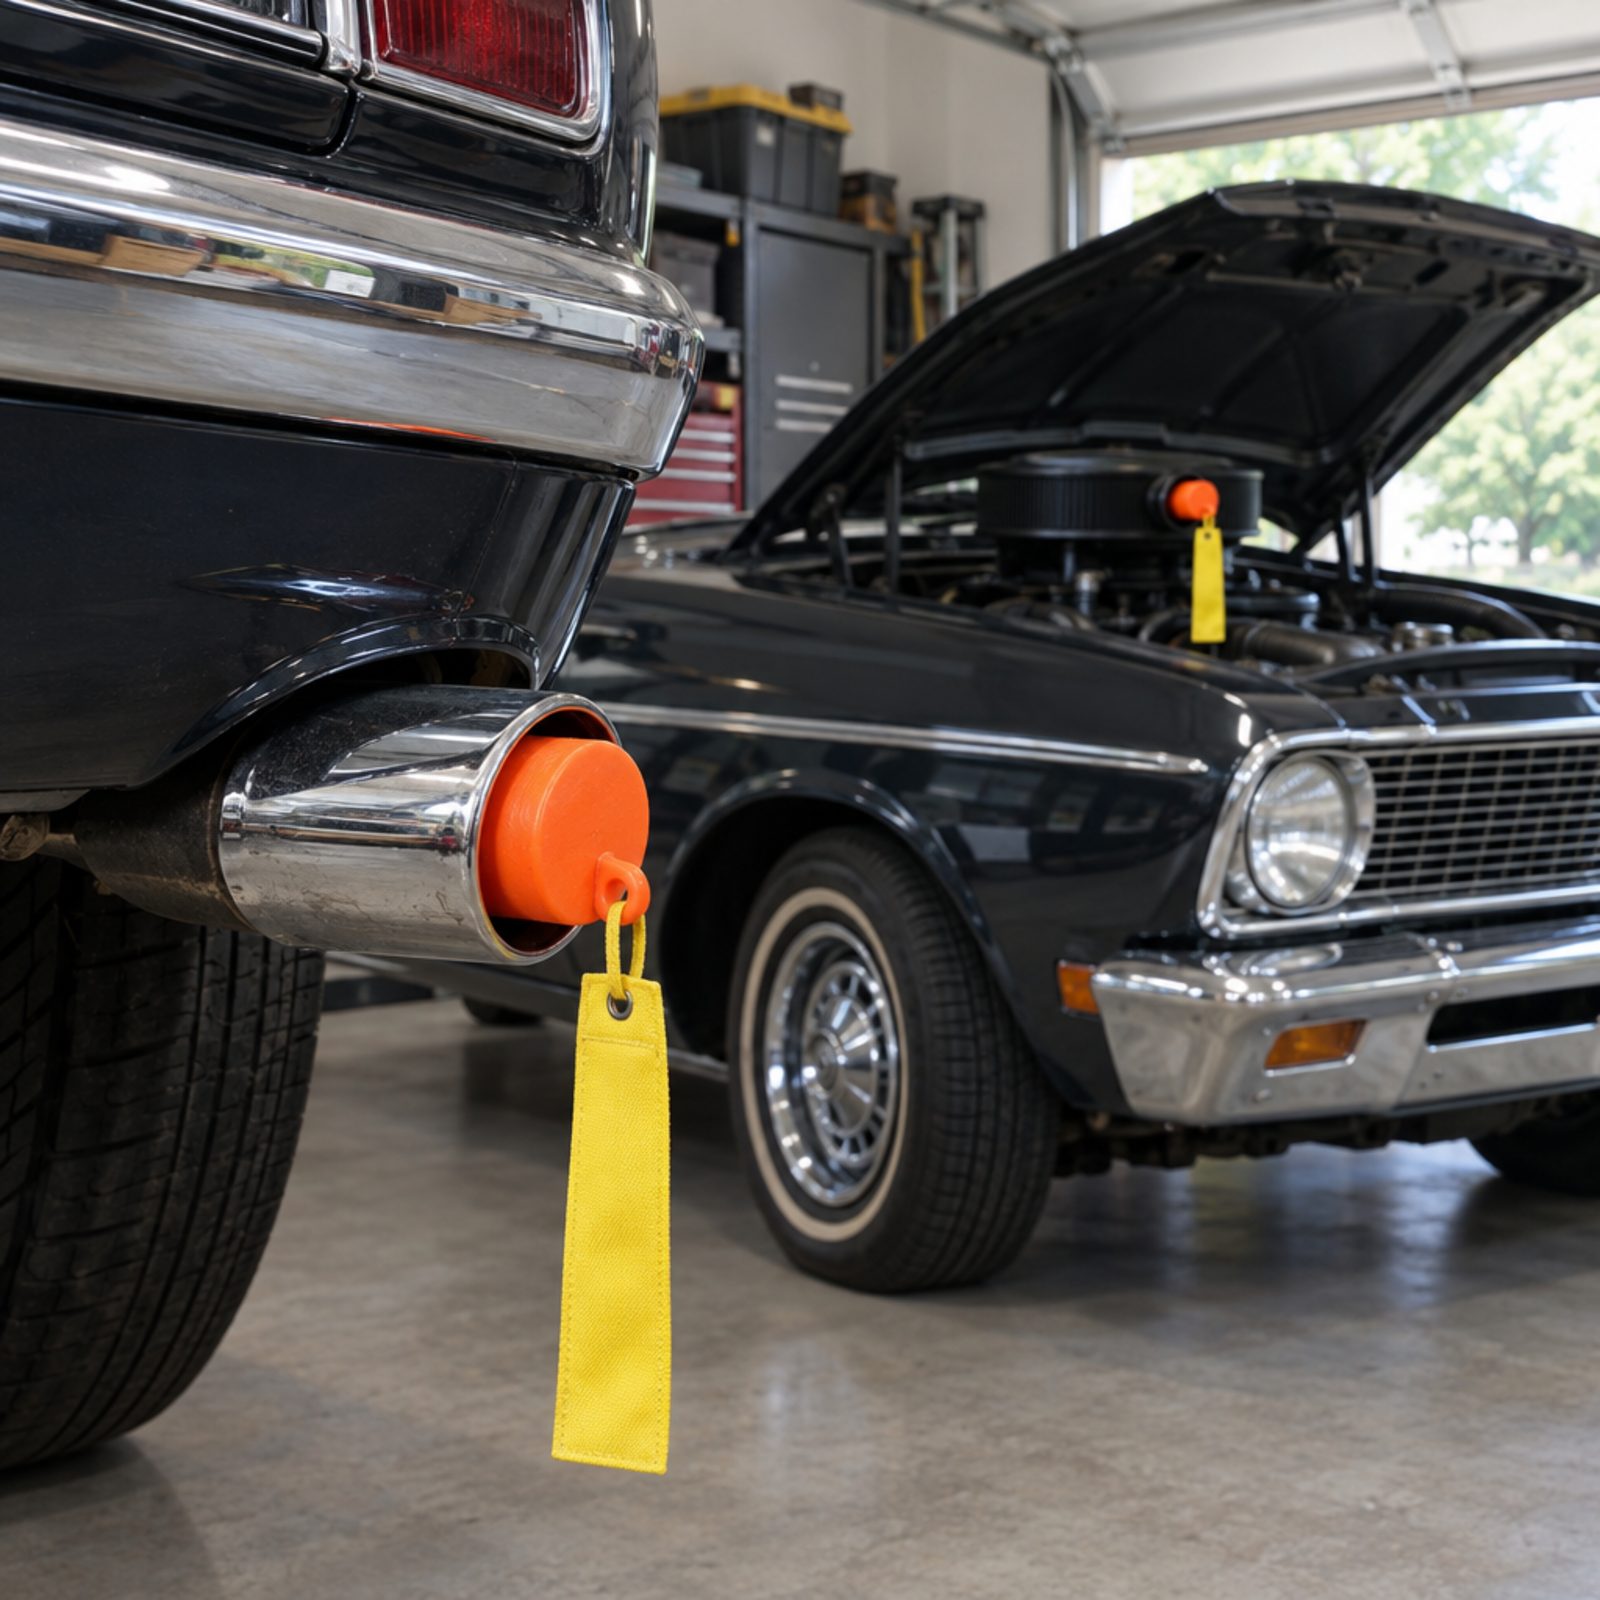
Mice love a stored car. The intake and the tailpipe are open doors straight into the engine, and a nesting rodent in an intake tract is a genuine nightmare — chewed wiring, acorns in your airbox, the works.
Plug both openings before storage. The trick that saves engines is the bright tag. Hang a long orange or yellow ribbon off each plug and you physically can’t start the car without seeing it first. Nobody has ever forgotten a plug that was waving a flag at them.
1. Check the Air Cleaner and Exhaust for Nests Before You Hit the Key
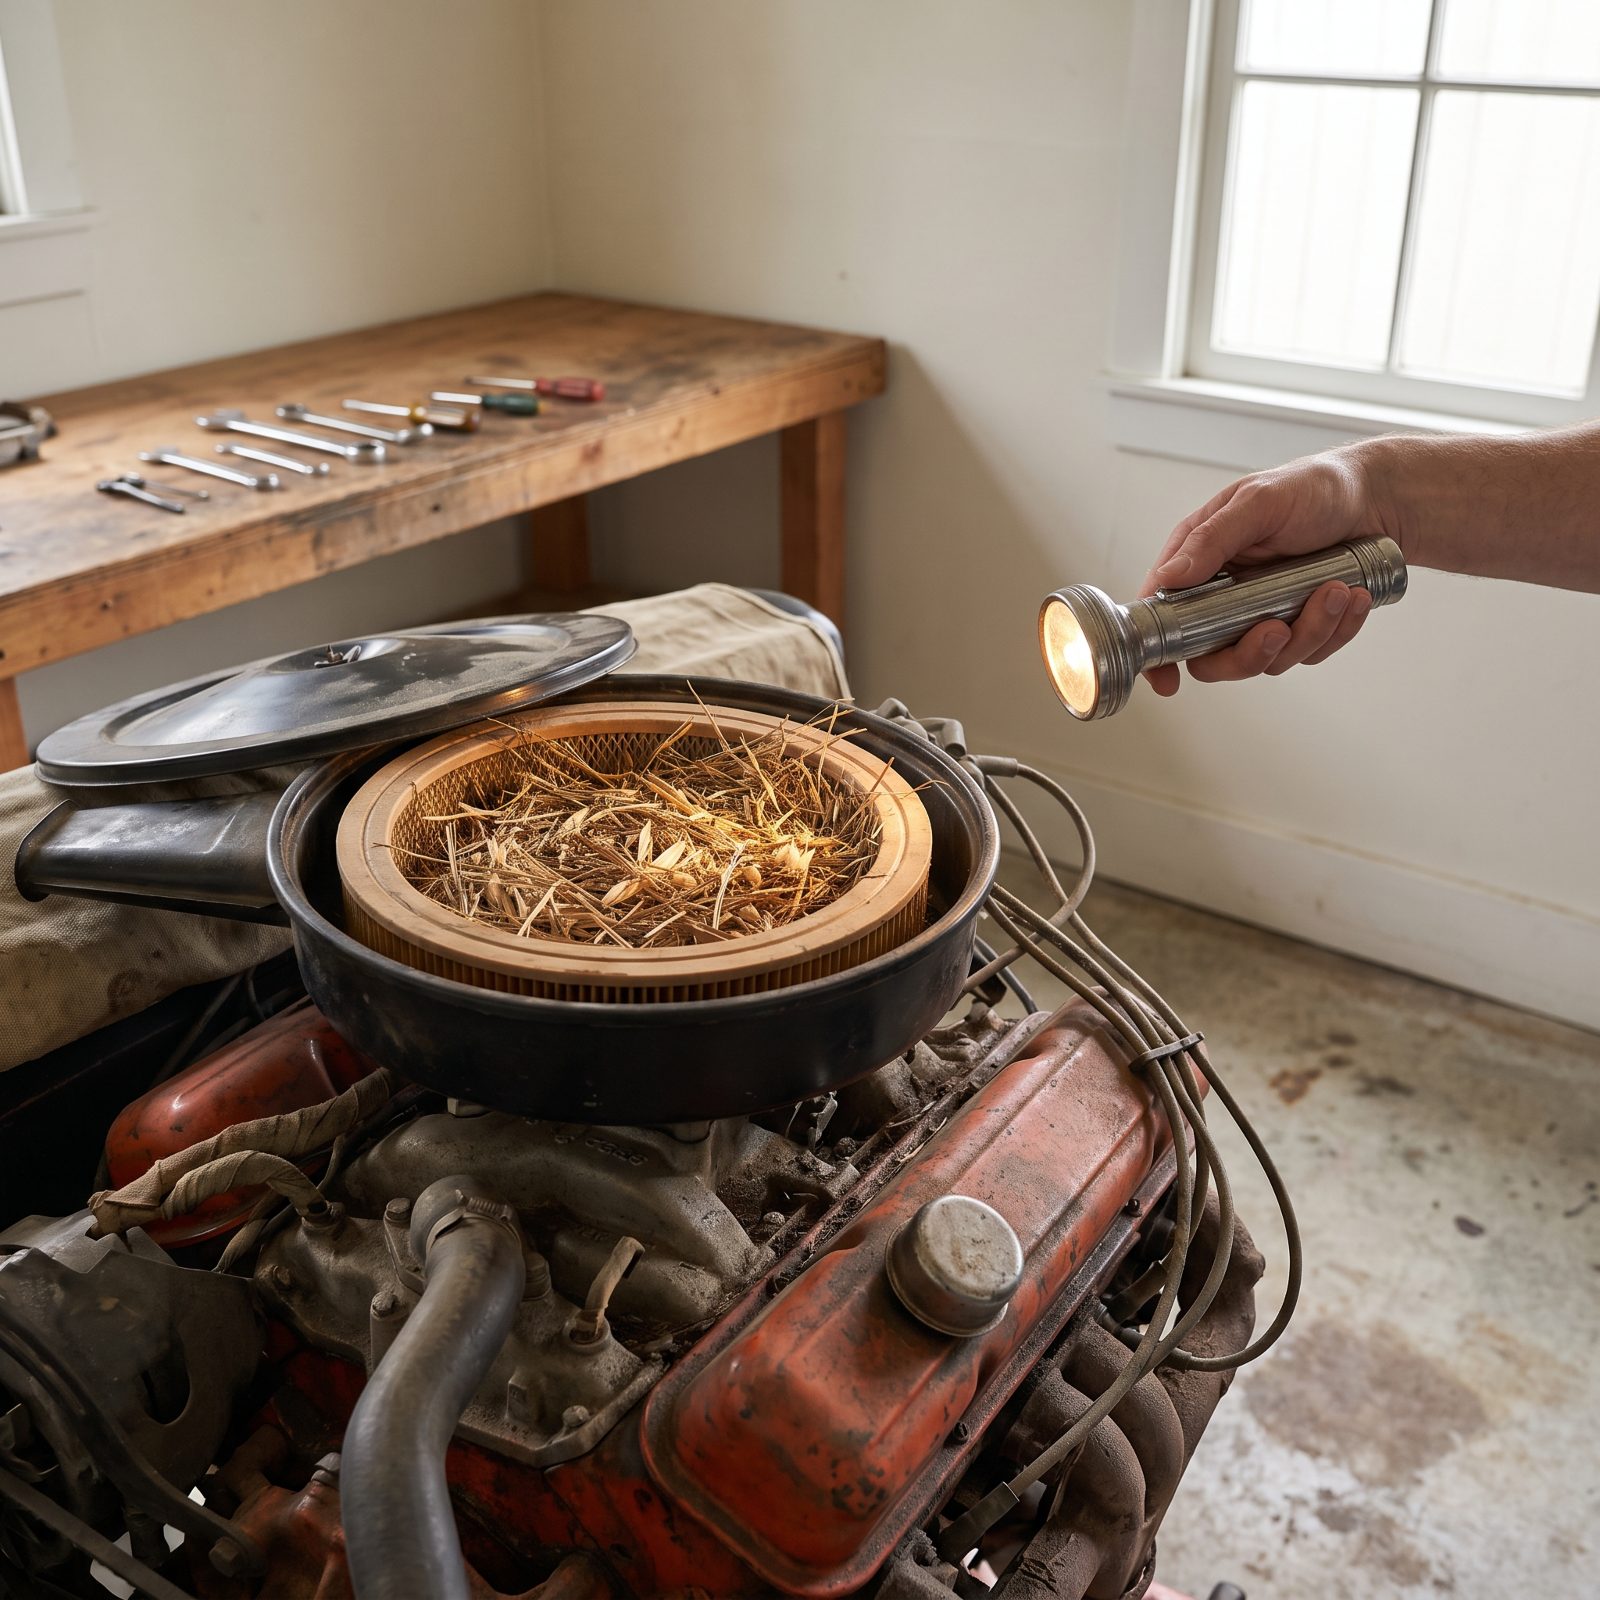
A car that sat all winter is a studio apartment for rodents, and the air cleaner is the penthouse — warm, dry, open at the top, lined with soft paper folds they love to shred. Mice haul in grass, acorns, insulation, whatever they can carry, and they build fast.
Pull the lid before the first crank of the season and look down into the filter. Shine a light up the tailpipe too, because a packed exhaust holds enough backpressure to make the engine run rough or refuse to catch. Two minutes, both of them. And both save you from sucking a nest into the intake or cooking one in the manifold, which smells exactly as bad as you’d guess.
Found a nest? Clear it, swap the chewed filter, and check the wiring nearby. Rodents gnaw insulation for the same reason they shred paper, and a chewed harness is a fire you haven’t noticed yet.